

White was selected for upper cabinetry by 52% of renovating homeowners, according to the 2023 U.S. Houzz Kitchen Trends Study. White can brighten an upper run without requiring the bases and island to match.
Treat color, construction, and placement as separate decisions. Stained bases can balance white uppers; a painted island needs to stand up to more contact than a cabinet above the refrigerator. In a mixed run, the finish can suit how each area is used.
White remains a standard choice, especially on uppers. For a remodel, choose where it earns its place rather than defaulting to an all-white kitchen.
Budget the White-Cabinet Remodel Scope
The 2024 U.S. Houzz Kitchen Trends Study put median U.S. spending on a major kitchen remodel, defined as replacing at least all cabinets and appliances, at $55,000 in mid-2023, compared with $18,000 for a minor remodel. Those are whole-project medians, not cabinet quotes. Don't use them as a price allowance for a painted cabinet package without accounting for labor, appliances, surfaces, and site work.
Read the scope behind the price
Major and minor kitchen remodel medians
The figures below are Houzz's U.S. median expenditures by scope and period, using the study linked above.
| Scope | Median spend | Period | What the figure covers |
|---|---|---|---|
| Major remodel | $35,000 | mid-2020 | Replacing at least all cabinets and appliances |
| Major remodel | $45,000 | mid-2022 | Same definition; the baseline for the subsequent 22% increase |
| Major remodel | $55,000 | mid-2023 | Same definition; nearly 60% above mid-2020 |
| Minor remodel | $8,000 | mid-2020 | Smaller scope; historical baseline |
| Minor remodel | $18,000 | mid-2023 | Smaller scope; up 29% year over year |
A remodel quote becomes useful when it identifies what the contractor will remove, retain, supply, and install. A cabinet price that excludes finished end panels, fillers, delivery, and installation isn't comparable to a complete package. Ask for those items to appear explicitly rather than assuming they're included.
Use an average kitchen remodel cost breakdown to organize the conversation, then get a site-specific proposal. Moving a sink, repairing concealed damage, or changing an appliance opening can alter the job more than switching between similar white door profiles.
Choose replacement or retention deliberately
Full replacement makes sense when the layout fails, cabinet boxes are damaged, or the interiors can't accommodate the storage you need. It also lets the designer coordinate drawer banks, appliance panels, and accessible storage without working around the original carcasses. The trade-off is disruption and a broader chain of dependent work.
Refacing or selective replacement can work when the existing boxes are square, securely attached, dry, and worth keeping. New doors won't correct a sagging shelf, a separating cabinet back, or an awkward sink location. Inspect the interiors before spending money on the exterior.
For a retained-box project, resolve these details before accepting a proposal:
- Exposed surfaces: Identify how face frames, cabinet ends, underside panels, and toe kicks will match the new doors.
- Hardware compatibility: Confirm that replacement hinges fit the existing construction and that drawer slides have sound mounting points.
- Countertop consequences: Establish whether the existing countertop can remain undisturbed and who accepts responsibility if removal causes damage.
- Finish repairs: Ask how chips will be repaired and whether matching touch-up material is included.
Budget rule: Don't buy new white doors to disguise cabinet boxes you already know need replacement.
Finally, separate color coverage from replacement scope. Replacing every cabinet doesn't require painting every cabinet white. Keeping the upper run light while specifying stained bases can be a deliberate design choice, not a compromise.
Protect spending on construction, usable drawers, and installation before adding decorative accessories. An organizer can usually be changed later. A poorly positioned sink base is much harder to undo after the countertop arrives.
Place White Where It Will Not Fight Daily Use
Mixed cabinetry deserves consideration before you commit to an all-white room. The 2025 U.S. Houzz kitchen trends report found that 33% of renovating homeowners chose white cabinets, while 24% selected contrasting upper and lower colors, and wood tones led lower cabinetry at 33%. White remains a mainstream choice, but homeowners aren't limited to using it uniformly.
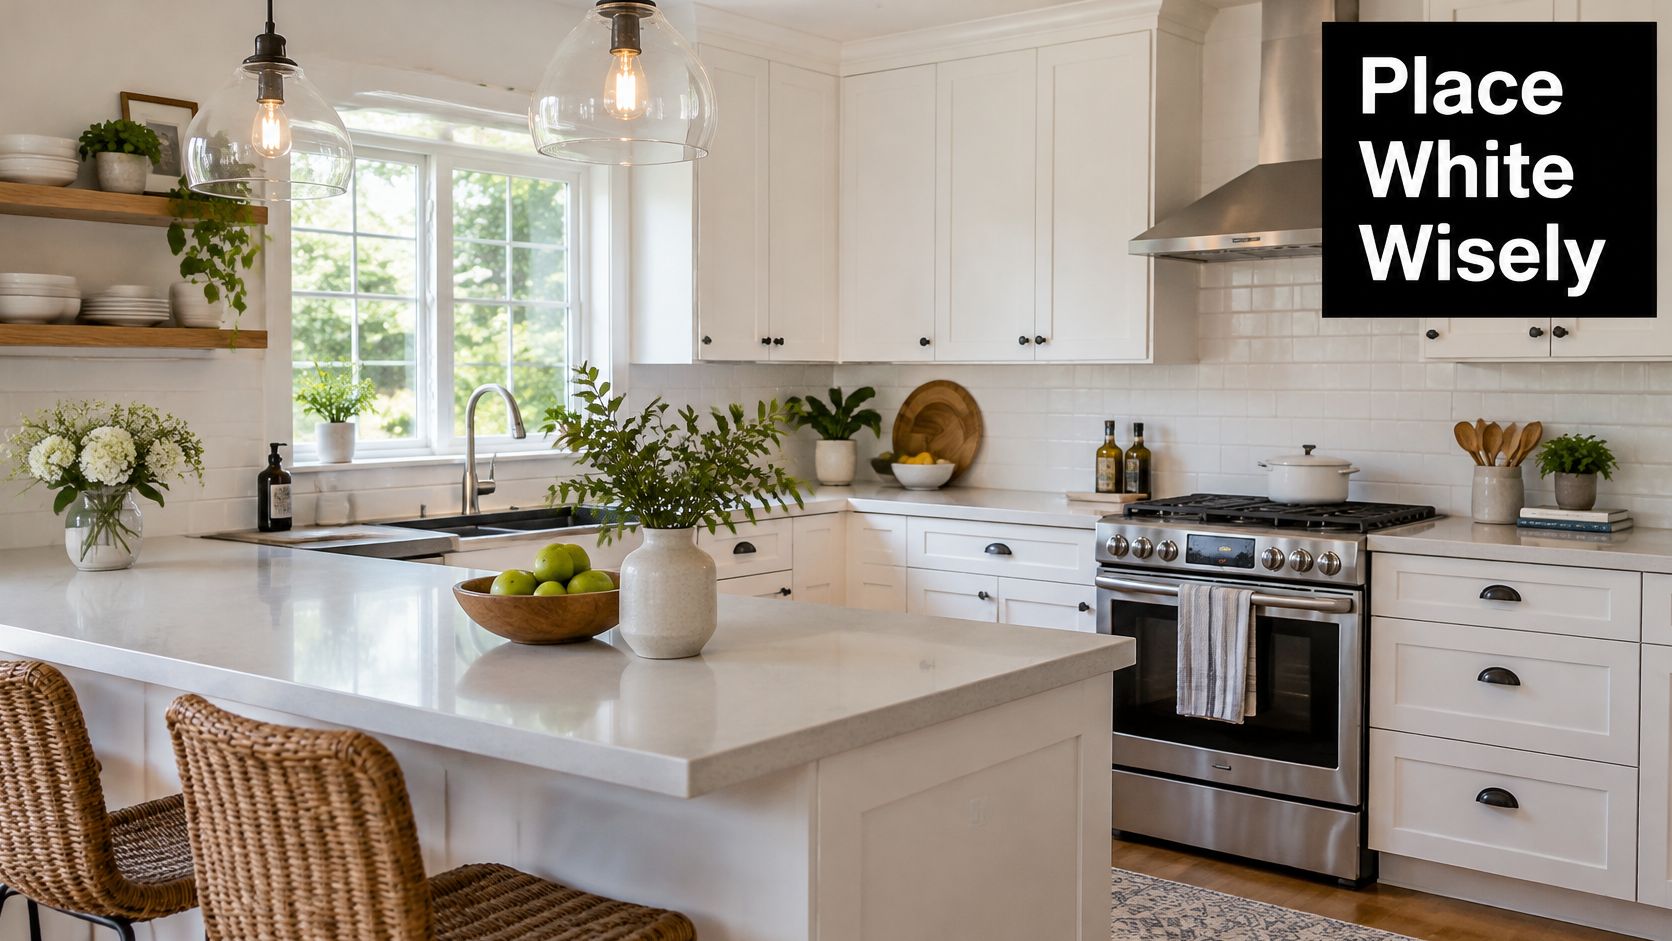
This kitchen illustrates how natural textures can soften a predominantly white cabinet scheme.
Match the finish to the household
White bases make dark food splashes and shoe marks easy to spot. That can help you clean promptly, but it also means the room may look untidy between wipe-downs. Stained wood with visible grain can disguise minor surface wear better, although it still needs cleaning.
Don't assume darker paint solves everything. Dark islands can show pale pet hair, flour, mineral residue, and fingerprints. Choose the contrast that suits your household's actual mess, not the one that looks cleanest in a staged photograph.
- Busy family kitchen: Consider white uppers with wood bases, particularly around seating where shoes contact panels.
- Frequent baking: Avoid choosing a dark island solely to hide dirt. Test flour and a damp handprint on the sample.
- Small, dim room: Keep the upper cabinets and backsplash light, then use the lower run to introduce warmth.
- Low-use kitchen: An all-white scheme may be practical if you're comfortable wiping exposed panels and protecting painted corners.
Test the complete palette at home
Bring home a finished door, not just a paint chip. Stand it vertically beside the countertop sample, backsplash, wall color, and flooring. Cabinet doors receive light differently from a sample laid flat on a table.
Check the combination in daylight and under the fixtures you'll use at night. Warm lamps can make a neutral white appear creamier; a cool white beside a cream countertop can make the countertop look yellow by comparison. Strong sunlight can also emphasize undertone differences that disappear in a showroom.
Sheen needs its own test. Matte reduces reflected glare, but some matte coatings show oily marks or resist wiping less effectively than others. Satin may be easier to maintain, depending on the coating system, while making surface irregularities more noticeable.
Ask the supplier to demonstrate cleaning on a finished sample. Use the proposed cleaner and a soft cloth, then inspect the door from an angle for streaks or burnishing.
White belongs where it supports the room and the cleaning routine. It doesn't need to cover every surface to make the kitchen feel light.
A darker metal pull can give a pale cabinet run definition without introducing another painted color. Keep hardware placement consistent, and let wood grain or a textured backsplash provide interest rather than adding competing white finishes.
Plan Clearances Before You Order Cabinets
A cabinet layout must work with appliances open and people moving through it. A plan that looks spacious with every door closed can fail during dishwasher loading or refrigerator access.
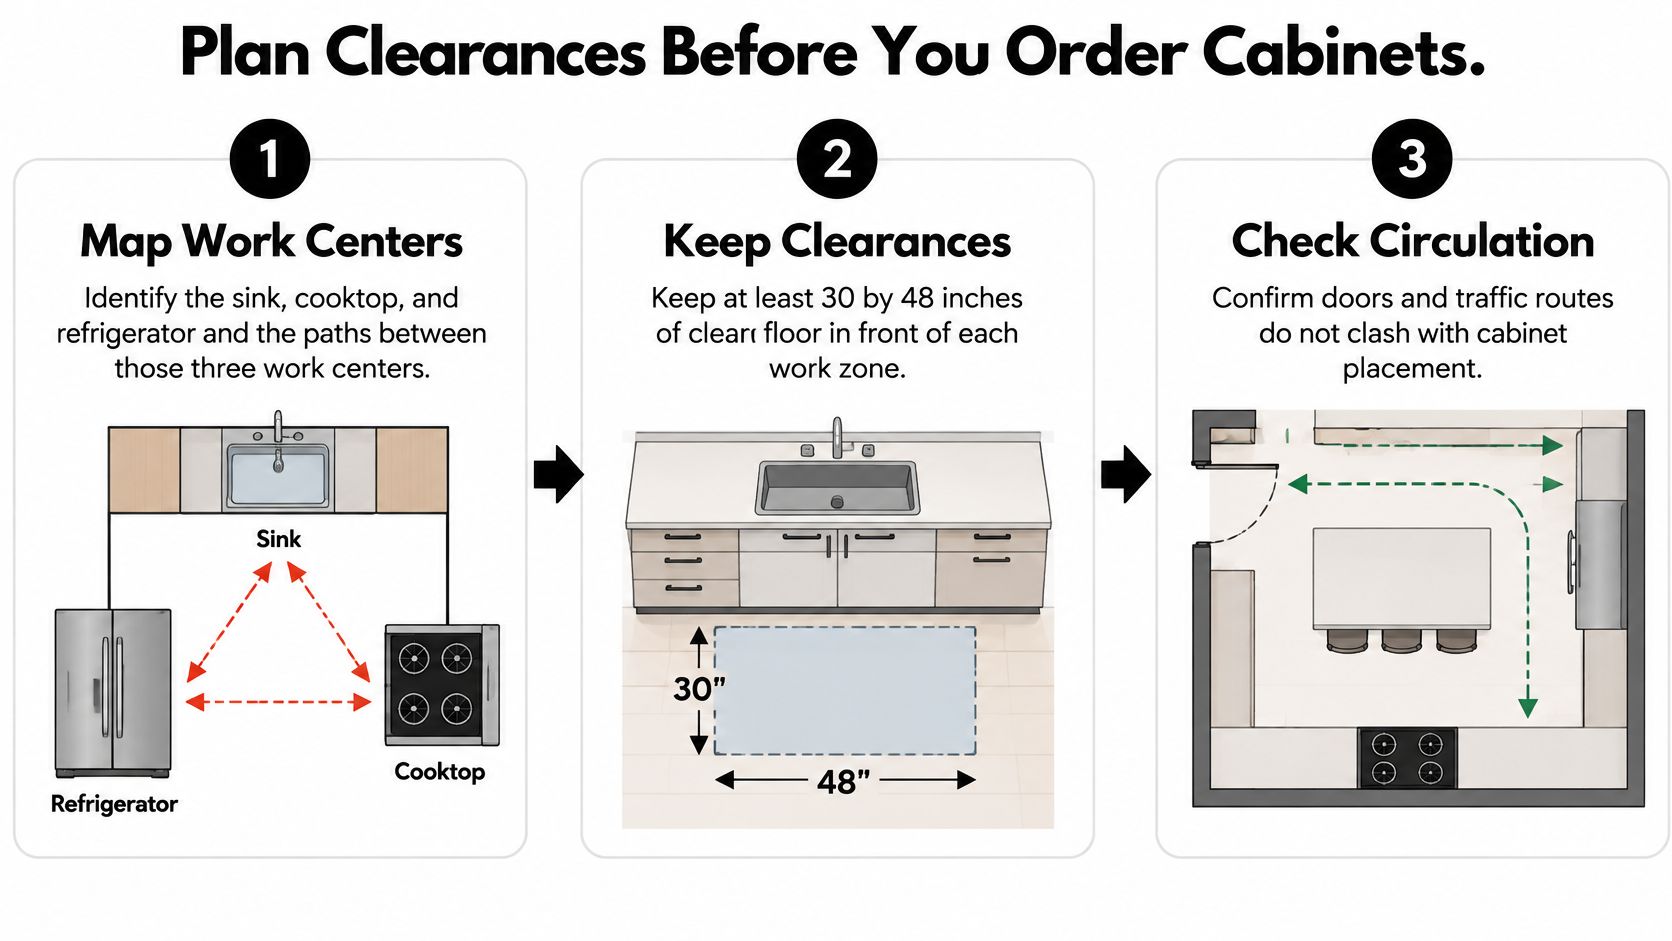
Use this planning graphic to organize the first layout review.
Follow the clearance-first sequence
The NKBA Kitchen Planning Guidelines provide the appliance-space, accessibility, obstruction, and corner-storage benchmarks summarized below. Treat them as planning checks, not a substitute for project-specific accessibility requirements or field verification.
Map the work centers. Locate the sink, cooking surface, and refrigerator on a measured drawing. Trace how someone carries groceries, washes produce, prepares food, and reaches the cooking area. Keep through-traffic from cutting unnecessarily across those tasks.
Reserve usable appliance space. Mark the clear floor area at each appliance, using the benchmark in the table. Draw the open dishwasher and oven doors too. Clear floor space and countertop landing space serve different purposes; don't substitute one for the other.
Plan for changing mobility. Check activity-center maneuvering space and entry clearance before filling the walls with cabinetry. An opening dimension on a floor plan isn't automatically the usable clear width once a door and its hardware are installed.
Draw every swing. Include cabinet doors, appliance handles, refrigerator drawers, and the room entry. Check whether the refrigerator can open far enough to remove its interior bins, not merely far enough to reach a shelf.
Resolve tall cabinets and corners. Don't interrupt the primary work route with a full-depth pantry tower. Select corner hardware early and verify its opening requirements, load rating, and access around adjacent appliances.
Finalize widths and projections. Only now settle cabinet widths, fillers, pull projection, and interior accessories. A filler is working space when it lets a door clear a wall or an adjacent handle.
Record installation tolerances. Require the installer to check wall plumb, rail alignment, reveals, and countertop overhang with a laser and straightedge before final door adjustment. White fronts make uneven shadow lines conspicuous.
Clearances to verify before cabinet widths are final
These are the NKBA-style planning benchmarks from the guidelines cited above.
| Check | Benchmark | Why it matters on white cabinets |
|---|---|---|
| Clear floor at each appliance | At least 30 x 48 inches | Reserves operating space; door swings still need separate checking |
| Aging-in-place maneuvering space | About 30–32 x 48–52 inches | Keeps activity centers usable if mobility changes |
| Wheelchair entry | At least 32 inches clear | Prevents a new cabinet run from narrowing the doorway |
| Block between work centers | No full-height, full-depth obstruction | Preserves movement between primary work centers |
| Corner storage | At least one functional corner cabinet | Avoids a dead corner concealed behind attractive doors |
Verify the drawing against the room
Use a kitchen design measurements checklist during the field measure. Record window trim, outlets, plumbing, ventilation routes, and wall irregularities, not just wall lengths.
Tape the proposed cabinet footprint onto the floor. Then rehearse unloading groceries and putting dishes away while another person walks through. If those movements conflict, adjust the layout before the shop manufactures the boxes.
The following video is an additional visual reference while reviewing the cabinet layout.
Use the actual appliance specification sheets for final approval. Marketing dimensions may not tell you everything about handle projection, ventilation, installation space, or required door movement.
Specify Wood Finishes and Sink-Base Moisture
A white finish tells you little about what's underneath it. Ask the cabinetmaker to identify the substrate for every component, including doors, boxes, shelves, drawer sides, and finished panels. A package described as wood cabinetry can still contain several different materials.
Compare construction rather than labels
Solid wood offers repairability and a natural material beneath the coating, but it moves as humidity changes. MDF provides a smooth painted surface, yet exposed edges need careful protection. Plywood can be useful for cabinet construction, but the grade, adhesive, assembly, and edge treatment still matter.
The EPA guidance on indoor air and pressed-wood products identifies formaldehyde concerns associated with composite wood, notes the absence of federally enforceable VOC limits for non-industrial indoor environments, and provides the referenced formaldehyde benchmarks of 0.05 ppm for hardwood plywood, 0.09 ppm for particleboard, and 0.11 ppm for MDF.
White cabinet materials to accept or question
The emission figures below are the EPA benchmarks referenced above. They aren't moisture ratings or proof that an individual cabinet complies.
| Material | Typical use | Formaldehyde benchmark | Moisture stance |
|---|---|---|---|
| Solid wood | Doors, frames, and some box components | Not a pressed-wood category | Finish completely; allow for humidity-related movement |
| Hardwood plywood | Boxes and shelves | 0.05 ppm | Prefer certified stock and sealed cut edges |
| Particleboard | Budget shelves or boxes | 0.09 ppm | Poor choice at an unsealed sink base |
| MDF | Painted doors and panels | 0.11 ppm | Seal every edge; avoid raw sink boxes |
Request documentation identifying the product and the applicable compliance or certification standard. A generic low-VOC description doesn't explain which coating was tested, what the test measured, or whether the statement applies to the supplied cabinet.
Keep emissions compliance and moisture resistance separate. A compliant panel can still swell after a plumbing leak. A moisture-resistant substrate can still require emissions documentation.
Write a wet-zone acceptance checklist
At the sink and dishwasher, specify protected edges, suitable adhesives, and sealed penetrations. Coastal humidity makes consistent indoor moisture control important, but it doesn't excuse poor edge treatment. No cabinet substrate should be treated as a substitute for fixing a leak.
- Before ordering: Approve a component-by-component material schedule and the written sink-base construction specification.
- At delivery: Inspect cabinet bottoms, end panels, toe kicks, and plumbing cutouts for exposed absorbent edges.
- During finishing: Maintain ventilation and follow the coating manufacturer's cure and occupancy instructions.
- Before acceptance: Flag swelling, chips, rough edges, and visibly inconsistent finish instead of letting hardware conceal them.
Review the proposed coating system alongside a guide to kitchen cabinet finishes. Ask about cleaner compatibility, touch-up procedures, and repair limitations, not just whether the finish is durable.
Order sign-off: Approve the substrate schedule, wet-zone details, finish sample, and measured layout together. A color approval alone isn't a complete cabinet specification.
Keep copies of those approvals with the order. If a substitution becomes necessary, require written acceptance before fabrication rather than discovering a different panel material on delivery day.
Sequence the Install Timeline
Build the schedule around confirmed production and site readiness, not a hoped-for completion date. White cabinetry needs protection from other trades, and a rushed installation leaves expensive finished surfaces exposed to avoidable damage.
Make each trade's work a prerequisite
Approve the order package. Finalize the scope, appliance models, finish sample, measured drawings, and material specifications before authorizing production. Record who can approve changes and how those changes affect price and delivery.
Confirm production and delivery in writing. Ask when the shop expects fabrication to finish and what must happen before delivery is booked. Don't remove a functioning kitchen solely because someone gave an informal arrival estimate.
Prepare the room. Schedule demolition, structural work where needed, plumbing rough-in, and electrical work before cabinet placement. Establish recessed lighting and under-cabinet wiring routes so electricians don't have to improvise around finished interiors.
Set and secure the boxes. The installer should establish reference lines, shim cabinets into position, and verify alignment before final fastening. Keep doors and finished panels protected while adjacent trades work.
Release countertop templating. The countertop fabricator needs fixed, level cabinets and confirmed sink and appliance details. Don't template against a sink base that still needs replacement or repositioning.
Finish and inspect. Coordinate countertop installation, plumbing connections, backsplash work, hardware, adjustments, and paint repairs in the order the project requires. Reserve final acceptance for a complete, functioning kitchen rather than an almost-finished cabinet delivery.
Leave room for fabrication corrections
A kitchen remodel timeline helps organize dependencies, but your contractor should attach actual responsibilities and confirmed dates to the working schedule. Identify who checks deliveries, who reports damage, and who arranges replacement parts.
Allow room for a shop correction. An incorrectly sized filler or damaged finished panel may need fabrication rather than an on-site patch. Ask whether temporary protection can keep other work moving without concealing the defect.
- Protect stored materials: Keep cabinets dry, supported, and away from active plastering or wet work.
- Control trade access: Don't let installers use finished drawers as tool storage or painted panels as workbenches.
- Document changes: Photograph concealed plumbing and wiring before the cabinets cover them.
Keep a running issue log during installation. Assign each item to the responsible trade so the final walk-through confirms completed repairs instead of becoming the first time anyone hears about a problem.
Fix Alignment Sheen and Edge Problems
Start the final inspection with the shadow gaps around the doors. Stand back and follow the horizontal and vertical lines across the run. Then look from the side, where a twisted box or proud door is easier to see.
Uneven reveals aren't always a hinge problem. The installer should check whether the cabinet boxes are level, plumb, square, and properly aligned before adjusting individual fronts. Hinge screws can fine-tune a sound installation; they can't reliably conceal a racked cabinet.
Diagnose the cause before accepting a repair
| Visible problem | What to check | Appropriate response |
|---|---|---|
| Gaps widen along a run | Box alignment, wall conditions, door adjustment | Correct the cabinet setup before fine-adjusting hinges |
| White looks muddy or yellow | Lighting, adjacent undertones, finish consistency | Test the lighting and compare against the approved sample |
| Sink-base edge swells | Plumbing leaks, wet cutouts, exposed substrate | Stop the moisture source and assess replacement |
| Corner pulls collide | Handle projection, filler, door swing | Resolve clearance before drilling additional doors |
| Door and filler have different sheen | Finish batch, substrate preparation, spray application | Request a matched repair or replacement |
A yellow cast doesn't automatically mean the shop used the wrong paint. Compare the installed finish with the approved sample in the same location under the same light. Temporarily test a different lamp before authorizing a repaint, and check whether warm wall paint or countertop undertones are affecting the comparison.
For a swollen sink-base edge, repair the leak first and let the area dry before assessing it. Swollen particleboard doesn't return to its original dimensions. Sealing the surface afterward may protect an intact neighboring edge, but it won't restore a distorted panel; damaged components may need replacement.
Reject cosmetic shortcuts
Before the installer drills the remaining handles, mock up a pull at a difficult corner and operate both doors. If they collide, consider a different projection, adjusted hardware placement, or a corrected filler arrangement. Don't accept chipped paint as the price of using the corner.
A sheen mismatch can result from different finishing batches, surface preparation, or application. Compare panels both straight on and under raking light. Ask for a controlled repair or replacement rather than a quick coat that leaves a larger visible patch.
Don't accept a repair because it disappears from the doorway. Check it from the position where you'll actually work.
Finish the walk-through with operational checks:
- Doors and drawers: Open them fully and confirm that fronts don't rub or strike adjacent parts.
- Soft-close hardware: Test closure with normal contents in place, not just empty drawers.
- Toe kicks and panels: Check joints, attachment, exposed edges, and cleaning access.
- Touch-ups: Inspect repaired chips after the repair material has dried under the room's permanent lighting.
Record unresolved items in writing with photographs and agreed remedies. A clean, working installation matters more than squeezing another accessory into the order.
Sinclair Cabinetry inc offers custom real-wood cabinetry, painted finishes, kitchen remodeling, and professional installation. Visit Sinclair Cabinetry inc to discuss white uppers, contrasting wood bases, and a cabinet plan built around your appliances, storage needs, and wet-zone requirements.