
Why Painting Cabinets Transforms Your Kitchen
Many homeowners considering a kitchen update wonder whether to paint or replace their cabinets. Often, the decision comes down to balancing cost, visual appeal, and the desire to preserve existing cabinetry. Painting offers a significant refresh without the expense of a full remodel, making it an attractive option for budget-conscious renovators.
Financial Advantages of Painting
Replacing kitchen cabinets can be a substantial investment, typically ranging from $8,000 to $15,000. Painting, however, presents a considerably more budget-friendly alternative. This cost savings allows you to redirect funds towards other key elements of your kitchen renovation.
Consider upgrading your countertops or appliances while still achieving a dramatically updated look. Painting allows you to maximize your budget's impact, achieving a high-end aesthetic without the high-end price tag.
Visual Impact and Longevity
A fresh coat of paint can dramatically transform your kitchen's appearance. Choosing the right colors can completely revitalize dated cabinets, breathing new life into the entire space. A well-chosen color palette can dramatically change the feel of your kitchen.
Properly applied paint also extends the lifespan of well-constructed cabinet boxes. This makes painting a sustainable choice, preserving existing materials and reducing waste. You're not just updating your kitchen; you're making a responsible choice for the environment.
Furthermore, the increasing popularity of professional cabinet refinishing underscores the demand for cost-effective, visually appealing updates. Approximately 60% of homeowners are choosing this option, driven by the desire for personalized, modern kitchens.
In Canada, refinishing typically costs between CAD 4,500 and CAD 8,500. This is significantly less than the CAD 15,000+ usually required for new cabinets. To delve deeper into current trends, learn more about cabinet refinishing trends.
Return on Investment and Character Preservation
Painting your kitchen cabinets isn't just budget-friendly; it's also a smart investment. This type of renovation typically yields a return of 80-100% upon resale. Moreover, it allows you to retain the unique character of well-crafted cabinetry.
This is particularly valuable in older homes with custom or antique cabinets. Rather than replacing them with generic options, painting preserves their historical charm and inherent value. This adds to your home’s overall appeal and market value. It's a win-win for both your budget and your home's character.
The Toolkit That Delivers Professional Results
Achieving a professional look when painting kitchen cabinets depends heavily on using the right tools. This isn't just about personal preference; the tools you choose directly affect the final result. We consulted with cabinet refinishing experts at Sinclair Cabinetry Inc. to develop this helpful guide for your painting project.
Essential Supplies for Painting Kitchen Cabinets
Just like a chef needs quality ingredients, you need the right supplies for effective cabinet painting. This includes everything from prepping the surface to that final coat of paint. Below, we've provided a checklist to guide you through gathering the necessary supplies for each stage of your cabinet painting project.
Before we dive into the list, we've created a handy table summarizing the essential cabinet painting supplies. This table outlines the purpose of each item and offers recommendations for different budget levels, allowing you to choose the best supplies for your needs.
Essential Cabinet Painting Supplies Checklist: Complete list of required tools and materials with recommendations at different price points.
| Item | Purpose | Budget Option | Mid-Range Option | Professional Grade |
|---|---|---|---|---|
| Cleaner | Removes grease and grime | Dish soap, vinegar, Borax, and water | Generic TSP substitute | TSP |
| Sandpaper | Creates a surface for primer adhesion | 120-grit sandpaper | 150-grit sandpaper in addition to 120-grit | 180-grit, 150-grit and 120-grit sandpaper |
| Sanding Block | Ensures even sanding pressure | Basic sanding block | Contoured sanding block | Electric sander |
| Tack Cloth | Removes dust after sanding | Standard tack cloth | Microfiber tack cloth | Compressed air and tack cloth |
| Primer | Creates a smooth base for paint | Generic water-based primer | Zinsser Bulls Eye 123 Water-Based Primer | KILZ 2 All-Purpose Primer |
| Paint | Provides color and finish | Behr Premium Plus Cabinet & Trim Enamel | Benjamin Moore Advance | Fine Paints of Europe Eurolux Acrylic |
| Brush | Paints detailed areas | Synthetic bristle brush | Wooster Brush | Purdy Brush |
| Roller | Paints flat surfaces | Standard foam roller | High-density foam roller | Paint sprayer |
| Paint Tray | Holds paint for rolling | Basic paint tray | Paint tray with liner | Spray gun and container |
| Drop Cloths | Protects surfaces from paint | Plastic sheeting | Canvas drop cloths | Heavy-duty canvas drop cloths |
| Painter's Tape | Creates clean lines | Standard painter's tape | FrogTape | 3M ScotchBlue Painter's Tape |
This table offers a starting point for assembling your cabinet painting toolkit. Remember to adjust the options based on your budget and project needs.
Choosing Your Application Method
Different cabinet styles and materials often require different application methods. Here’s a breakdown:
-
Brush: Best for those intricate details and corners. Investing in high-quality brushes is worthwhile for a smooth, even application.
-
Roller: Excellent for flat surfaces and larger panels. Foam rollers minimize texture, creating a smooth finish.
-
Sprayer: Ideal for a factory-like finish. However, using a sprayer requires practice and proper ventilation. Sprayers are typically more expensive and can be challenging to master, but they offer the fastest application.
Creating an Efficient Workspace
Preparation is key! Setting up a dedicated workspace will streamline the entire process. Consider these tips when planning your workspace:
-
Ventilation and Temperature Control: Ensure adequate ventilation and temperature control for optimal drying. This prevents dust and debris from settling on wet paint and allows the paint to cure properly.
-
Surface Protection: Covering surfaces with drop cloths or newspaper protects your home from paint splatters.
-
Elevating Cabinet Components: Elevate your cabinet doors and drawers using wooden blocks or painter's pyramids. This allows you to paint all sides easily and prevents sticking.
By assembling the right toolkit and establishing a well-organized workspace, you're setting yourself up for a successful cabinet painting project that will transform your kitchen.
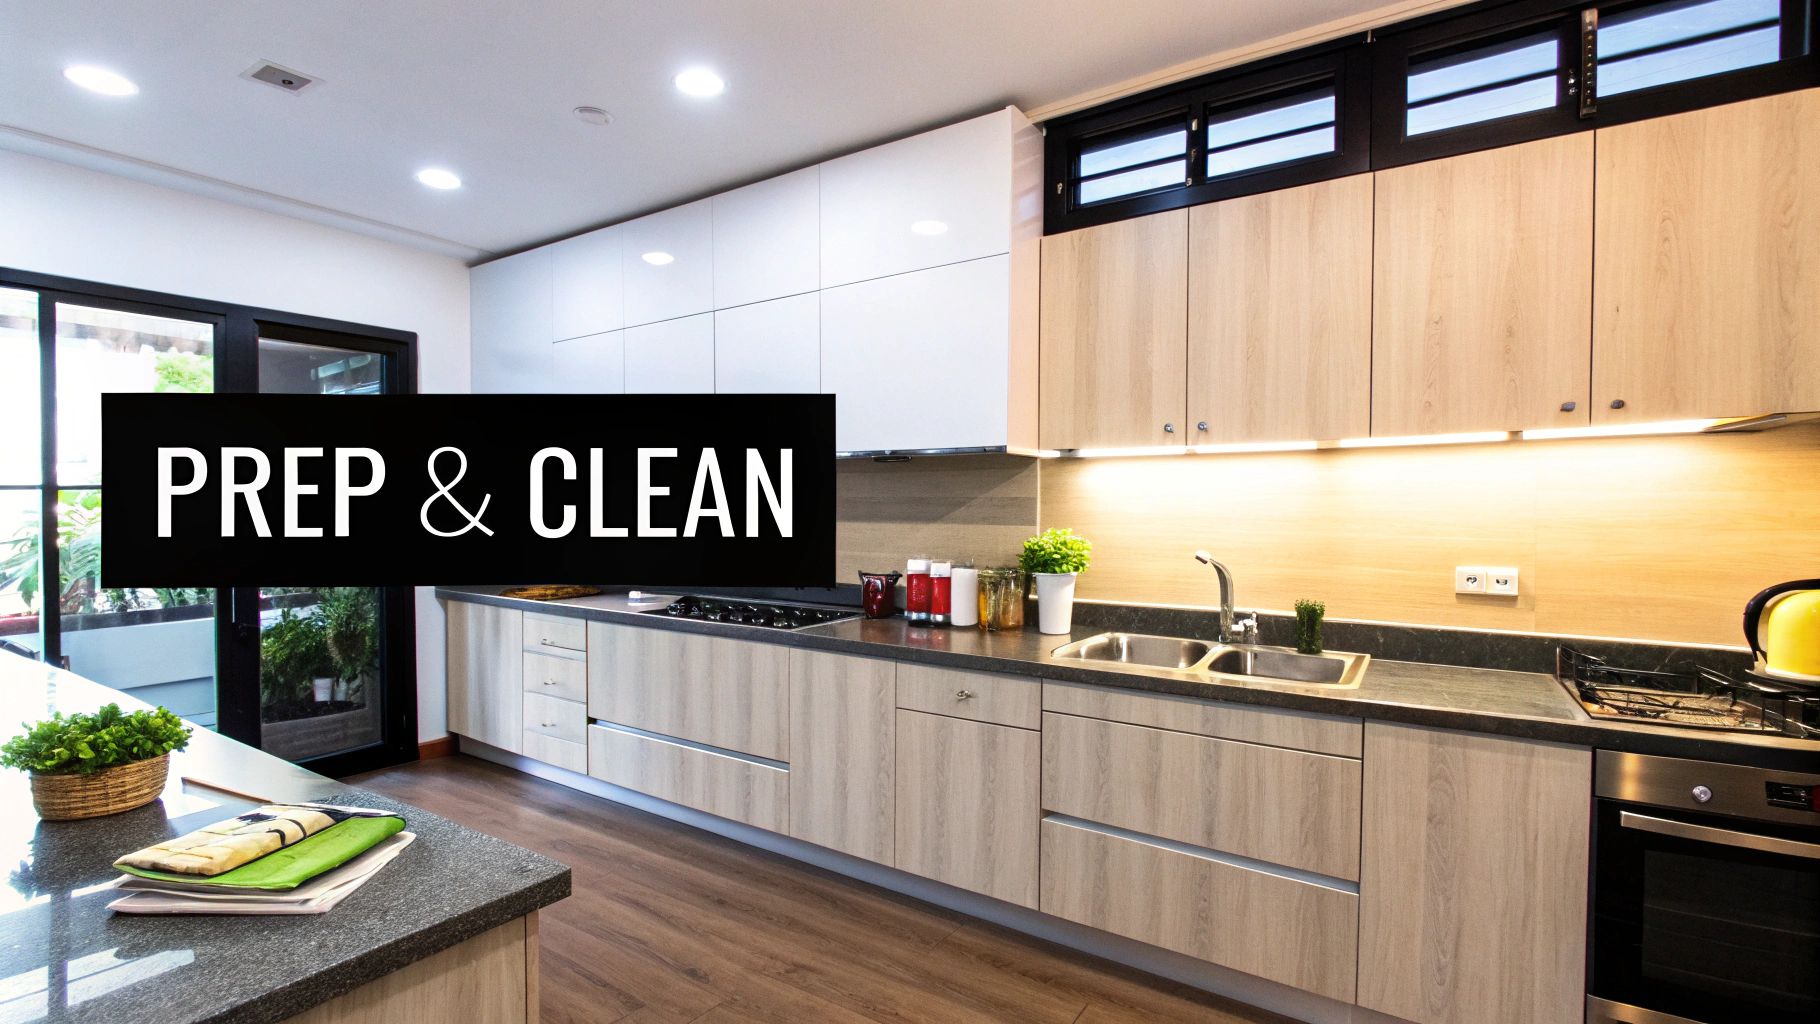
Preparation: Where Most DIYers Go Wrong
The old adage "a job well begun is half done" rings especially true for painting kitchen cabinets. This initial phase, often perceived as tedious, actually determines 80% of your final results. Professional painters grasp this, dedicating significant time to meticulous preparation. Emulating their thoroughness is your secret to a professional-looking finish.
Cleaning: The Foundation of a Flawless Finish
Over time, grease and grime accumulate on kitchen cabinets, often unseen. This residue can sabotage your paint job, leading to peeling and chipping. Thorough cleaning is the crucial first step.
- Choose the right cleaner: A simple mixture of dish soap, vinegar, Borax, and water is often effective and eco-friendly. Always test any cleaning solution in an inconspicuous area first to ensure compatibility with your cabinet's finish.
- Step-by-step cleaning process: Remove all hardware. Wash cabinets with your chosen cleaner, focusing on crevices and corners. Rinse with clean water and dry completely.
Hardware Removal and Organization: Preventing Reassembly Headaches
Removing hardware seems simple, but disorganization can create a frustrating reassembly process. A systematic approach will save you time and aggravation.
- Labeling system: Number each cabinet door and drawer, creating a corresponding diagram. This ensures correct reassembly. Store hardware in labeled zip-top bags to prevent loss.
- Protecting hinges: If reusing existing hinges, clean and store them separately in labeled bags. This preserves their finish and function.
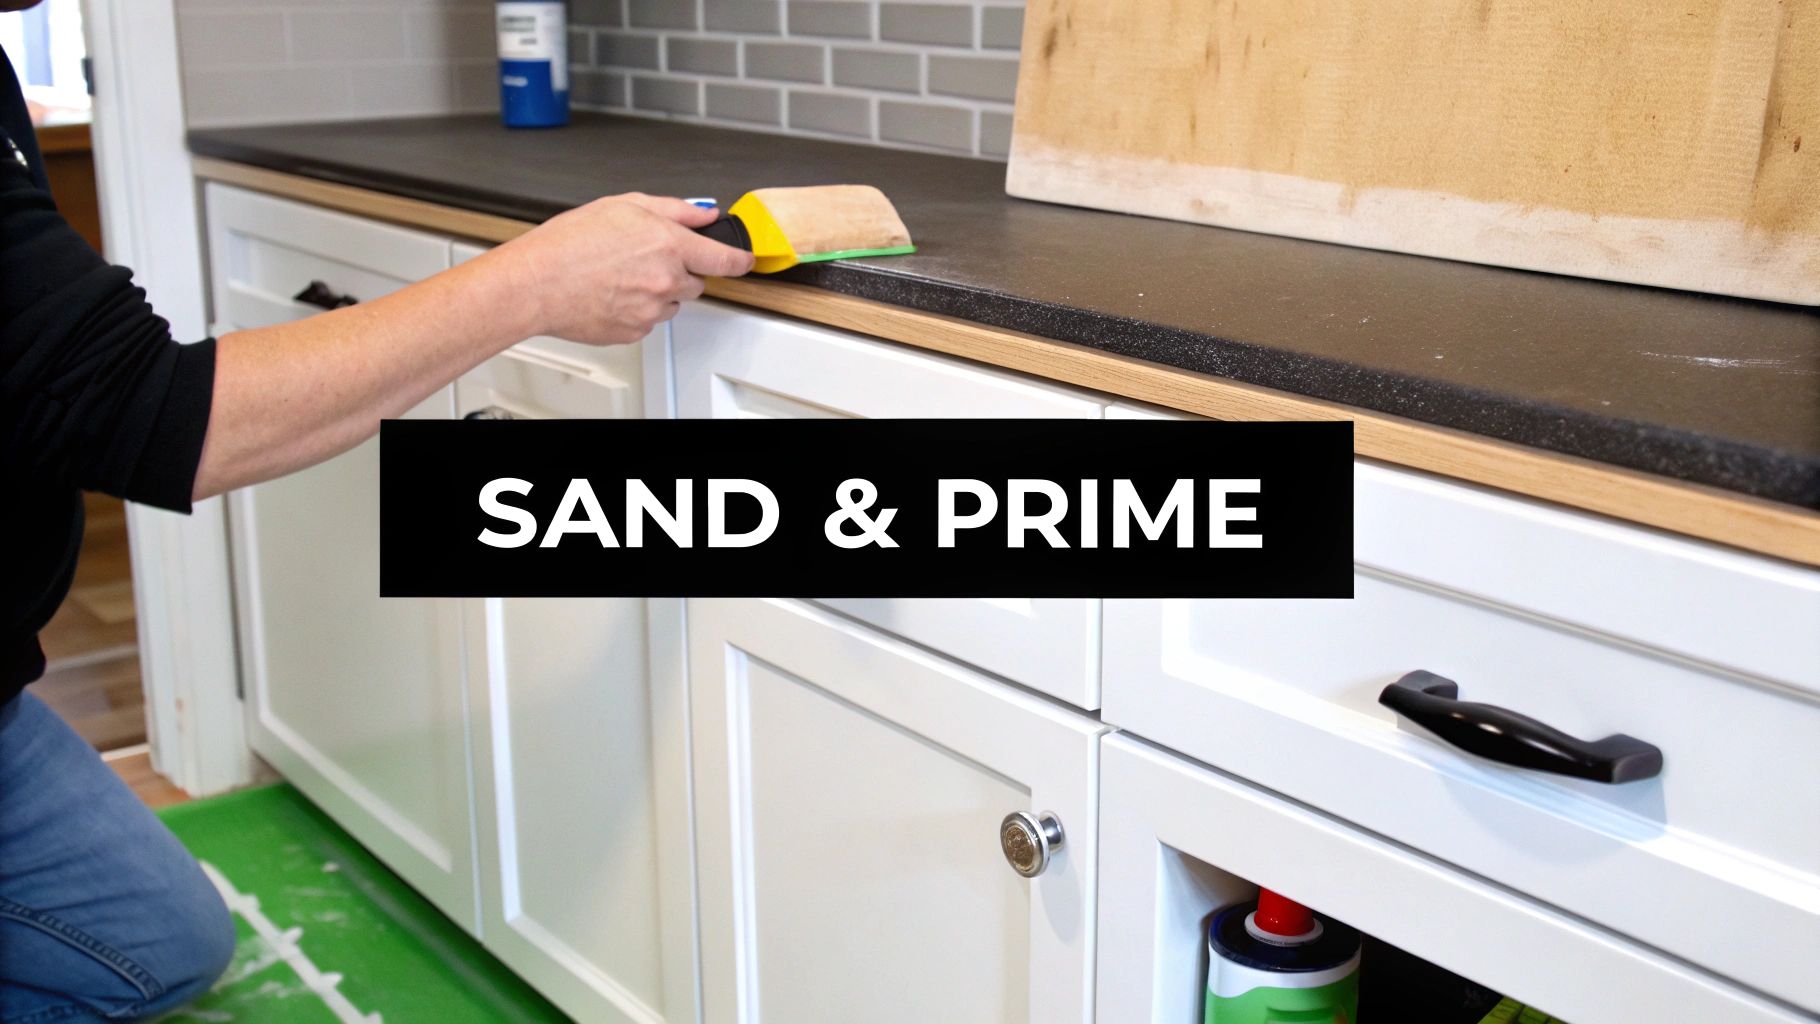
Sanding: Creating the Perfect Surface for Adhesion
Sanding creates a surface for primer and paint to adhere to. Over-sanding, however, can damage delicate details. Finding the right balance is crucial.
- Proper grit progression: Begin with a coarser grit sandpaper (around 120-grit) for the initial sanding. For a smoother finish, use a finer grit (150 or 180-grit) after priming.
- Sanding technique: Sand lightly and evenly, focusing on rough spots and existing finish. Avoid excessive pressure, particularly on detailed areas or veneer surfaces. A sanding block helps ensure even pressure.
Maintaining a Dust-Free Environment
Dust is the enemy of a smooth paint finish. Maintaining a dust-free environment is essential throughout the project.
- Containing dust during sanding: Sand outdoors or in a well-ventilated area. Use a shop vacuum with a brush attachment to remove dust.
- Tack cloth: Use a tack cloth to remove remaining dust particles before priming and painting. This ensures a smooth, professional result.
Addressing Cabinet Damage: Prepping for a Flawless Look
Before painting, address any existing damage. This ensures a professional and long-lasting result. Fill holes or dents with wood filler and repair any water damage for a smooth surface.
Additionally, consider current trends. Bold colors are gaining popularity for 2025, including earth tones, pastels, and vibrant hues like deep blues and greens. These bold choices personalize your kitchen and can increase home value. Learn more at Custom Coatings Inc..
By meticulously following these preparation steps, you're building the foundation for a beautiful and durable finish that will transform your kitchen cabinets. The extra effort will pay off.
Selecting Paint That Stands Up to Kitchen Life
Choosing the right paint is crucial for kitchen cabinets. You want a finish that not only looks fantastic but also withstands daily use. Unlike regular wall paint, cabinet paint must resist moisture, heat, food splatters, and frequent cleaning. This guide will help you choose the best paint for your kitchen cabinets.
Understanding Cabinet Paint Formulations
The secret to long-lasting kitchen cabinets lies in the paint. Standard wall paints won't hold up to the demands of a kitchen. They lack the resistance to moisture and grease, leading to chipping and peeling. Therefore, it's essential to choose a paint specifically designed for cabinetry. These durable paints offer superior adhesion, scrubbability, and resistance to stains and fading.
Sheen and Performance: Finding the Right Balance
The sheen of your paint significantly impacts both the look and durability of your cabinets. A matte finish provides a modern look but can be harder to clean. A high-gloss finish is very durable and easy to wipe down but might highlight imperfections. Satin and semi-gloss finishes offer a compromise. They provide a subtle sheen while being relatively easy to clean.
To help you compare the different paint types available, we've put together a handy table. It summarizes the key characteristics of each option, making it easier to choose the best paint for your project.
Cabinet Paint Type Comparison
Comparison of different paint types for kitchen cabinets, highlighting pros and cons of each option
| Paint Type | Durability | Drying Time | Application Difficulty | Best For | Cost Range |
|---|---|---|---|---|---|
| Oil-Based Enamel | Very High | Long | Moderate | High-traffic kitchens, humid climates | High |
| Water-Based Acrylic | High | Short | Easy | DIY projects, low-VOC preference | Medium |
| Hybrid Alkyd-Acrylic | Very High | Moderate | Moderate | Balancing durability and ease of application | Medium-High |
| Chalk Paint | Low-Medium | Short | Easy | Distressed or vintage looks | Medium |
| Milk Paint | Low | Short | Easy | Antique or rustic styles | Medium |
This table helps you quickly compare the pros and cons of different paint types, allowing you to select the best option based on your specific needs and priorities, whether it's durability, drying time, or ease of application.
Color Selection: Complementing Your Kitchen's Existing Elements
The right color can transform your kitchen. Consider your existing countertops, backsplashes, and flooring. If you have dark granite countertops, lighter cabinets can create balance. Lighter countertops might pair well with darker or brighter cabinet colors.
In 2024, warm neutrals, jewel-toned blues, and moody darks were on trend. Two-toned cabinets also gained popularity. This offers homeowners more flexibility. You can tailor your kitchen design to your personal style. Learn more at Cabinet Door Store. Choose a color that elevates your kitchen’s aesthetic without a complete remodel. This creates a stylish look you'll love for years to come.
The Painting Process That Won't Fail You
This is where your hard work truly shines. The painting process demands attention to detail. Think of it as applying makeup: the right techniques can mean the difference between a flawless finish and a messy look. We've gathered insights from professional cabinet painters to share their proven methods.
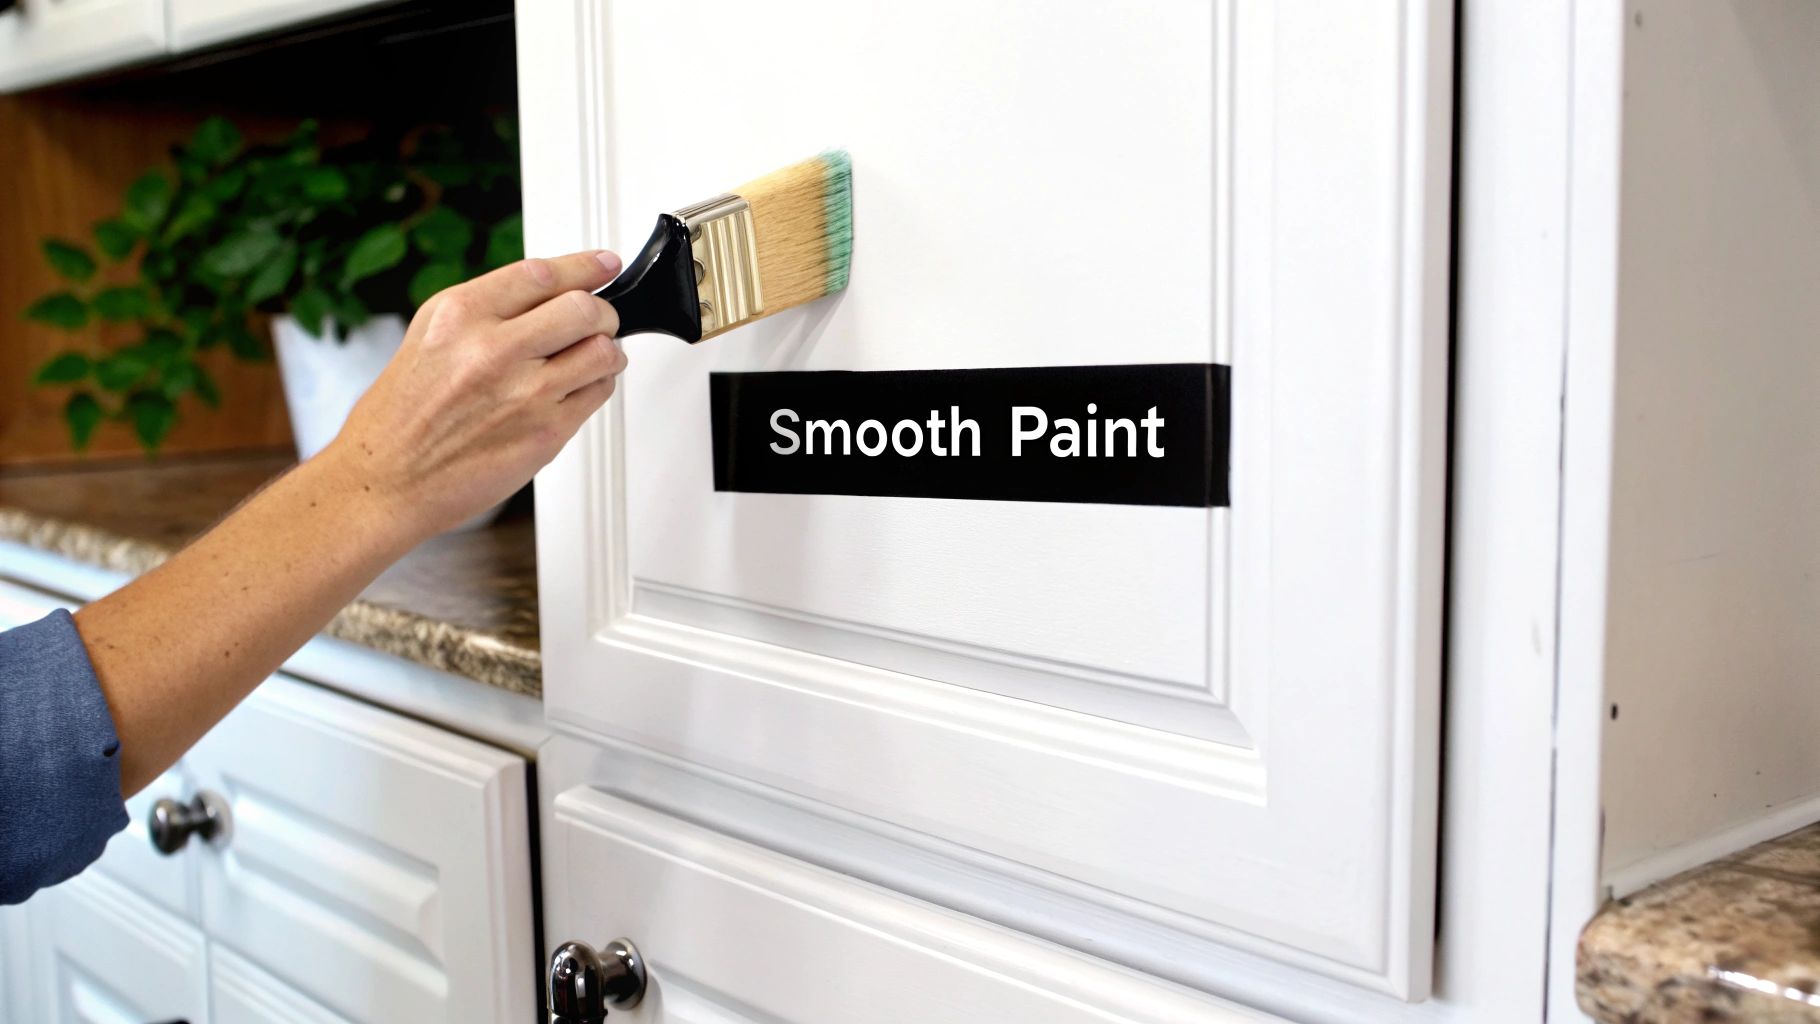
Mastering the Application Techniques
A professional finish hinges on choosing the right application method for each cabinet part. This targeted approach optimizes efficiency and minimizes flaws.
-
Flat Surfaces (Doors & Drawer Fronts): A high-density foam roller is ideal. It delivers a smooth, even coat with minimal texture, similar to a professional sprayer. Slightly overlap each stroke to prevent streaks.
-
Frames, Molding & Recessed Panels: A high-quality brush is crucial for these intricate areas. Choose a brush with angled bristles for precise application in tight corners. Apply thin, even coats to prevent drips and buildup.
-
Inside Corners: Use a smaller brush for these challenging areas, ensuring full coverage without excess paint. For more tips, check out our blog post: How to master detailed cabinet painting.
Achieving Streak-Free Surfaces: The Secrets Revealed
Streaks and brush marks are a common DIY painting pitfall. However, a few simple strategies can help you avoid them.
-
Optimal Number of Coats: Two coats of paint typically provide sufficient coverage and color saturation. A third coat might be necessary when painting a lighter color over a darker one.
-
Proper Drying Time: Allow adequate drying time between coats, typically 4-6 hours. This prevents the paint from becoming sticky and ensures a smooth, durable finish.
-
Temperature Considerations: Avoid painting in extreme temperatures or high humidity, which can impact drying time and the final result. The ideal temperature range is 60-80°F (15-27°C) with moderate humidity.
Troubleshooting Common Issues Like a Pro
Even with meticulous preparation and application, challenges can arise. Knowing how to address these problems is key to a successful outcome.
-
Orange Peel Texture: This bumpy texture usually results from applying the paint too thickly or using a roller with excessive nap. Lightly sand the affected area and apply a thinner, even coat.
-
Visible Brush Marks: Minimize these by using a high-quality brush and applying thin, even strokes along the wood grain. If brush marks persist, lightly sand and reapply.
-
Uneven Coverage: This can happen if the primer wasn't applied evenly or if the paint was applied too thinly. Ensure thorough coverage with both primer and paint, adding more coats if needed.
Quality Control: Every Step of the Way
Professional painters conduct quality checks throughout the project. This ensures that any problems are identified and resolved early on.
-
After Priming: Inspect for imperfections or missed areas. Sand and re-prime as needed before painting.
-
After Each Coat of Paint: Check for streaks, drips, or uneven coverage. Correct any issues before the next coat.
-
Before Reassembly: Carefully examine the finished cabinets for any remaining flaws. Touch up any areas before reattaching the hardware.
By following these steps and using the professional advice we've shared, you'll be well-equipped to achieve a beautiful, lasting finish that transforms your kitchen cabinets.
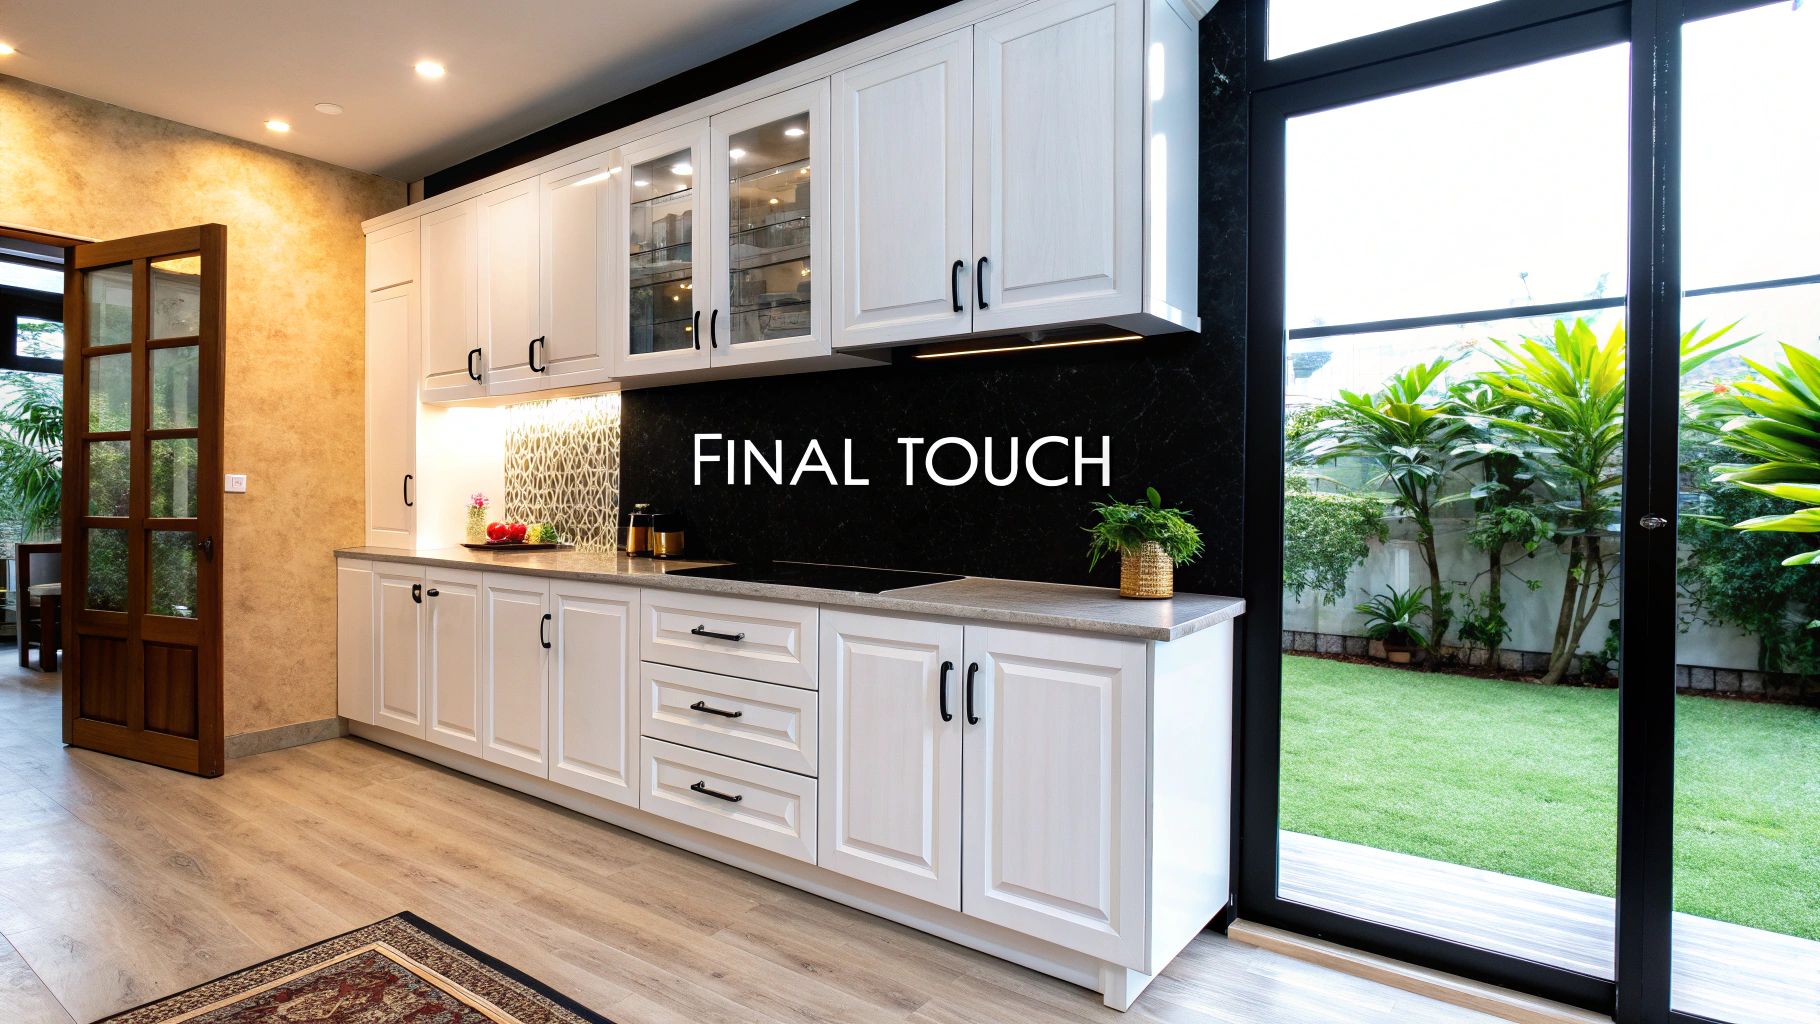
Kitchen Transformations That Inspire Confidence
Seeing real-world examples of painted kitchen cabinets can significantly boost your confidence and offer valuable insights for your own project. This section explores a variety of kitchen transformations, demonstrating the dramatic impact a fresh coat of paint can have. Learn from other homeowners' experiences and discover practical tips to apply to your own kitchen update.
Inspiring Case Studies: From Drab to Fab
These case studies illustrate how painting kitchen cabinets can revitalize a range of kitchen styles and address various cabinet conditions.
-
Case Study 1: The Dated Oak Kitchen Revival: This 1990s kitchen featured honey oak cabinets that felt distinctly outdated. The homeowners opted for a soft white paint and updated the hardware to create a bright, modern farmhouse look. They learned the crucial role of meticulous preparation and the noticeable impact of high-quality paint on the final result. You might be interested in: How to master detailed cabinet painting.
-
Case Study 2: The Budget-Friendly Kitchen Glow-Up: This homeowner transformed their worn laminate cabinets with a bold teal paint, proving that even budget-friendly materials can achieve stunning results. They shared the specific challenges of painting laminate and offered tips for ensuring proper paint adhesion.
-
Case Study 3: The Historic Home Cabinet Preservation: In this century-old home, the homeowners preserved the character of their original wood cabinets with a classic cream paint. They stressed the importance of researching historically appropriate colors and finishes. Learn more in our article about how to choose cabinets.
Lessons Learned From DIYers and Pros
These real-world examples provide invaluable takeaways for anyone considering painting their kitchen cabinets.
-
Importance of Preparation: Many homeowners highlighted that thorough cleaning and sanding are essential for a durable and professional-looking finish. This step is often the most time-consuming, but it forms the foundation for the entire project.
-
Choosing the Right Paint: The type of paint significantly impacts the final appearance and durability of your cabinets. Choosing a high-quality cabinet paint specifically designed for kitchen use is essential.
-
Unexpected Challenges: Some homeowners encountered unexpected challenges, such as uneven coverage or difficulty painting intricate details. These stories offer practical lessons in troubleshooting common painting issues.
-
Long-Term Performance: Homeowner interviews provide insights into how painted cabinets hold up over time, revealing the factors that contribute to long-lasting results.
Adapting Techniques for Your Kitchen
These case studies offer more than just inspiration; they provide practical guidance on adapting techniques to your specific circumstances.
-
Cabinet Material: Whether your cabinets are wood, laminate, or metal, these examples demonstrate how to tailor your approach to each material.
-
Kitchen Layout: From small galley kitchens to spacious open-plan designs, these transformations offer insights into optimizing your workflow and minimizing disruption during the painting process.
-
Personal Circumstances: Consider your skill level, available time, and budget when planning your project. These case studies showcase projects of varying complexity, providing tips for effectively managing your time and resources.
By learning from others' experiences and adapting their techniques, you can confidently approach your own kitchen cabinet transformation. Ready to create your dream kitchen? Contact Sinclair Cabinetry Inc. today for a free consultation! Let's discuss your project. We specialize in custom cabinetry and can help you transform your kitchen into a beautiful and functional space.