
You open the closet door and find the floor buried under shoeboxes. Boots have been kicked into corners, sneakers are stacked heel-to-toe, and a wire rack is sagging under the weight of a dozen pairs. The problem usually isn't a lack of storage products. It's that the storage was purchased before anyone measured the collection, the room, or the way the shoes are used.
A custom closet shoe organizer should be planned like cabinetry, not assembled like a temporary rack. Count the footwear, calculate usable shelf length, protect the reach zone, and separate flats from boots before a single panel is cut. The broader closet organizer market reached $8.25 billion in 2025 and is projected to reach $11.82 billion by 2030, according to The Business Research Company's closet organizer market report. That demand reflects a practical shift toward modular storage and renovation, but a larger market doesn't make a poorly measured shoe wall work better.
Why Most Closet Shoe Setups Fail Before They Start
On a first home visit, I start with the shoes, not door styles or finish samples. A sagging wire rack may be poorly made, or it may be carrying tall boots on shelves intended for sneakers. Shoeboxes often spread across the floor because the original shelves were too shallow, too high, or too short for the collection.
The first planning error is buying storage before counting the shoes. A rack may promise room for a set number of pairs, yet wide sneakers and heeled shoes consume more usable space than the product illustration suggests. Real capacity depends on clear inside width and each pair's profile, not the cabinet's outside dimensions or a manufacturer's layout. A closet organization systems guide helps frame the wider storage plan, while the footwear inventory determines the shoe section.
Four planning mistakes I see repeatedly
- Treating ceiling height as unusable: A tall closet can provide valuable vertical storage, but everyday shoes still end up on the floor when upper areas are left empty. High shelves suit seasonal footwear, not the main retrieval zone.
- Mixing boots and flats on one shelf: Tall boots need generous vertical clearance, while flats waste space in a boot-height opening. Adjustable shelves work only when their openings are set around the collection.
- Ignoring access geometry: Place the main everyday-shoe zone within the 15- to 48-inch vertical reach band, and provide at least 30 by 48 inches of clear floor space for standing and retrieval, as described in custom shoe storage planning guidance.
- Designing for a static collection: A system sized for today's flats may fail after boots, athletic shoes, or formal pairs are added. Fixed openings make it difficult to rebalance the wall.
Before fabrication, convert the inventory into a cabinet plan: total pairs, linear shelf feet, openings for special clearances, and space reserved for display or protection. That calculation determines whether shelves, cubbies, pull-outs, or a combination will serve the collection. It also prevents a common shop-floor problem, cutting panels for a layout that looked adequate on paper but cannot hold the shoes in daily use.
Measure Your Space and Your Shoe Collection the Right Way
A shoe wall can look spacious until the doors, trim, and floor covering are accounted for. Measure the clear interior wall width from corner to corner, not the outside of an existing cabinet. Record floor-to-ceiling height, baseboard depth, door or bifold swing, and the highest obstruction, including a shelf rod, soffit, outlet, or HVAC register. For broader room planning, use this walk-in closet dimensions planning guide.
Measure the ceiling at several points. Older rooms commonly have a crowned floor or slight variations from wall to wall, so a built-in organizer may need to be scribed or shimmed during installation. Note crown molding, casing, and the height of the carpet pad or finished flooring. A base planned from the subfloor can end up too tall after the final floor covering is installed.

Build the inventory by shoe type
Count by category instead of treating every pair as interchangeable:
- Flats and folded slippers.
- Sneakers and everyday athletic shoes.
- Heels and dress shoes.
- Ankle boots.
- Tall boots.
- Seasonal or rarely worn pairs.
For preliminary planning, 10 to 12 inches of shelf depth covers most everyday shoes. Larger men's sizes may need up to 14 inches, according to custom closet shoe shelf sizing guidance. That guidance also estimates 6 to 8 pairs of women's shoes or 4 to 6 pairs of men's shoes per linear foot. A 6-foot shoe wall can typically support about 40 to 80 pairs, depending on shelf type and spacing.
Use a worksheet with four columns: category, pair count, shelf type, and required opening. A six-foot run equals 6 linear feet, but side panels, dividers, and fillers reduce usable capacity. Measure pairs side by side, particularly wide sneakers, sculptural heels, and boots. Interior width controls the layout, not the cabinet's outside dimension.
Plan vertical openings separately. Start with about 6 to 7 inches for flats and sneakers, 8 to 9 inches for heels, 11 inches for ankle boots, and 18 to 22 inches for tall boots. These are starting dimensions for the cut sheet. Measure the tallest actual pair before fabrication, then convert the inventory into shelf feet, shelf counts, and special openings. That calculation gives the cabinet maker a buildable plan before a single panel is cut.
Choosing the Right Mix of Shelves, Cubbies, and Pull-Outs
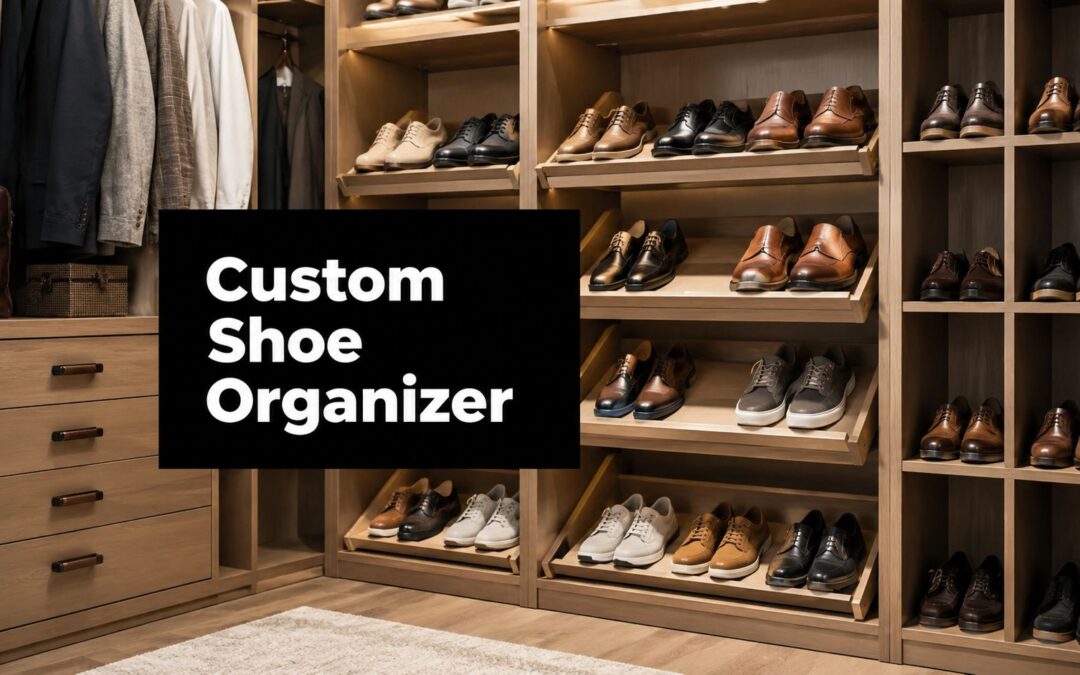
A shoe collection usually needs more than one storage format. Flat shelves provide the highest density for flats and sneakers, but a deep run can hide shoes behind the front row. Slanted shelves keep toes visible and make daily selection easier. Their angle and display clearance reduce the number of pairs each opening can hold.
Open cubbies give every pair a defined location. They work well for boots, seasonal footwear, and shoes with soles or shapes that do not sit neatly on a flat shelf. The trade-off is reduced flexibility. An opening sized around one boot can become wasted space when the collection changes, so cubbies belong where the inventory is stable.
| Configuration | Visibility | Pairs per Linear Foot | Best For | Cost Impact |
|---|---|---|---|---|
| Flat shelves | Moderate, especially on deeper runs | Generally strongest for compact shoes | Flats, sneakers, ankle boots | Lower |
| Slanted shelves | High, with toes easy to see | Lower than flat shelving because of angle and display clearance | Heels and dress shoes | Moderate |
| Open cubbies | High, each pair has a defined opening | Depends heavily on opening width and height | Boots, seasonal shoes, display collections | Moderate to high |
| Pull-out racks | Low when closed, high when extended | Depends on cabinet width and hardware | Dust-sensitive leather and formal footwear | Higher |
| Rotating carousels | High for selected pairs | Often inefficient when vertical space is considered | Small collections and feature areas | Higher |
Pull-outs suit shoes stored behind doors or owners who want less visual clutter. They bring a rear row forward instead of forcing someone to reach into a dark cabinet. Hardware quality affects alignment, load capacity, and long-term movement, so review the construction details before specifying pull-out cabinet organizers.
Match the layout to the collection
For a 60-pair collection, use the percentage breakdown as a planning guideline, not a fixed specification: roughly 60 percent flat or angled shelving, 25 percent cubbies, and 15 percent pull-outs can provide a balanced starting point. The actual mix should follow the inventory. A sneaker-heavy collection needs more flat shelving, while a boot-heavy wardrobe requires more tall openings and cubbies.
Translate that mix into linear feet and shelf counts before cutting material. Reserve the most visible openings for daily pairs, place special footwear where pull-outs can protect and display it, and keep some shelves adjustable for future changes. The cabinet should support the collection you own now without making every later change require a rebuild.
Rotating units often photograph well, but they can waste vertical space and add another moving mechanism to a cabinet that needs to stay quiet and stable. Use them selectively rather than as the default. A workable organizer shows daily pairs immediately, protects less frequently worn footwear, and leaves enough adjustability to absorb changes in the collection.
Materials, Finishes, Hardware, and Lighting That Hold Up
The cabinet box determines durability more than the color or sheen. In a humid, Florida-style closet, 3/4-inch furniture-grade plywood makes a dependable carcass through recurring humidity cycles, particularly when exposed edges receive proper edgebanding. Prefinished melamine is a practical standard option for shelves and interiors, provided the shop treats its edges, backs, and fastener locations carefully.
Solid wood fronts add warmth but still respond to seasonal moisture. Rift-sawn oak and maple suit visible doors, drawer fronts, and trim when a stable, refined appearance matters. Painted parts finished with conversion varnish generally resist abrasion better than those finished with catalyzed lacquer. Prefinished laminate or melamine simplifies cleaning, while stained wood requires more material and finishing work for its added character.
| Material or Component | Positioning | Humidity Performance | Best Use |
|---|---|---|---|
| Prefinished melamine | Standard | Practical when edges are sealed | Functional shelves and cabinet interiors |
| Furniture-grade plywood | Durable | Strong choice for sealed cabinet boxes | Humid closets and long-lasting carcasses |
| Rift-sawn oak or maple fronts | Refined | Stable, but still responds to moisture | Visible doors, drawer fronts, and trim |
| Conversion varnish | Durable finish | Resists wear on finished surfaces | Painted or stained exposed components |
| Full-extension soft-close slides | Heavy-duty | Depends on protected installation | Pull-outs carrying loaded footwear |
| Low-voltage LED strips in aluminum channel | Integrated lighting | Performs well when wiring and channels are protected | Even shelf illumination |
Hardware determines whether a shoe organizer continues to align after repeated use. Specify full-extension soft-close slides rated for 75 to 100 pounds for substantial boot rows or loaded pull-outs. European-style 110-degree hinges provide useful adjustment for cabinet doors. A slide that feels fine while empty can sag or bind once footwear is added, so confirm its load rating against the planned shelf count and shoe inventory.
Low-voltage LED strips installed in aluminum channels spread light more evenly than loose tape. A warm 2700K to 3000K color temperature keeps leather and wood from appearing cold, while the channel shields the strip from impact. Protect wiring from snags and leave enough access for future service. In a damp closet, sealed plywood boxes, finished backs, and sensible ventilation gaps help the cabinet tolerate its surroundings.
Review this guide to cabinet hardware and finishes before finalizing the specification. Match the finish to the room, then confirm that the slides, hinges, channels, and mounting details suit the actual footwear load.
How a Custom Cabinet Maker Actually Builds Your Organizer
Once the drawing is approved, the work follows a predictable path. The first serious step is a site measure, even if someone already provided rough dimensions. I use a laser and a notched story pole to capture out-of-plumb walls, floor crowning, baseboard conditions, and electrical or HVAC obstructions that are easy to miss with a tape alone.
The design then moves into CAD. A good shop drawing shows every shelf, cubby, door, and pull-out with its clear interior dimensions. Some shops provide a rotatable three-dimensional view, which lets the homeowner catch a blocked outlet or an awkward boot opening before materials are ordered.

What happens in the shop
The approved drawing becomes a material cut sheet. CNC machining cuts panels consistently, while edgebanding protects exposed edges and pre-drilled shelf-pin or dowel holes keep the assembly accurate. The shop then dry-fits the carcasses, installs slides where specified, and checks the relationship between doors, dividers, and moving parts.
That dry-fit is not a ceremonial step. It catches a shelf that interferes with a hinge, a pull-out that needs more face-frame clearance, or a boot opening that is technically tall enough but difficult to use. Rush work may shorten shop scheduling, but it shouldn't remove this inspection.
Installation is where the room gets resolved
On installation day, the crew levels the units, shims uneven walls, scribes face frames, anchors the organizer to studs, and adjusts doors and slides. A typical installation takes 4 to 8 hours, while the full path from signed drawing to installed closet generally takes 4 to 8 weeks in most shops, according to the custom cabinet workflow described in the project brief.
A homeowner should leave the consultation with more than a finish sample. Ask for the approved drawing, the clear interior shelf dimensions, the planned boot openings, and the access route into the room. The finished organizer should be judged by how easily a person retrieves a pair, not only by how cleanly it appears in a rendering.
A shop walkthrough can also clarify the difference between a display concept and a buildable cabinet:
Budget, Timeline, and Where the Money Really Goes
A shoe collection can fit on paper and still exceed the budget once doors, drawers, lighting, and wall corrections enter the plan. A single wall section typically ranges from $1,800 to $6,500 installed, while a whole-closet system can reach $8,000 to $15,000 or more, depending on scope. Cabinet length, material grade, drawer work, doors, lighting, and site conditions drive the final price.
| Cost Category | Share of Total | Typical Dollar Range | Notes |
|---|---|---|---|
| Materials | 35% to 45% | Project-dependent | Plywood, melamine, wood fronts, edgebanding |
| Labor and shop time | 30% to 40% | Project-dependent | Design support, machining, assembly, installation |
| Hardware, finishing, and lighting | Remainder | Project-dependent | Slides, hinges, paint, stain, LED components |
| Pull-out racks | Feature allowance | $200 to $600 per feature | Depends on width, load rating, and finish |
| Soft-close mechanisms | Feature allowance | $200 to $600 per feature | Applies to selected moving components |
| Integrated LED lighting | Feature allowance | $200 to $600 per feature | Includes specified lighting components and installation |
Use these categories to compare proposals, not as a fixed bid sheet. An open shoe wall with durable laminate may stay near the lower end. Stained wood, enclosed cabinets, several pull-outs, and integrated lighting increase both material and installation time.
Spend where movement and fit matter
The hardware deserves attention when shelves or racks carry loaded shoes every morning. Put the budget first into accurate measurements, square cabinet boxes, dependable slides, and a finish suited to the room. Decorative wood upgrades can wait if a pull-out sags, a door binds, or a boot opening is difficult to use.
A 10% to 15% contingency covers site surprises, especially in older homes with uneven walls and floors. The planning timeline is commonly 6 to 10 weeks, including design, revisions, shop fabrication, and installation. That schedule gives the cabinet maker time to confirm linear shelf capacity, clearances, hardware, and fit before installation, rather than forcing expensive changes after the first board is cut.
Maintenance, Common Mistakes, and Quick Answers
Day two is when the organizer becomes part of the household. Wipe shelves monthly with mild soap and water, then dry them with a clean cloth. Melamine scuffs can often be handled with a carefully used melamine sponge, while painted surfaces should be treated with the specified touch-up paint rather than an abrasive cleaner.
Keep an eye on moving parts. Retighten hinges and pull-out hardware every 3 months, following the maintenance checklist supplied with the project. Don't put damp sneakers directly onto finished shelves, and use boot supports or shoe trees when shape retention matters.

Mistakes that show up after installation
- Baseboard depth was missed: The organizer may sit proud of the wall or leave an unwanted gap.
- Shims weren't secured properly: An uneven wall can make a cabinet look correct on installation day, then allow movement later if the correction isn't anchored.
- Lighting was chosen by appearance alone: An unsuitable LED strip can cast an unpleasant green tint over white shelving and leather.
- Shelves were loaded without a plan: Heavy boots and dense rows can stress components that were designed for lighter footwear.
- Damp footwear was stored immediately: Moisture trapped against a shelf can create odor and finish problems.
Quick answers for practical concerns
How should I control humidity in a warm climate?
Keep the closet ventilated, allow footwear to dry before storage, and use sealed cabinet boxes with finished backs where conditions demand extra protection. A cabinet isn't a substitute for room-level humidity control.
Can lighting be added later?
Sometimes, but retrofitting wiring inside finished cabinetry is more invasive than planning channels and wire paths during fabrication. If lighting is likely, reserve access before the panels are installed.
Will a built-in organizer add measurable resale value?
There isn't a verified resale figure to promise. A well-built organizer can improve daily function and presentation, but buyers value the room as a whole, and a custom feature should be designed for useful storage rather than an assumed return.
Before ordering, put the shoe inventory, clear dimensions, shelf openings, material specification, hardware ratings, finish, lighting plan, and installation scope into the approved drawing. Sinclair Cabinetry inc can design and build custom closet cabinetry with dedicated shoe shelves, cubbies, and related storage as part of a broader cabinet project. Visit Sinclair Cabinetry inc to discuss your closet dimensions and collection before fabrication begins.