
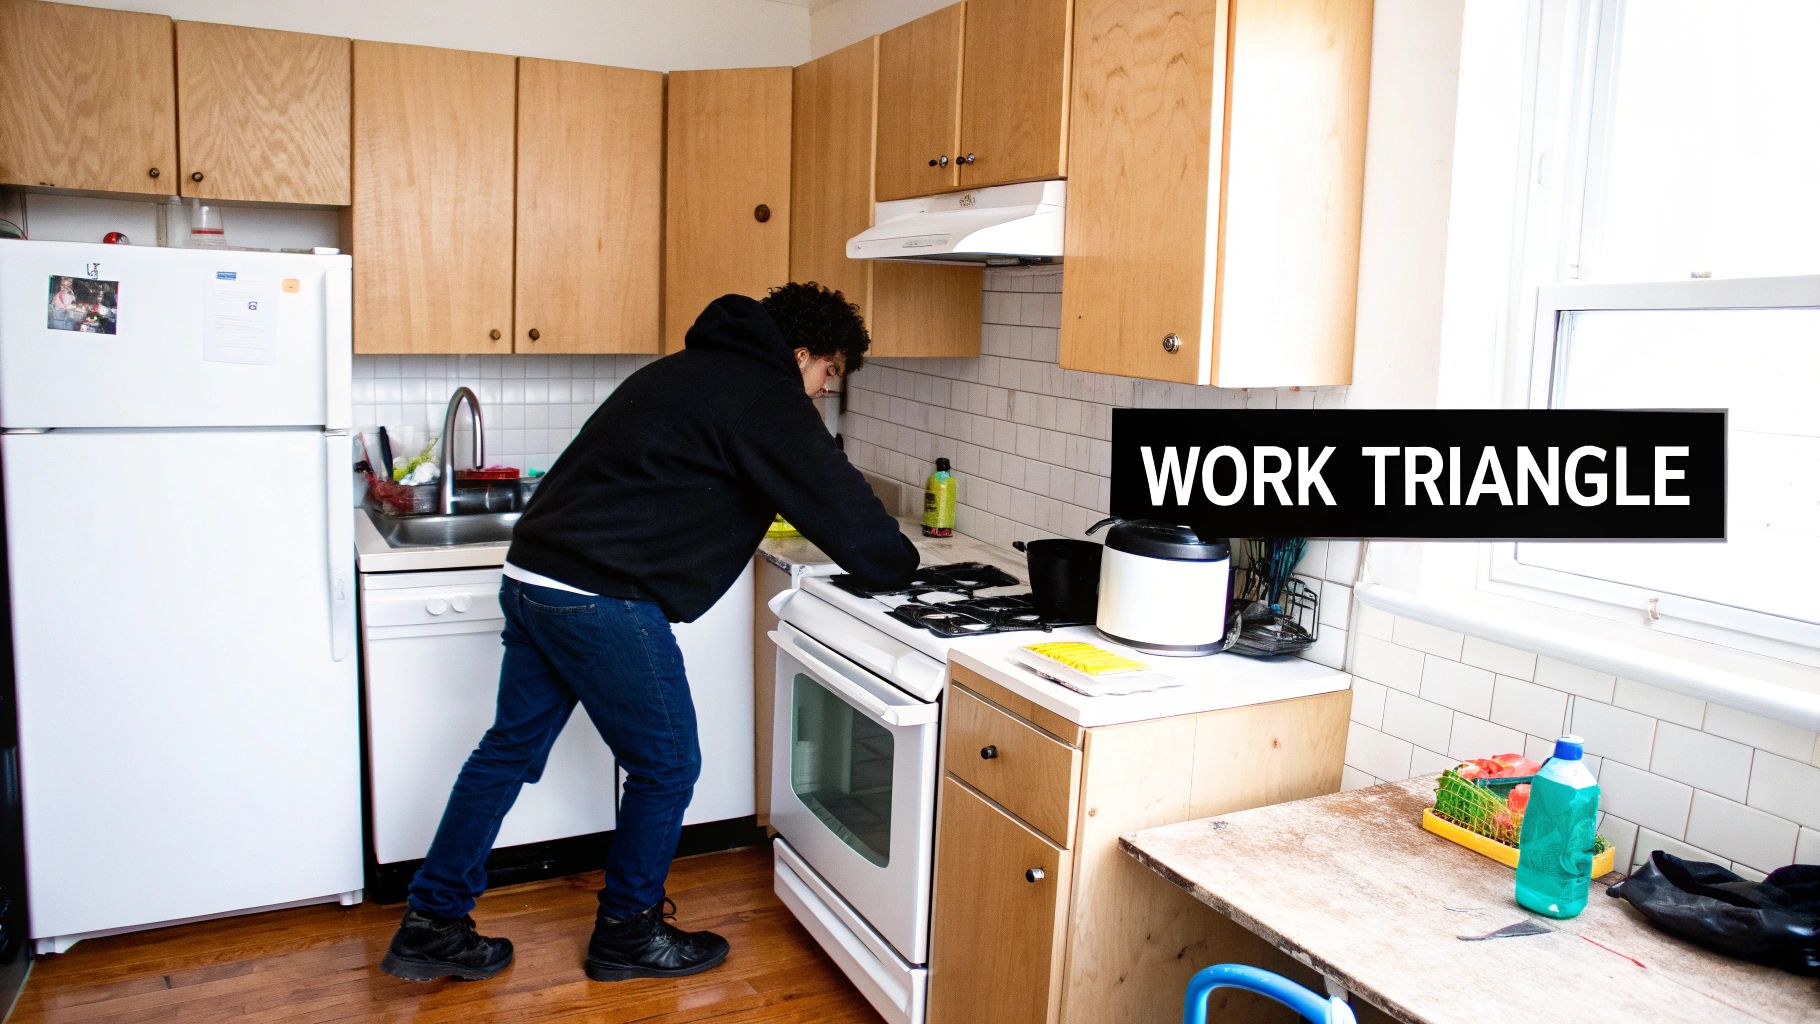
Picture this: you're in the kitchen, and you glide effortlessly from the fridge to the sink, then over to the stove. Everything you need is just a few steps away. That seamless flow is the magic of the kitchen work triangle, a design principle that’s been the secret sauce of functional kitchens for decades.
It’s a simple concept, really. The triangle connects your three core work stations—refrigerator, sink, and cooktop—to minimize wasted steps and make your time in the kitchen feel intuitive and natural.
Why the Kitchen Work Triangle Still Matters Today
Kitchen designs have changed a lot over the years, but the need for an efficient layout is timeless. The work triangle isn't just some abstract theory; it's a practical blueprint for a space that actually works for you. Think of it as the invisible choreography that guides your movements, making cooking less of a workout and more of a joy.
Believe it or not, this idea isn't new. It came out of motion-efficiency studies in the early 20th century and was officially standardized in the 1940s at the University of Illinois School of Architecture. Researchers watched cooks and realized that the path between the sink, stove, and refrigerator accounted for over 80% of all movement during meal prep. Their goal was to cut out all those extra steps, and the dimensional rules they created are still the gold standard today.
The Foundation of Smart Kitchen Design
At its heart, the work triangle is all about creating an ergonomic and logical flow. It makes sure your main work areas are close enough for convenience but not so close that you feel boxed in. Finding that sweet spot is what turns a good kitchen into a great one.
A well-designed triangle helps in a few key ways:
- Minimizes Traffic Jams: It cleverly routes the main cooking path away from the household's foot traffic. No more bumping into people while you're carrying a hot pan.
- Reduces Physical Strain: Shorter travel distances mean less fatigue, which you’ll definitely appreciate when you’re in the middle of a big holiday meal.
- Boosts Overall Safety: A clear, efficient path means fewer chances for spills, collisions, and accidents.
The real beauty of the work triangle is its simplicity. It gives you a solid starting point for any kitchen remodel, guaranteeing that function is just as important as form right from the get-go.
Ultimately, getting this principle right is the first step toward a smarter renovation. Modern kitchens might have more complex "work zones" or need to accommodate multiple cooks, but the triangle remains the essential backbone. This is where custom cabinetry can shine, designed to enhance that flow and put storage exactly where you need it most. To see how it all comes together, check out our deep dive on what the kitchen work triangle is.
The Golden Rules of Kitchen Triangle Dimensions
Specific, well-planned measurements are what take the work triangle from a good idea to a functional masterpiece. These aren’t just arbitrary numbers; they are time-tested guidelines that ensure your kitchen is a space of effortless movement, not a daily obstacle course.
Think of them as the recipe for a perfect workflow. The whole point is to keep your three main work stations—the sink, refrigerator, and cooktop—close enough for efficiency but far enough apart to avoid feeling cramped. It’s all about striking that perfect balance.
The 4-to-9 Foot Rule for Each Leg
The distance between any two points of the triangle—say, from your sink to your stove—should be no less than 4 feet and no more than 9 feet. This is the absolute sweet spot for any kitchen layout.
-
Less than 4 feet? You’ve created a bottleneck. Appliance doors will bang into each other, you’ll have zero counter space for prep work, and the area will feel claustrophobic, especially with more than one cook in the kitchen.
-
More than 9 feet? Now you’re running a marathon just to make dinner. You’ll find yourself taking endless extra steps to move ingredients from the fridge to the sink, which gets old fast.
Imagine your triangle is a conversation between your three main work areas. If they're too close, they're shouting over each other. If they're too far apart, they can't communicate effectively. The goal is a comfortable, productive dialogue.
The 13-to-26 Foot Rule for the Total Perimeter
Next up, you need to look at the big picture. Add up the lengths of all three legs of the triangle. The total perimeter should fall somewhere between 13 feet and 26 feet.
This rule keeps the overall layout cohesive and efficient. A total distance under 13 feet is a sure sign of a cramped, tight workspace. Go over 26 feet, and the kitchen becomes far too spread out for practical, everyday use.
To help you keep these crucial numbers straight, here’s a quick summary:
Kitchen Triangle Dimension Rules at a Glance
This table breaks down the core dimensional rules for an optimal kitchen work triangle. Following these guidelines ensures your layout promotes efficiency and comfort, preventing common design pitfalls.
| Guideline | Recommended Measurement | Purpose |
|---|---|---|
| Individual Leg Length | Between 4 and 9 feet | Prevents the workspace from being too cramped or too spread out. |
| Total Perimeter | Between 13 and 26 feet | Ensures the overall kitchen layout is efficient and not overly large. |
| Traffic Flow | No major obstructions | Keeps pathways clear for seamless movement between workstations. |
These simple rules form the foundation of a highly functional kitchen. They’re the difference between a space that works against you and one that feels like an extension of your own two hands.
How to Measure and Account for Obstacles
So, how do you get these dimensions right? Always measure from the center of each appliance or workstation. For the sink, that means measuring from the center of the main basin. This gives you a consistent, accurate starting point.
But here’s the most critical part: you have to account for roadblocks. A clear, direct path between each point of the triangle is non-negotiable.
A beautiful kitchen island, a peninsula, or even a large rolling cart can completely disrupt the flow if it cuts across a leg of the triangle. A well-placed island is a fantastic asset, but if you have to constantly walk around it to get from the sink to the stove, it’s defeating the entire purpose of the work triangle. For a deeper dive into getting every inch just right, our guide to kitchen design measurements can help ensure your space is perfectly optimized for both flow and function.
How the Triangle Works in Common Kitchen Layouts
The kitchen work triangle isn't some rigid, one-size-fits-all rule. Think of it more as a flexible guideline, a concept whose true genius is how it adapts to the unique footprint of your kitchen, regardless of its shape or size.
Once you see how the triangle functions in different layouts, from a cozy L-shape to a sprawling U-shaped space, you'll start to see its power. Let's break down how this classic design principle takes shape in the most popular kitchen setups.
L-Shaped Kitchens: The Classic Corner Setup
The L-shaped kitchen is a crowd-pleaser for a reason. It uses two perpendicular walls for cabinetry and appliances, which naturally opens up the room. This makes it a perfect candidate for adding a dining nook or an island without making things feel cramped.
The work triangle is incredibly efficient here. A common approach is to place the refrigerator on one end of the "L," the cooktop on the other, and the sink somewhere in the middle. This setup is brilliant because it keeps the main work zone clear of household traffic—family members can move through the open side without ever getting in the cook's way. The only real challenge is the corner cabinet, but clever custom solutions like lazy Susans or pull-out shelving can make that awkward spot a storage powerhouse.
U-Shaped Kitchens: The Ultimate Workflow
If you're serious about cooking, the U-shaped layout is a dream come true. With cabinets and appliances running along three walls, it creates a tight, highly functional work triangle. We often call this the "cockpit" of the kitchen because everything you need is just a pivot away.
In a U-shaped layout, each of the three key workstations—sink, stove, and refrigerator—can command its own wall. This separation gives you generous counter space between each point, creating dedicated zones for prepping, cooking, and cleaning.
The triangle is compact and efficient, which means fewer steps and more productivity. The biggest potential pitfall? A U-shaped kitchen can feel a bit boxed in, especially if the room is narrow. It's also critical to plan your corner cabinet access and ensure you have enough clearance if you decide to drop an island in the middle.
Galley Kitchens: Streamlined Corridor Efficiency
Named after the lean, functional kitchens on ships, the galley layout is a masterclass in efficiency. It features two parallel walls and is common in smaller homes and apartments where space is at a premium. Here, the work triangle is less of a triangle and more of a streamlined work zone.
To make it work, you'll typically place the sink and cooktop on one wall and the refrigerator on the opposite wall. This keeps the core tasks flowing smoothly, but you need to follow a few ground rules:
- Avoid the Appliance Line-Up: Whatever you do, don't put all three triangle points on the same wall. That just creates a cramped, linear assembly line instead of an efficient triangle.
- Keep Pathways Clear: A galley kitchen often doubles as a hallway. Make sure your main work zone doesn't clash with the primary traffic flow through the room.
- Optimize Clearance: You need at least 4 feet of space between the opposing countertops. This allows for comfortable movement and ensures you can open appliance doors all the way without hitting anything.
Below is a visual guide that breaks down the core rules that make these layouts click.
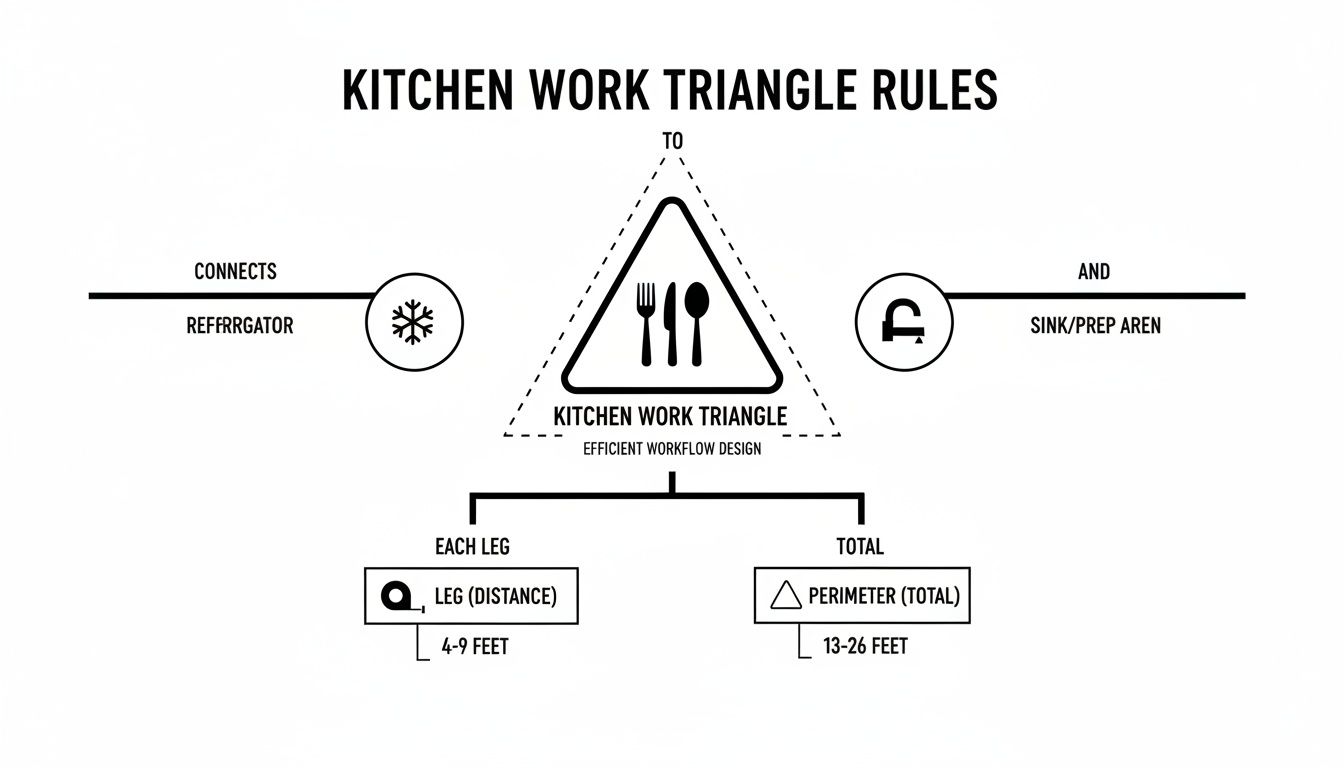
This infographic really nails the fundamental distance rules—the leg lengths and total perimeter—that are essential for applying the work triangle effectively, no matter what layout you're working with.
Integrating Islands Without Breaking Your Workflow
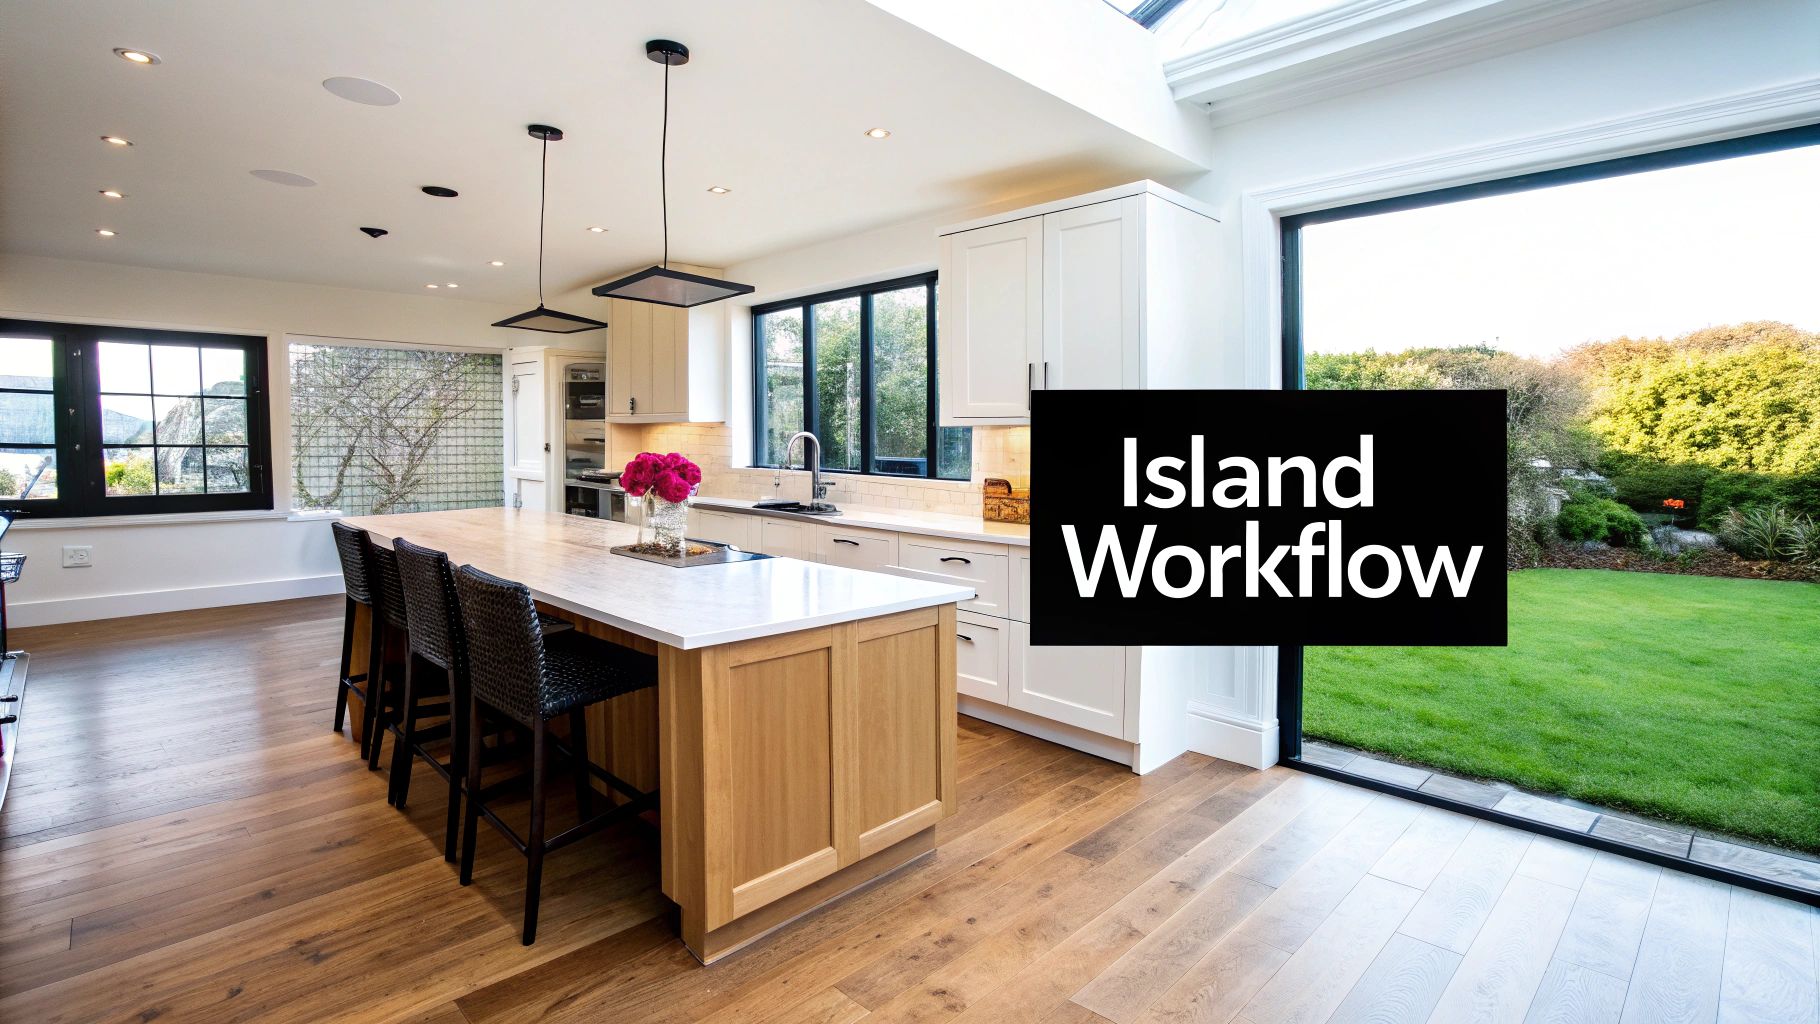
A kitchen island is often the heart of the home—a magnetic hub for everything from food prep and homework to casual dinners. But if it's poorly planned, that beautiful centerpiece can become a major roadblock, forcing you to run laps around it just to get from the fridge to the sink.
The secret is deciding its role from the very beginning. Will it be a point in the triangle itself or a separate, complementary workspace?
For an island to be a true anchor in your workflow, it needs to house one of your primary stations, like a prep sink or the main cooktop. This strategic move transforms the island from an obstacle into an essential part of the kitchen’s natural rhythm.
If you envision your island more as a standalone prep station or a seating area, it's critical that it doesn't intersect any of the triangle’s legs. This requires careful measurement to preserve clear, direct paths between the fridge, sink, and stove.
Maintaining Clear Pathways and Dimensions
Proper clearance around an island isn't just a suggestion; it's essential for a functional kitchen. Obstructing the paths of your kitchen triangle layouts completely defeats the purpose of the design.
To keep your kitchen flowing smoothly and avoid frustrating traffic jams, stick to these fundamental spacing rules:
- Main Walkways: You’ll want a minimum of 42 to 48 inches of clear space on any side of the island that serves as a major walkway. This gives people room to pass through without bumping into the cook.
- Work Aisles: For the aisles right in front of your main work zones—like the stove or sink—aim for at least 42 inches. If you often have more than one person cooking, bumping that up to 48 inches will make a world of difference.
An island shouldn't feel like a barrier you have to navigate. It should feel like a natural extension of your workspace, seamlessly integrated into the kitchen’s flow rather than fighting against it.
Designing a Functional Island Hub
Beyond just where you put it, the design of the island itself is what makes it truly work. It's fascinating—even designers who now champion modern "work zone" concepts still lean on the triangle's core principles. In fact, 78% of professional designers still actively reference the work triangle when planning their kitchens.
Expert cabinet makers use advanced software to map out these paths, making sure an island doesn’t add hundreds of needless steps to your daily routine.
A custom island is the perfect opportunity to make your work triangle even better. By thoughtfully incorporating effective storage solutions for pots and pans, you can add features that directly support your workflow. Think integrated trash pull-outs near the prep sink or deep drawers for cookware right across from the stove.
If you’re looking for more ideas, check out our guide on how to design a kitchen island that perfectly balances style and function.
How the Triangle Works in a Modern Kitchen
The classic kitchen was a one-person show, designed for a single cook with a simple job to do. But today? The kitchen is Grand Central Station—it's where homework gets done, guests gather, and multiple cooks try to share the space without bumping elbows. This new reality makes you wonder: does a principle designed for one person still work in our busy, modern lives?
The short answer is yes, but it needs a little help. We don't throw out the kitchen triangle; we build on it. The modern solution is to think in work zones, a concept that partners with the triangle to create a kitchen that can handle anything you throw at it. This approach keeps that primary, efficient path for the main cook while carving out dedicated spots for everything else.
This shift in thinking is a direct result of how we live now. Open-concept layouts are king, turning the kitchen from a hidden workspace into the social heart of the home. In fact, about 51.2% of American homeowners now favor an open kitchen, a huge move away from the closed-off rooms of the past. Because of this, designers are blending the triangle with work zones to manage the beautiful chaos of family life. You can read more about the future of kitchen design on rmcad.edu.
Creating Your Own Work Zones
Think of work zones as mini-kitchens, each perfectly equipped for a specific job. When you create these dedicated areas, you eliminate traffic jams and allow multiple things to happen at once without anyone getting in each other's way. It’s the ultimate strategy for a busy, multi-functional kitchen.
Here are a few popular work zones you can build into your layout:
- Baking Zone: This is where you group your stand mixer, baking sheets, flour, and sugar. Many people opt for a slightly lower countertop here to make kneading and rolling dough more comfortable.
- Coffee or Beverage Station: A dedicated spot with the coffee maker, mugs, and maybe a small fridge for milk keeps the morning rush contained and out of the main cooking area.
- Prep Zone: This is often a secondary sink on an island, complete with a cutting board and compost bin. It’s perfect for letting someone chop veggies while another person is busy at the stove.
- Cleaning Zone: Centered around the main sink and dishwasher, this zone corrals dirty dishes and keeps them separate from where food is being prepped.
The goal is to layer functionality. Your primary work triangle is still the backbone of the kitchen, making sure core cooking tasks are fast and easy. The specialized zones just support all the other ways you actually live in the space.
How Zones and Triangles Work Together
This layered approach is where custom cabinetry really shines. You can design a baking zone with a built-in marble countertop for pastry or a beverage station with custom pull-outs for coffee pods and wine bottles. The primary triangle—the path between the main fridge, stove, and sink—remains clear and direct for the head chef.
Meanwhile, other family members can grab a drink or make a snack without ever cutting through that main workflow. This hybrid model gives you the best of both worlds: the proven efficiency of classic kitchen triangle layouts and the real-world flexibility that today’s busy households demand.
Your Guide to a Perfectly Designed Kitchen
Bringing your dream kitchen to life is a journey, one that takes your ideas and makes them real. We've seen how timeless concepts like kitchen triangle layouts and modern work zones aren't just abstract theories—they're the very blueprints for a space that feels like it was built just for you.
True mastery in kitchen design happens when you blend that functional choreography with your own personal style. It's about creating a kitchen that feels just as good to cook in as it does to look at. This is where thoughtful planning turns a concept into a tangible, beautiful, and highly efficient room.
Turning Vision into Reality
The process of creating a custom kitchen is a collaborative art form. It all starts with your vision and is brought to life through expert guidance and precision craftsmanship.
Here’s a look at the key stages:
- Expert Planning: A designer is your partner in translating your needs into a functional layout. They make sure every inch serves a purpose while respecting the core principles of an efficient workflow.
- 3D Modeling: With advanced design software, you can step into a virtual model of your kitchen before a single piece of wood is cut. It’s a crucial step that lets you visualize traffic flow and tweak the details until they’re perfect.
- Meticulous Craftsmanship: Finally, skilled artisans get to work. They bring the design to life, building custom cabinetry that is not only stunning but also built to handle the rigors of daily life for years to come.
An exceptional kitchen is always the result of a great partnership. It’s a space where every cabinet, countertop, and appliance is placed with intention, creating a harmonious environment that’s perfectly tailored to your lifestyle.
For those diving even deeper, it's worth noting that the same core ideas are crucial for effective commercial kitchen layout planning strategies, too.
Ready to start your own design journey? A well-planned kitchen is an investment in your home's daily joy and function. Let's build a space that’s uniquely yours.
Still Have Questions About Kitchen Layouts?
Even the best-laid plans can bring up a few questions. When you're in the thick of designing, it's completely normal for little details to pop up. Here are some straightforward answers to the questions we hear most often about kitchen triangles, so you can move forward with your design confidently.
Can a Kitchen Have More Than One Work Triangle?
You bet. In fact, for larger kitchens or homes where there's often more than one cook, adding a second work triangle is a brilliant move. A classic example is putting a prep sink on the island, which creates a neat little triangle with the fridge and the cooktop.
This setup is a game-changer. It means one person can be rinsing veggies at the island while someone else is at the main sink handling cleanup. The trick is to make sure each triangle has its own clear path and they don't cross over each other, keeping the kitchen humming along smoothly for everyone involved.
What's the Single Biggest Mistake to Avoid?
If there's one thing you absolutely want to sidestep, it's putting a major roadblock right in the middle of your work triangle. Think of a big, immovable island or a tall pantry cabinet plopped directly between the sink and the stove.
Placing an obstacle like that forces you to constantly walk around it, which completely torpedoes the whole point of an efficient layout. Always, always make sure you have a clear, direct path between your sink, stove, and refrigerator. It’s all about maintaining that easy flow.
The whole idea behind the work triangle is to create the path of least resistance. Anything that makes you take a detour, no matter how small, just adds needless steps and a bit of frustration to your daily routine.
How Does the Triangle Work with a Separate Wall Oven and Cooktop?
This is a great question. When your cooking appliances are split up, the cooktop is almost always the main point of your work triangle. Why? Because that's where the active, hands-on cooking happens day in and day out.
The wall oven is more of a secondary player since you use it less frequently. So, you'll want to map out your primary triangle between the sink, refrigerator, and cooktop. The wall oven should be placed somewhere convenient and nearby, but just outside the main traffic lanes so it doesn't get in the way.
Ready to create a kitchen that perfectly marries timeless design rules with your modern life? The team at Sinclair Cabinetry inc are experts in crafting custom cabinetry that transforms your ideas into a stunning, functional reality. Start your design journey with us today!