
The Reality of Kitchen Remodel Timelines: What to Actually Expect
Let's be honest: kitchen remodels rarely stick to those ideal timelines we see on TV. Forget the 3-week turnaround; most kitchen renovations realistically take 3-5 months. Several factors contribute to this, from the inherent complexity of the project to unforeseen problems that might pop up during demolition or installation.
A simple refresh with new countertops and appliances will naturally be much quicker than a complete gut job involving structural changes.
Understanding the Timeline Spectrum
How long your kitchen remodel will take depends on a variety of things. The scope of the project is a major factor. A minor remodel, focusing mostly on cosmetic upgrades, could take just a few weeks.
However, a major remodel involving structural changes, custom cabinetry, or extensive plumbing and electrical work can easily stretch over several months. The kitchen remodeling industry itself has experienced significant growth, impacting both trends and overall spending.
In 2025, kitchen and bath remodeling spending is expected to grow by 2.6%. This growth is fueled in part by homeowners wanting to improve their living spaces and the increasing popularity of modern kitchen designs. For example, around 40% of people surveyed said they were unhappy with their kitchen’s appearance, a key motivator for remodeling. You can find more detailed statistics here: 2025 Kitchen and Bath Market Outlook.
Managing Expectations and Maintaining Sanity
A successful kitchen remodel hinges on realistic expectations and proactive planning. Check out our guide on Signs You Need a Remodel for some helpful planning tips. One frequent mistake is underestimating the planning phase, which includes design, budgeting, and getting the necessary permits.
This crucial stage can take several weeks, so don't rush it. Understanding the psychological phases of a renovation is also key. Initial excitement can quickly turn to frustration during demolition and the inevitable delays that can arise.
Preparing for the Unexpected
Even the best-laid plans can be disrupted. Unforeseen issues like discovering structural problems during demolition, material delays, or navigating the permit process can all impact the timeline. This is why adding buffer time to your schedule is crucial.
Equally important is maintaining open and consistent communication with your contractor. This helps manage expectations and allows you to address any issues that may come up promptly. By understanding the realities of a kitchen remodel timeline and taking a proactive approach, you can navigate the process more smoothly and create the kitchen you've always dreamed of.
Planning Phase: Creating Your Renovation Roadmap (Weeks 1-6)
The key to a successful kitchen remodel is thorough planning. This critical phase, spanning weeks 1-6, helps avoid costly mistakes and keeps your project on schedule. One of the biggest, and most expensive, mistakes homeowners make is rushing this initial stage, often leading to budget overruns and design compromises.
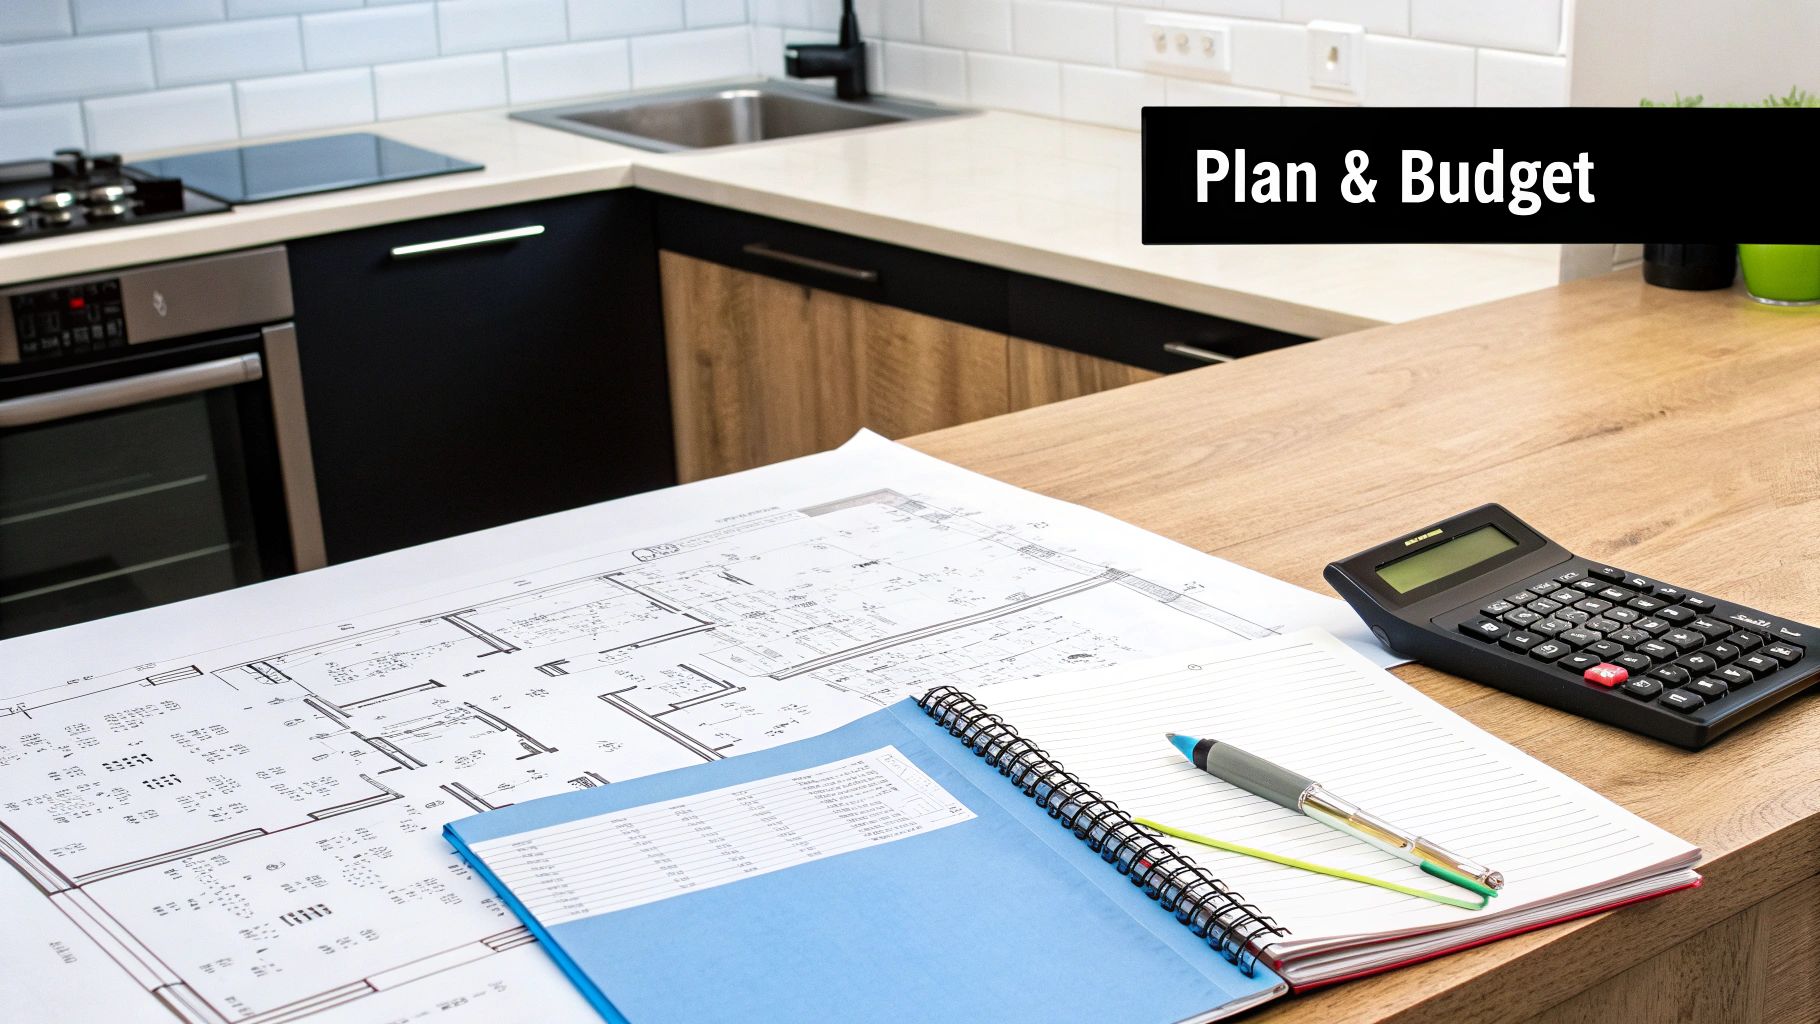
Defining Your Vision and Budget
The first step involves defining your ideal kitchen within a realistic budget. A mood board can help visualize your desired aesthetic and identify essential features. At the same time, you'll want to create a preliminary budget, including material costs, labor, and a contingency fund for unexpected expenses. This budget will likely be adjusted as your plans develop, but having a starting point is crucial. For a helpful resource, check out this checklist: How to master your kitchen remodel with this checklist.
Designing Your Dream Kitchen
Next, translate your vision into concrete plans. This means taking precise measurements of your current space, creating concept sketches, and selecting materials. Think about crucial elements like workflow, storage needs, and appliance placement to create a functional layout. This is the perfect time to explore various design styles, cabinet configurations, and countertop materials.
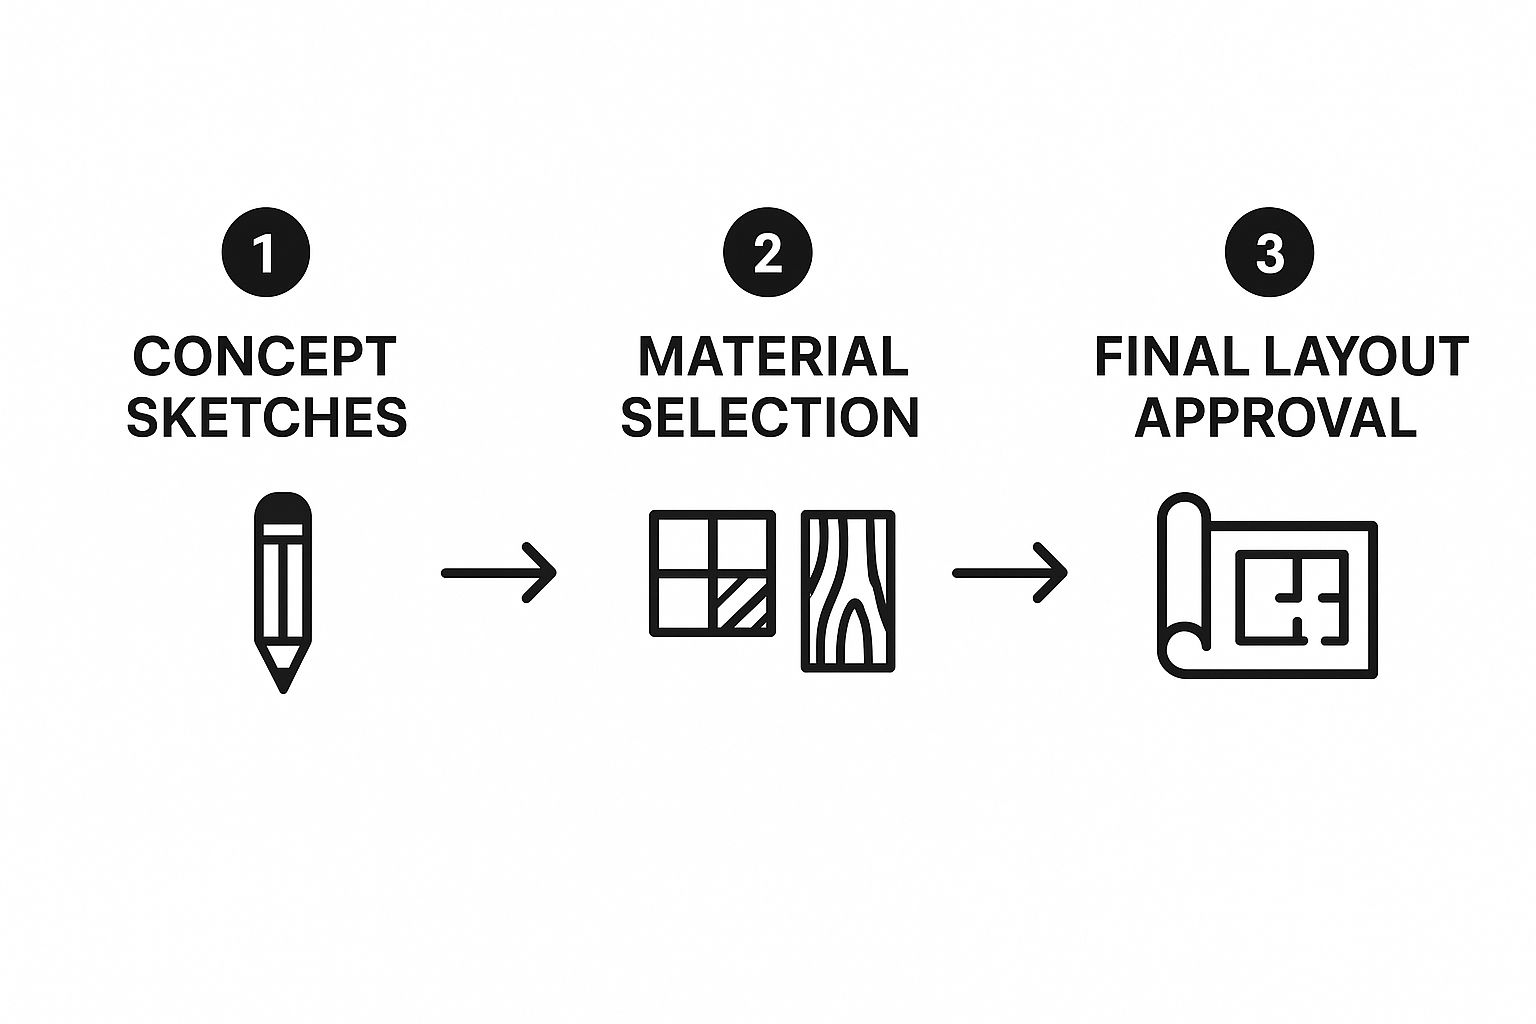
This infographic showcases the design process, from the initial concept sketches to material selection and final layout approval. Each step builds on the last, emphasizing the need for a structured approach. Thorough planning, from the initial brainstorming session to the final blueprints, ensures that your dream kitchen aligns with both your vision and the physical realities of your space.
Securing Permits and Contractors
Once your design is finalized, you'll move on to the logistics. This includes obtaining necessary permits from your local authorities, a process that can sometimes take time. Start interviewing potential contractors. Make sure to check references and verify licenses and insurance. A detailed contract outlining the scope of work, payment schedule, and project timeline protects both you and the contractor.
Finalizing Materials and Preparing for Demolition
The last step in the planning phase involves ordering materials and prepping your home for demolition. Finalize all material choices, paying close attention to potential lead times for custom orders. Start clearing out your kitchen and setting up a temporary kitchen space elsewhere in your home. These preparations minimize disruptions to your daily routine once construction begins. Careful preparation in these early stages sets the stage for a much smoother, more efficient renovation.
To help visualize the planning phase, take a look at the table below:
Planning Phase Breakdown: This table shows the typical timeline for each planning activity and who is responsible.
| Planning Activity | Typical Duration | Responsible Party | Critical Considerations |
|---|---|---|---|
| Defining Vision and Budget | 1-2 Weeks | Homeowner | Establish a realistic budget, including a contingency fund. Research desired materials and appliances. |
| Designing the Kitchen | 2-3 Weeks | Homeowner/Designer | Accurate measurements, functional layout, and material selection are crucial. Consider workflow, storage, and appliance placement. |
| Securing Permits & Contractors | 1-2 Weeks | Homeowner/Contractor | Obtain necessary permits. Vet contractors thoroughly, checking references, licenses, and insurance. Establish a clear contract. |
| Finalizing Materials & Prep for Demolition | 1 Week | Homeowner/Contractor | Order materials, considering lead times. Prepare the space for demolition, including setting up a temporary kitchen. |
This table highlights the key activities and timelines for the planning phase. As you can see, the homeowner is actively involved in each step, ensuring their vision is realized throughout the process. Understanding the timeline and responsibilities for each activity sets the project up for success from the start.
Demolition & Structural Work: Embracing Creative Destruction
This phase of your kitchen remodel timeline marks the exciting (and often messy) transition from planning to tangible progress. It’s where your vision truly begins to take shape. Demolition and structural work isn't simply about tearing down walls; it involves careful planning, potential discoveries, and important decisions that will influence the entire project. Experienced contractors emphasize homeowner involvement during this phase, highlighting the need to protect adjacent areas and establish a temporary kitchen.
Protecting Your Home and Sanity
Before any demolition begins, protecting adjacent spaces from dust and debris is critical. This involves sealing doorways with plastic sheeting, covering furniture, and possibly relocating valuable items. During the planning phase, consider creating a comprehensive roadmap, much like a digital transformation roadmap for a business, outlining each step of the demolition process. Setting up a temporary kitchen area, even if it's just a microwave and mini-fridge, can significantly reduce stress during the remodel. These proactive measures can make a real difference in preserving both your home and your peace of mind.
Navigating Demolition Discoveries and Red Flags
Demolition often uncovers hidden surprises, some welcome and others not so much. Uncovering original hardwood floors under old linoleum can be a delightful bonus, while discovering structural damage or outdated plumbing can present unforeseen challenges. It’s important to differentiate between typical demolition mess and genuine problems. Minor cracks in plaster are common, but significant structural problems, like rotted wood or unstable foundations, demand immediate attention and potential adjustments to the project plan. These unexpected discoveries can impact both your timeline and budget, making clear communication with your contractor essential. Understanding potential issues and how to address them allows for greater flexibility, minimizing disruption and helping you achieve your dream kitchen.
Managing Waste Removal Efficiently
Demolition creates a substantial amount of waste, and proper disposal is key. Collaborating with your contractor to coordinate waste removal keeps the project site safe and organized. This could involve renting a dumpster, scheduling regular pickups, or even donating reusable materials to salvage yards. With kitchen remodels representing 38% of all renovations, efficient and sustainable demolition practices are increasingly important. For more statistics on the remodeling industry, check out this resource: Remodeling Industry 2025. Effective waste management isn't just about maintaining a clean job site; it’s also a crucial component of a sustainable renovation. By incorporating eco-friendly disposal methods, you can minimize your environmental impact while staying on schedule.
MEP Phase: The Invisible Foundation of Your Dream Kitchen

Around weeks 10-12 of your kitchen remodel, you'll encounter a phase that's less about dazzling visuals and more about the essential inner workings: the MEP (Mechanical, Electrical, and Plumbing) phase. While it might not be as exciting as choosing new countertops, this stage sets the foundation for a safe and functional kitchen. Ignoring this crucial step can lead to expensive repairs later.
Electrical: Powering Your Modern Kitchen
Today's kitchens demand substantial electrical power. Older homes often lack the capacity to handle modern appliances like induction cooktops and double ovens. Upgrading your electrical system is vital during the MEP phase.
Ample outlets and strategically placed lighting are also essential. Overlooking these details can result in overloaded circuits, safety hazards, and the constant annoyance of tripped breakers. A well-planned electrical system ensures your kitchen can handle all your culinary adventures.
Plumbing: More Than Just Sinks and Faucets
The plumbing phase involves more than hooking up sinks and dishwashers. Careful planning of pipe layouts, ensuring proper water pressure, and anticipating future maintenance needs are all critical.
If you're altering your kitchen's layout or adding appliances like a pot filler, new plumbing lines are often necessary. A well-designed plumbing system, installed during the MEP phase, guarantees efficient water flow and prevents future leaks.
Mechanical: Ensuring Proper Ventilation and Air Quality
A powerful range hood is crucial for a healthy kitchen. It removes cooking odors, smoke, and excess moisture, preventing mold growth. Proper airflow also improves overall air quality.
Finding a qualified MEP Technician is crucial for this phase. Their expertise ensures all systems are correctly installed and integrated. Addressing these mechanical aspects early prevents future problems.
Common MEP Challenges and Solutions
Renovations often uncover challenges like outdated wiring, inadequate plumbing, and poor ventilation. Early detection allows for proactive solutions. Outdated wiring might require a complete replacement to meet current codes.
Existing plumbing may need rerouting to accommodate new appliances or layouts. Addressing these challenges, even if it slightly adjusts the timeline, protects your investment and ensures a functional kitchen. Successfully navigating the MEP phase involves meticulous planning, open communication with your contractor, and investing in systems that make your kitchen truly shine.
Installation Phase: Watching Your Vision Take Shape
This phase, typically lasting around five weeks, is where your dream kitchen starts to become a reality. It's a carefully planned process where the installation sequence is crucial. Patience during this stage of your kitchen remodel is key to avoiding costly errors later.
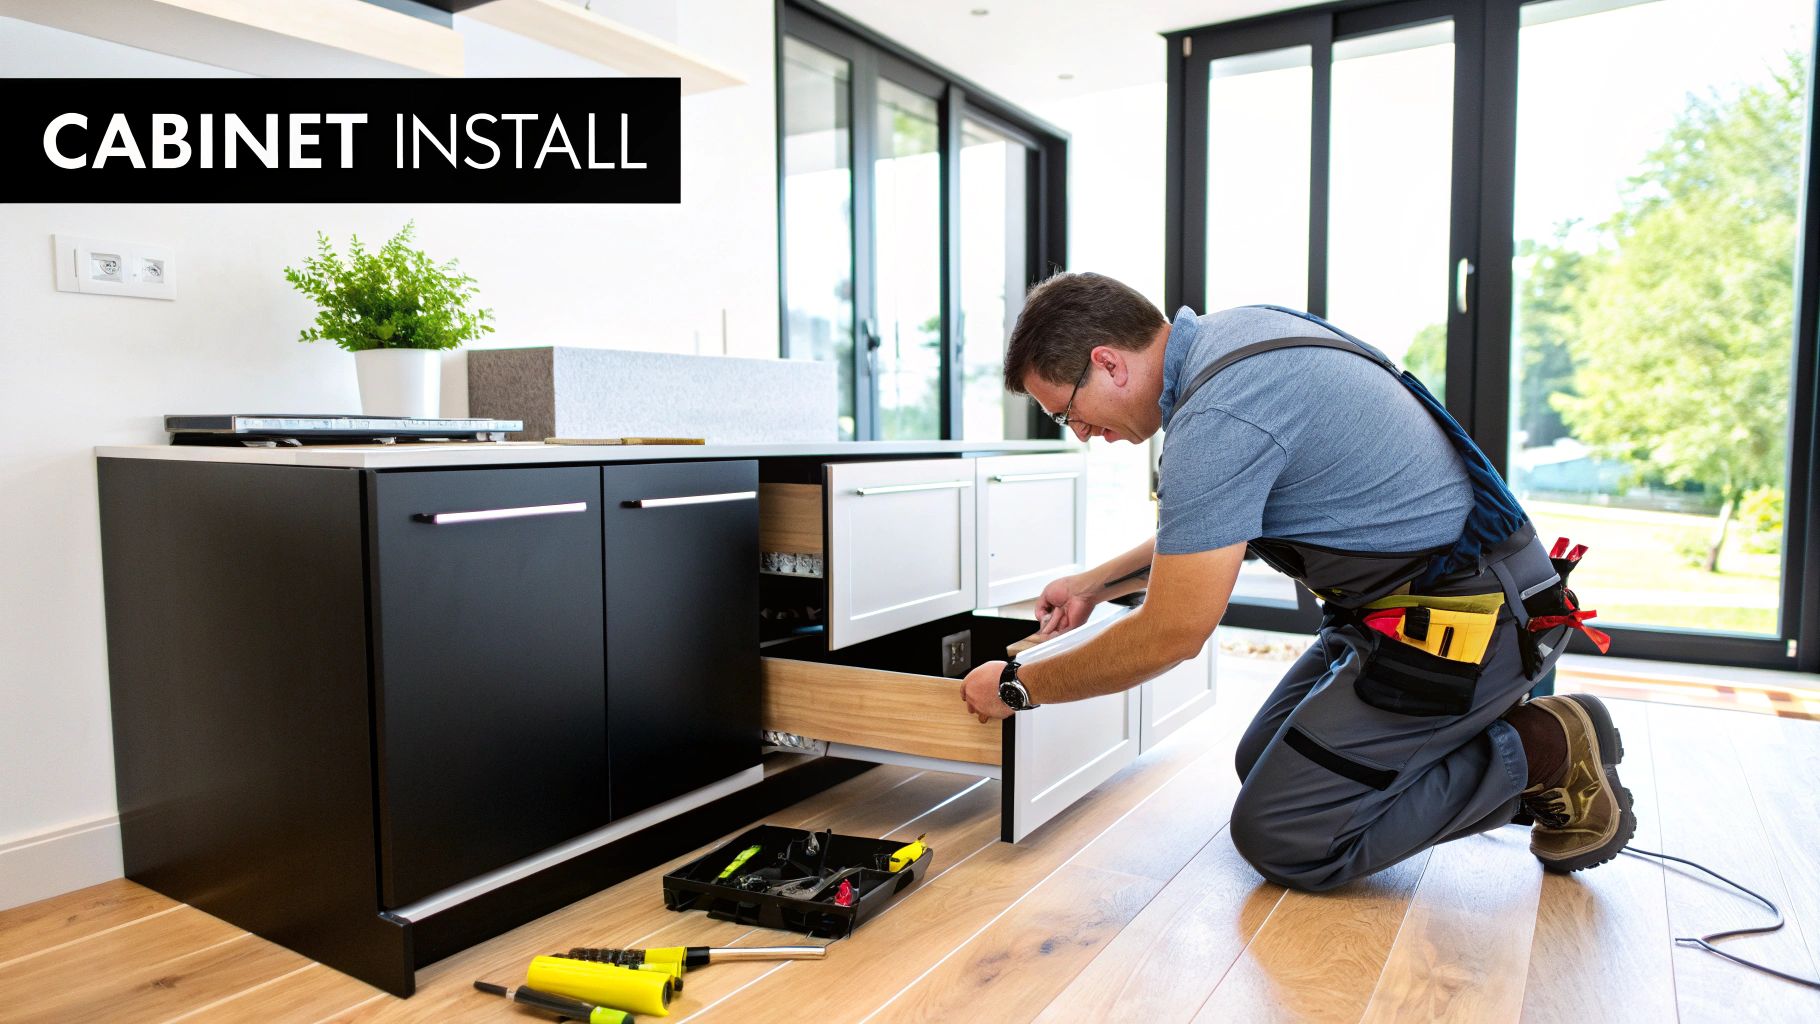
Cabinet Installation: The Foundation of Your Kitchen
Cabinet installation is the cornerstone of this phase, and precision is paramount. Cabinets must be perfectly level and aligned to serve as a solid base for all subsequent installations. This process usually takes several days, depending on the design's complexity and the number of cabinets.
Even seemingly small imperfections during cabinet installation can lead to significant problems later, impacting countertop measurements and appliance installations. Taking the time to ensure accuracy now will prevent headaches and additional expenses down the road.
Countertops, Backsplash, and Flooring: Layering in the Details
After the cabinets are securely installed, countertops can be templated and installed. This step relies heavily on the preceding cabinet installation; countertops can't be cut and fitted until the cabinets provide a stable and level surface. Finding qualified MEP technicians is also vital for a successful remodel.
Following countertop installation, the backsplash is added. This not only safeguards your walls but also adds a key design element to the kitchen. Flooring installation can occur before or after the cabinets and countertops, depending on your project and chosen materials. Coordinating these steps correctly maintains a smooth workflow.
Appliance Installation and Fixture Placement: The Finishing Touches
Once the countertops and backsplash are in, appliances can be installed. This involves connecting plumbing and electrical lines, highlighting the importance of a correctly completed MEP phase. Sinks, faucets, and lighting fixtures are installed next, followed by the final details like cabinet hardware. These finishing touches transform the space from a construction site into a working kitchen.
Navigating Supply Chain Issues and Quality Checks
Supply chain disruptions have become more frequent in recent years. During the installation phase, it’s important to have backup plans. For instance, if your preferred appliance is delayed, having an alternative option readily available can prevent major setbacks in your overall timeline.
Regular quality checks are also vital throughout this phase. Identifying minor issues early, such as a slightly misaligned cabinet or a damaged tile, prevents them from becoming larger, more expensive problems later. Open communication with your contractor and regular walkthroughs are essential to ensuring everything meets your expectations.
Let's take a look at the typical installation timeline. The table below provides a breakdown of each step, its usual duration, prerequisites, and potential causes for delays.
Installation Phase Timeline: This table breaks down each installation step, its typical duration, dependencies, and potential delay factors
| Installation Step | Typical Duration | Prerequisites | Common Delay Factors |
|---|---|---|---|
| Cabinet Installation | 3-5 days | Completed framing, plumbing, and electrical rough-in | Incorrect measurements, damaged cabinets during delivery |
| Countertop Installation | 1-2 days | Installed and level cabinets | Templating errors, material availability |
| Backsplash Installation | 1-3 days | Installed countertops | Tile availability, complex patterns |
| Flooring Installation | 1-5 days | Subfloor preparation, can be done before or after cabinets | Material delivery delays, installer availability |
| Appliance Installation | 1-2 days | Completed MEP rough-in, installed cabinets and countertops | Appliance delivery delays, incorrect connections |
| Fixture Installation | 1-2 days | Completed plumbing and electrical rough-in | Fixture availability, damaged fixtures |
Understanding the installation phase's timeline, dependencies, and potential challenges helps with proactive planning and problem-solving, keeping your kitchen remodel on schedule.
Finishing Touches: Transforming Construction Into Your Kitchen
The final phase of your kitchen remodel is all about the details. This is where a good kitchen becomes a great kitchen, transforming a construction zone into a warm and inviting space. This phase involves careful inspections, addressing touch-ups, and a final deep clean. Open communication with your contractor is key throughout this process.
Conducting Final Inspections: A Keen Eye for Detail
Effective final inspections are crucial for catching any remaining issues. This isn't a quick walk-through; it's a methodical examination of every aspect of your new kitchen. Check appliance installation and operation, ensure electrical outlets and switches function correctly, and confirm that the plumbing is leak-free. Documenting every issue, big or small, is vital for a successful project completion.
The Punch List: Your Roadmap to Perfection
A punch list is a detailed record of any incomplete or unsatisfactory work. It’s your tool to ensure every detail meets your expectations, from cabinet hardware alignment to paint touch-ups. This list should be thorough.
- Cabinet doors closing smoothly
- Drawers operating without sticking
- Backsplash grouting is complete
This meticulous approach guarantees every element aligns with your vision. A comprehensive punch list holds contractors accountable for delivering high-quality results.
Touch-Ups, Testing, and the Final Clean: The Transformation Begins
Addressing punch list items typically involves touch-up painting, caulking, and minor adjustments. Inspect the paint job for any imperfections. Ensure all caulking is smooth and consistent. Make any necessary adjustments to cabinet hardware or drawer alignment.
Thorough testing of all systems – appliances, plumbing, and electrical – is critical.
- Run the dishwasher
- Test the garbage disposal
- Check the oven
Finally, the final clean truly transforms the space. This isn't just tidying up; it's a deep clean to remove all construction dust and debris, revealing the beauty of your new kitchen. It’s the final step in turning a construction site into the kitchen of your dreams.
Successfully completing this last phase depends on proactive inspections, a detailed punch list, and addressing all touch-ups. By focusing on these key elements, you'll ensure a polished and perfect final result.
Surviving Timeline Delays: Maintaining Sanity When Plans Change
Even the most carefully planned kitchen remodel can encounter unexpected setbacks. Delays are practically unavoidable, so understanding this from the start can help you stay calm throughout the renovation. This section explores common causes of delays, strategies for minimizing their impact, and ways to cope with the emotional ups and downs of a prolonged remodel.
Identifying Normal Delays Vs. Red Flags
Knowing the difference between typical delays and serious problems is crucial for managing your expectations and stress levels. Waiting a few extra days for a specific tile shipment, for instance, is normal. However, unexplained delays lasting weeks warrant a conversation with your contractor.
Typical delays might include:
- Permitting taking longer than expected
- Small material backorders
- Weather affecting outdoor work
Red flags, on the other hand, could include:
- The contractor consistently missing deadlines
- Poor communication or unresponsiveness
- Big changes to the project scope without a good reason
For more information on managing unexpected costs related to delays, check out our article on mastering your kitchen remodel budget.
Building Buffer Time and Communication Protocols
One of the best ways to handle delays is to include buffer time in your initial schedule. Adding a week or two to each project phase provides flexibility if problems arise, preventing small setbacks from becoming major delays.
Clear communication with your contractor is also vital. Regular check-ins, even a quick email or phone call, keep you informed of progress and allow you to address potential delays proactively. Open communication builds trust and helps manage expectations.
Adapting Daily Routines and Maintaining Perspective
Living through a kitchen remodel, especially a long one, disrupts daily routines. Simple things like cooking, cleaning, and even making coffee become more difficult. Planning for these disruptions is essential.
- Set up a temporary kitchen area with a microwave and mini-fridge to maintain some normalcy.
- Consider meal prepping or ordering takeout to reduce cooking stress.
- Designate "clean zones" to minimize construction dust and debris.
Remember, the renovation process is temporary. Keep your eye on the prize – a beautiful and functional new kitchen. Embrace the process, and know that the temporary inconvenience will be worth it. Ready to start your dream kitchen transformation? Visit Sinclair Cabinetry today to explore our custom cabinetry solutions.