
Ready to Remodel Your Dream Kitchen? Start Here!
A kitchen renovation transforms your home. This kitchen renovation checklist ensures your project runs smoothly, covering eight essential steps. From initial budget planning and design layout to contractor hiring and material selection, this list guides you. We'll also cover demolition, mechanical system upgrades, cabinet/countertop installation, and those all-important final touches. Use this checklist to create the kitchen you've always wanted.
1. Budget Planning and Financial Preparation
Creating a comprehensive budget is the cornerstone of any successful kitchen renovation. This crucial first step in your kitchen renovation checklist involves determining your financial capacity, researching the costs associated with materials and labor, setting aside a contingency fund to handle unforeseen issues, and exploring potential financing options if necessary. Thorough budget planning prevents overspending, reduces financial stress, and allows you to make informed decisions throughout the renovation process.

A well-structured budget includes line-item breakdowns for materials (cabinetry, countertops, appliances, flooring), labor (demolition, installation, electrical, plumbing), permits, and design fees. A critical component is the contingency allocation, typically 10-20% of the total budget, designed to absorb unexpected costs like hidden plumbing problems or unforeseen structural issues. Cash flow timeline planning ensures you have the funds available when needed throughout the project. Finally, evaluating financing options like home equity loans or personal loans can help bridge the gap if your available funds fall short. Learn more about Budget Planning and Financial Preparation to get a clearer understanding of the costs involved.
This item deserves its place at the top of the kitchen renovation checklist because without a realistic budget, your dream kitchen can quickly turn into a financial nightmare. It helps prioritize where to allocate funds – perhaps you’re willing to splurge on high-end appliances but opt for stock cabinetry, or vice-versa. This foresight creates realistic expectations for the project scope, allowing for thoughtful decisions rather than rushed choices driven by budget constraints mid-project.
Pros:
- Prevents overspending and financial stress
- Helps prioritize fund allocation
- Creates realistic project scope expectations
- Facilitates thoughtful decision-making
Cons:
- Requires time-consuming research for accurate estimates
- Market fluctuations can impact material costs
- Hidden issues can emerge during demolition, affecting the budget
Examples:
- A Seattle homeowner meticulously tracked all expenses in a detailed spreadsheet, budgeting $15,000 for cabinets and $4,500 for countertops. Their 15% contingency fund proved invaluable when unexpected plumbing repairs arose.
- A Chicago family used a kitchen renovation budget app for real-time expense tracking. This allowed them to identify savings opportunities and justify splurging on high-end appliances while opting for more budget-friendly stock cabinets.
Tips:
- Obtain at least three quotes from contractors for accurate price comparisons.
- Research material costs from different suppliers and consider seasonal variations.
- Consider phasing the renovation if budget constraints are tight. For example, tackle the cabinets and countertops in one phase and appliances and flooring in another.
- Always include a minimum 15% contingency fund for unexpected issues.
- Track all expenses in real-time using spreadsheets or budgeting apps.
The importance of meticulous budget planning has been popularized by HGTV renovation shows like "Property Brothers" and "Fixer Upper," online resources like Houzz budgeting tools, and personal finance experts like Dave Ramsey who emphasize careful renovation budgeting. By prioritizing budget planning, you set the stage for a successful and stress-free kitchen renovation.
2. Design Planning and Layout Optimization
Design planning and layout optimization are absolutely crucial steps in any kitchen renovation checklist. This phase lays the groundwork for a functional and aesthetically pleasing kitchen that caters to your specific lifestyle needs. It's about more than just picking pretty cabinets; it's about creating a space that truly works for you. A well-planned layout optimizes workflow, maximizes available space, and ensures your new kitchen is a joy to use for years to come. This is where you'll address traffic flow, storage requirements, and the overall spatial harmony of your kitchen. Skipping this step can lead to costly mistakes and a kitchen that doesn’t live up to its full potential.
A core component of layout planning is the kitchen work triangle. This classic design principle focuses on the relationship between the sink, stove, and refrigerator, aiming to minimize the distance between these frequently used areas. A well-designed work triangle reduces unnecessary steps and improves cooking efficiency. Beyond the triangle, traffic flow analysis ensures smooth movement throughout the kitchen, preventing bottlenecks and congestion. Storage capacity planning is also essential, taking into account your cooking habits and the amount of cookware, appliances, and food you need to store. Furthermore, thoughtful lighting design, incorporating ambient, task, and accent lighting, sets the mood and enhances both functionality and aesthetics. Modern design planning often utilizes 3D rendering capabilities, allowing you to visualize the final result before any construction begins.
Features of Effective Design Planning:
- Work triangle optimization: Streamlining movement between sink, stove, and refrigerator.
- Traffic flow analysis: Ensuring ease of movement and preventing congestion.
- Storage capacity planning: Maximizing storage solutions to fit your needs.
- Lighting design (ambient, task, and accent): Creating the right atmosphere and enhancing functionality.
- 3D rendering capabilities: Visualizing the final design before construction.
Pros:
- Prevents costly layout mistakes before construction begins.
- Ensures the kitchen functions efficiently for your specific needs.
- Helps visualize the final result.
- Coordinates all design elements cohesively.
Cons:
- Professional design services can be expensive.
- Structural limitations may restrict optimal layouts.
- Balancing aesthetics with functionality can be challenging.
Examples of Successful Implementation:
- A cramped galley kitchen in a New York apartment was transformed with a peninsula design that doubled counter space while maintaining an efficient workflow.
- A suburban family home improved functionality by relocating the refrigerator to create an unobstructed pathway between the kitchen and dining area.
Actionable Tips:
- Measure the space meticulously—twice! Accuracy is paramount.
- Consider how you actually use the kitchen before finalizing the layout. Think about your cooking habits and daily routines.
- Leave adequate clearance spaces (36" walkways, 42" work aisles).
- Test the work triangle by walking through simulated cooking scenarios. Imagine yourself preparing a meal and see how the layout flows.
- Use painter's tape on the floor to mark cabinet and appliance footprints. This provides a real-world visualization of the space.
- Utilize kitchen design software or apps to visualize different options. Learn more about Design Planning and Layout Optimization to explore layout ideas and cabinet options.
Design planning and layout optimization deserves its place on the kitchen renovation checklist because it sets the stage for a successful project. By carefully considering these elements, you can ensure your renovated kitchen not only looks beautiful but also functions seamlessly for your individual needs. This is a vital step for homeowners, interior designers, and builders alike, impacting everyone from luxury real estate developers seeking high-end cabinetry to eco-conscious consumers prioritizing sustainable materials. Popularized by kitchen design experts like Candice Olson and Sarah Richardson, and guided by organizations like the NKBA (National Kitchen and Bath Association), this phase is essential for creating a kitchen you’ll love.
3. Contractor Selection and Hiring
A successful kitchen renovation hinges on skilled execution. This makes choosing the right contractor arguably the most crucial step in your kitchen renovation checklist. Contractor selection and hiring involves a thorough process of researching potential candidates, verifying their credentials and references, comparing quotes, negotiating contracts, and establishing clear communication channels. This stage sets the foundation for the entire project, impacting everything from the quality of workmanship to adherence to timelines and budgets.
Finding the right contractor is crucial for a successful kitchen renovation. Check out this guide on selecting the best general contractors to help you make an informed decision. Source: Best General Contractors Easy Selection Guide from Ellingson Roofing LLC
This process begins with thorough research. Credential verification is paramount, encompassing licenses, insurance, and bonding status. Reviewing a contractor's portfolio of completed projects, especially those similar in scope and style to your envisioned kitchen renovation, provides valuable insights into their capabilities. Checking references by contacting previous clients allows you to gain firsthand perspectives on the contractor's reliability, communication, and problem-solving skills.
Features like detailed contract development, incorporating precise specifications, a realistic timeline, and a well-defined payment schedule, are essential for protecting your interests and ensuring a smooth renovation. Planning the payment schedule, typically involving a small upfront percentage (10-30%) with staged payments tied to milestones, protects you from overpaying before work is completed. Finally, establishing a regular communication protocol, such as weekly meetings or progress reports, fosters transparency and facilitates proactive problem-solving.
Pros:
- Professional expertise: Ensures quality workmanship and attention to detail.
- Legal protection: Proper licensing and insurance safeguard you against liabilities.
- Problem-solving: Experienced contractors can anticipate and resolve potential issues effectively.
- Established network: Contractors have existing relationships with suppliers and subcontractors, streamlining the renovation process.
Cons:
- Waiting lists: In-demand contractors often have busy schedules and may require booking well in advance.
- Higher costs: Hiring a professional comes at a higher price compared to DIY approaches.
- Potential miscommunication: If expectations and project details aren't clearly defined upfront, misunderstandings can arise.
Examples:
- A homeowner in Austin meticulously compared five contractors across 15 criteria, including experience, cost, and client reviews, using a spreadsheet before making a final selection, demonstrating the importance of a structured approach to contractor evaluation.
- A Chicago renovation project succeeded after the homeowners conducted video interviews with past clients of their top three contractor candidates. This proactive approach to reference checking provided valuable insights that ultimately led to a positive renovation experience.
Tips for Your Kitchen Renovation Checklist:
- Verify credentials: Thoroughly check contractor licenses, insurance, and bonding status through relevant licensing boards and insurance providers.
- Portfolio review: Examine completed projects similar to your kitchen renovation to assess the contractor's skill level and design aesthetic.
- Reference checks: Contact at least three previous clients for references and inquire about their overall experience with the contractor.
- Detailed contract: Ensure the contract includes detailed specifications, a realistic timeline, and a clear payment schedule.
- Communication protocol: Establish a regular communication protocol (weekly meetings, progress reports) to maintain transparency and address any concerns promptly.
- Upfront payment: Never pay more than 10-30% upfront. Staggered payments tied to milestones protect your investment.
- Permit verification: Confirm that the contractor will obtain the necessary permits and comply with all local building codes.
Including contractor selection and hiring in your kitchen renovation checklist is non-negotiable. It safeguards your investment, maximizes your chances of achieving your dream kitchen, and minimizes the stress and potential pitfalls associated with complex renovation projects.
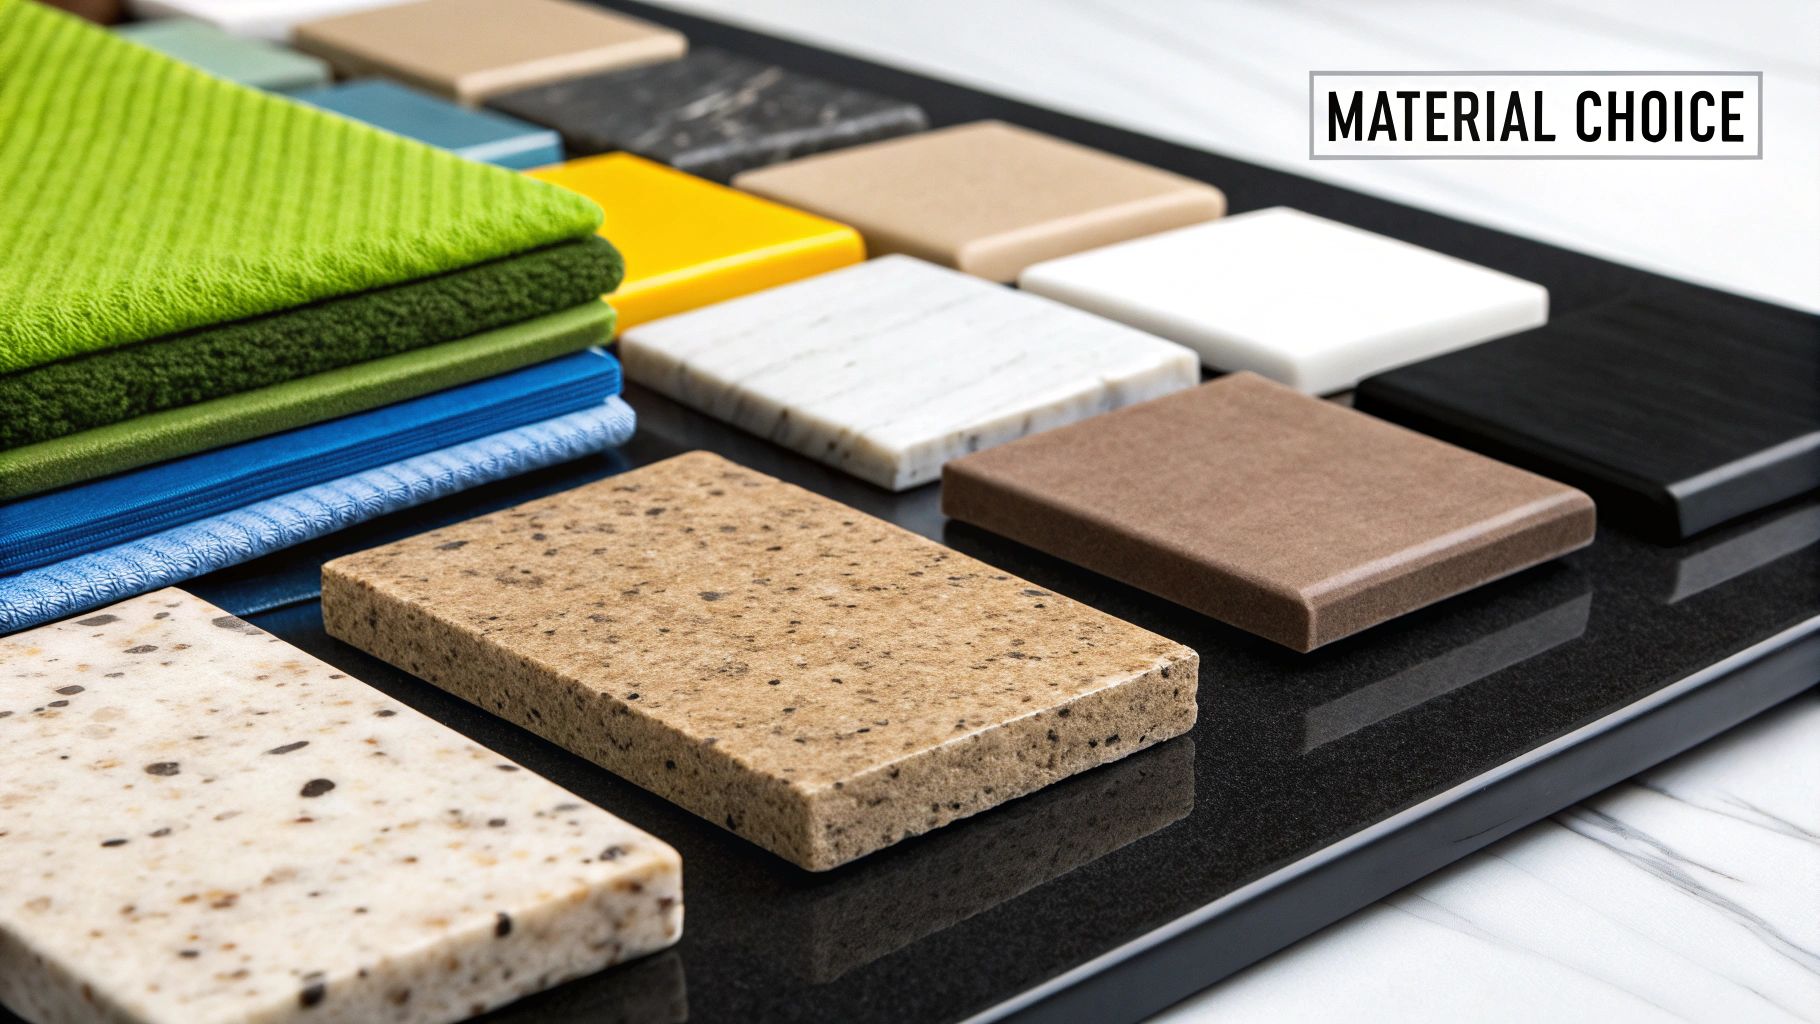
4. Material Selection and Procurement
Material selection and procurement is a crucial stage in any kitchen renovation checklist. This phase involves researching, comparing, and purchasing all the physical components of your new kitchen, from the cabinets and countertops to the flooring, backsplash, appliances, fixtures, and even the smallest hardware. It's a multi-faceted process that requires carefully balancing your desired aesthetic with practical considerations like durability, maintenance, and, of course, budget. Successfully navigating this stage sets the foundation for a beautiful and functional kitchen that meets your needs and stands the test of time.

This stage deserves a prominent place on the kitchen renovation checklist because the materials you choose directly impact the final look, feel, and functionality of your kitchen. Key features of this process include conducting a comparative analysis of different material options, acquiring and evaluating samples, performing a cost-benefit analysis for each potential choice, assessing sustainable and eco-friendly alternatives, and meticulously planning lead times to avoid project delays. For example, a homeowner in Portland might prioritize durability by choosing quartz countertops for areas near the sink, while opting for a luxurious marble section for a dedicated baking area. Another example might be a Florida renovation incorporating hurricane-resistant windows without compromising the desired coastal aesthetic.
Pros of meticulous material selection:
- Personalization: Hand-picking each element ensures the final result aligns perfectly with your aesthetic vision.
- Budget Optimization: You gain the flexibility to balance quality and cost across different elements, splurging on some while saving on others.
- Sustainability: This stage allows you to prioritize eco-friendly materials and practices.
- Control: You have complete control over the specific features and functionality of your kitchen components.
Cons to be aware of:
- Overwhelm: The sheer volume of available options can be daunting.
- Delays: Supply chain issues and unforeseen circumstances can impact your project timeline.
- Storage: You might need to store materials before installation, requiring adequate space.
- Price Fluctuations: Prices can change between the time you select a material and when you actually purchase it.
Actionable Tips for Success:
- Order Samples: Always order samples of all materials to see how they look in your specific lighting conditions and alongside other chosen elements.
- Create a Mood Board: Develop a cohesive material board to visualize how everything works together before making final decisions.
- Research Maintenance: Understand the cleaning and upkeep requirements for each material before committing.
- Plan for Lead Times: Order materials well in advance of your installation dates, factoring in potential delays.
- Consider Lifecycle Costs: Think about the long-term costs of ownership, including maintenance and potential replacements, not just the initial purchase price.
- Order Extra: Purchase 10-15% extra flooring and tile to accommodate future repairs or replacements.
- Verify Everything: Double-check all specifications and quantities before placing your orders.
By following these tips and dedicating sufficient time and effort to material selection and procurement, you’ll be well on your way to creating a kitchen that is both beautiful and functional for years to come. This process is essential for anyone undertaking a kitchen renovation, from homeowners looking for budget-friendly updates to luxury real estate developers seeking high-end finishes. It's this level of detail and planning that elevates a good kitchen renovation to a truly great one.
5. Demolition and Structural Preparation
Demolition and structural preparation is a crucial stage in any kitchen renovation checklist. This phase involves the careful and systematic dismantling of existing kitchen elements, preparing the space for the new design, and addressing any underlying structural issues before the new installation begins. This step sets the foundation for a successful renovation and ensures the longevity and safety of your new kitchen. Ignoring this critical step can lead to costly surprises and delays down the line.
What it Involves:
Demolition isn't just about swinging a sledgehammer. It's a systematic process that involves:
- Protecting Adjacent Areas: Safeguarding non-demolition zones with dust barriers and floor protection.
- Disconnecting Utilities: Safely turning off and disconnecting plumbing, electrical, and HVAC systems.
- Systematic Dismantling: Carefully removing existing cabinets, countertops, appliances, flooring, and backsplash.
- Debris Management: Organizing, removing, and properly disposing of construction debris.
- Structural Assessment: Evaluating the existing structure for any damage, weaknesses, or code violations. This can include inspecting wall framing, subflooring, and load-bearing walls.
- Utility System Examination: Assessing the condition of existing plumbing, electrical, and HVAC systems and determining if upgrades or repairs are necessary.
- Surface Preparation: Preparing walls, floors, and ceilings for new installations, ensuring they are level, plumb, and meet code requirements.
Examples of Successful Implementation:
- Salvaging for Sustainability: A Denver homeowner carefully removed original cabinetry for donation to Habitat for Humanity ReStore, demonstrating a commitment to sustainable renovation practices.
- Uncovering Hidden Problems: A Boston renovation revealed knob-and-tube wiring during demolition, prompting a necessary, albeit unexpected, complete electrical system update. This highlights the importance of this phase in a kitchen renovation checklist.
Actionable Tips:
- Document Everything: Photograph and document existing utility locations before demolition begins. This will be invaluable during the re-installation phase.
- Dust Containment is Key: Set up robust dust containment systems, including plastic sheeting, drop cloths, and air purifiers, to minimize dust spread throughout your home.
- Temporary Kitchen Setup: Create a temporary kitchen elsewhere in your home for meal preparation during the renovation.
- Waste Management: Rent a dedicated dumpster for construction waste to keep debris contained and organized.
- Salvage and Donate: Salvage and donate usable materials whenever possible to minimize waste and support sustainable practices.
- Contingency Planning: Have contingency plans and funds available for unexpected structural or utility issues. These unforeseen problems are common and can significantly impact your budget and timeline.
- Safety First: Consider lead paint and asbestos testing for older homes before demolition begins.
Pros:
- Early Problem Detection: Reveals hidden issues early in the process, allowing for proactive solutions.
- Infrastructure Upgrades: Provides an opportunity to upgrade outdated infrastructure and address code violations.
- Clean Slate: Creates a clean slate for new installations, ensuring a smooth and efficient process.
- Potential for Salvage: Offers the potential to salvage and repurpose existing materials, saving money and reducing environmental impact.
Cons:
- Disruption: Demolition is extremely disruptive to daily home life.
- Unexpected Problems: High potential for discovering unexpected problems that can add cost and time to the project.
- Dust and Debris: Managing dust and debris can be challenging.
- Potential Cost Overruns: Can be more expensive than anticipated if structural issues emerge.
Why This Item Deserves Its Place in the List:
Demolition and structural preparation is a non-negotiable step in a kitchen renovation checklist. It ensures a solid foundation for your new kitchen, mitigates potential problems down the line, and provides the opportunity to upgrade essential systems. While it can be disruptive and potentially uncover unforeseen issues, the long-term benefits of a properly executed demolition far outweigh the temporary inconveniences. It's an investment in the longevity, safety, and functionality of your dream kitchen.
6. Mechanical Systems Installation and Upgrading
This critical stage of your kitchen renovation checklist, Mechanical Systems Installation and Upgrading, focuses on the essential behind-the-scenes work that ensures your new kitchen runs smoothly, safely, and efficiently. It involves updating or installing all the utility systems that power your kitchen: electrical wiring, plumbing lines, gas connections, and ventilation systems. Integrating smart home technology is also a key consideration during this phase. Proper planning and execution of these mechanical systems are vital for a successful and long-lasting kitchen renovation.
This step deserves its place on the kitchen renovation checklist because overlooking these crucial systems can lead to costly problems down the line. A beautiful new kitchen is useless if the wiring can't handle the appliances, the ventilation is inadequate, or the plumbing leaks. Addressing these elements early in the renovation process prevents future headaches and ensures your kitchen is built to last.
Features of this stage include:
- Electrical load capacity assessment: Determining if your current electrical panel can handle the increased demand of new appliances.
- Plumbing line routing and fixture compatibility: Ensuring proper water supply and drainage for all sinks, dishwashers, and other fixtures.
- Gas line safety and placement: Safely connecting gas lines for stoves, ovens, and other gas-powered appliances.
- Ventilation system effectiveness evaluation: Determining the appropriate ventilation system to effectively remove cooking fumes and moisture.
- Smart home integration planning: Wiring for smart appliances, lighting, and other connected devices.
Pros of Upgrading Mechanical Systems:
- Modernizes home infrastructure to current safety standards: Reduces the risk of electrical fires and other hazards.
- Creates adequate power for modern appliances: Ensures your new appliances have the power they need to operate efficiently.
- Prevents future issues like leaks or electrical failures: Saves you money and stress in the long run.
- Improves energy efficiency and home functionality: Can lower utility bills and enhance the overall comfort of your kitchen.
Cons of Upgrading Mechanical Systems:
- Typically requires licensed professionals, increasing costs: Specialized expertise is essential for safety and code compliance.
- Often requires permits and inspections: Adds time and complexity to the renovation process.
- May need temporary utility shutoffs: Can disrupt daily routines during the renovation.
- Can reveal additional issues requiring remediation: Unforeseen problems can arise, potentially impacting the budget and timeline.
Examples of Successful Implementation:
- A 1950s kitchen renovation in Seattle required upgrading from a 60-amp to a 200-amp electrical service to support new appliances, demonstrating the importance of load capacity assessment.
- A San Francisco remodel incorporated water filtration systems directly into the plumbing design, showcasing the ability to customize plumbing solutions.
Actionable Tips for Your Kitchen Renovation Checklist:
- Plan electrical outlets according to how you'll actually use the space: Aim for a minimum of one outlet per 4 feet of counter space.
- Consider dedicated circuits for major appliances: Prevents overloading circuits and tripping breakers.
- Install plumbing access panels for future maintenance: Makes it easier to access pipes for repairs or replacements.
- Choose a ventilation system based on cooking habits (CFM requirements): Ensures proper ventilation for different cooking styles.
- Run extra conduit for future technology needs: Future-proofs your kitchen for evolving technology.
- Document the location of all in-wall utilities before closing walls: Essential for future renovations or repairs.
- Verify all work is permitted and inspected as required by local code: Ensures safety and compliance.
Popularized By:
Licensed plumbers, electricians, and HVAC specialists play a crucial role in this phase. Smart home technology companies like Nest, Ring, and Samsung SmartThings offer integrated solutions. Energy efficiency programs like Energy Star promote sustainable practices. Home inspection experts like Mike Holmes emphasize the importance of proper mechanical systems.
Addressing the mechanical systems during your kitchen renovation is not just a box to check; it's a fundamental investment in the safety, functionality, and longevity of your new kitchen. By following these tips and working with qualified professionals, you can ensure your dream kitchen becomes a reality.
7. Cabinet and Countertop Installation
This crucial stage of your kitchen renovation checklist focuses on installing the core components that define your kitchen's functionality and aesthetic appeal: cabinets and countertops. Cabinet installation involves precise leveling and securing them to the walls and floor, integrating organizational features, and ensuring a perfect fit. Countertop installation, on the other hand, begins with templating to ensure precise measurements, followed by fabrication, careful fitting, and meticulous seaming for a flawless finish. This phase truly brings your kitchen vision to life.

This step deserves its place on the kitchen renovation checklist because it transforms the space from a construction zone into a functional kitchen. It establishes the primary storage and work areas, setting the stage for appliance installation and finishing touches. The features of this phase, such as precise cabinet leveling and secure mounting, custom modifications for a perfect fit, interior organizational systems, countertop templating and fabrication, seam minimization techniques, and edge treatment application, all contribute to the final outcome. For example, a Milwaukee renovation maximized storage in a narrow space with custom pull-out pantry cabinets, showcasing the potential for customization. Learn more about Cabinet and Countertop Installation to see how quartz countertops can elevate your custom cabinetry. Another example saw a Houston kitchen transformed with a seamless waterfall edge quartz countertop, becoming the room's focal point.
The benefits of professional cabinet and countertop installation are substantial. They define both the aesthetic and functional aspects of the kitchen, create essential storage and work surfaces, and offer the opportunity for customization to meet specific needs. The transformation is visually dramatic, instantly upgrading the look and feel of the space. However, there are also considerations to keep in mind. This phase requires precise measurements and skilled installation; mistakes can be costly and time-consuming to rectify. Heavy stone countertops might necessitate structural reinforcement, and there's limited flexibility for modifications after installation.
Pros:
- Defines both aesthetic and functional aspects of the kitchen
- Creates primary storage and work surfaces
- Opportunity for customization to specific needs
- Dramatically transforms the space visually
Cons:
- Requires precise measurements and skilled installation
- Mistakes can be expensive and time-consuming to correct
- May require structural reinforcement for heavy stone countertops
- Limited ability to modify after installation
Tips for a Successful Cabinet and Countertop Installation:
- Verify all measurements meticulously before ordering cabinets. Double-checking ensures a perfect fit and avoids costly reorders.
- Ensure walls are straight and floors are level before installation begins. This foundational step prevents issues with cabinet alignment and door functionality.
- Consider cabinet installation height based on the primary cook's height. Ergonomic design enhances comfort and efficiency.
- Plan countertop seam locations to be less visible or in low-use areas. This improves the overall aesthetic and minimizes wear and tear on seams.
- Include blocking in walls for secure cabinet hanging. This reinforcement provides long-term stability, especially for heavier cabinets.
- Select countertop edge profiles based on both aesthetics and safety. Rounded edges are generally safer for households with children.
- Allow proper curing time for adhesives and sealants before use. This ensures a strong and durable bond.
This phase is essential for anyone undertaking a kitchen renovation, from homeowners seeking to modernize their space to luxury real estate developers creating high-end kitchens. Careful planning and professional installation are key to achieving a beautiful and functional kitchen that meets your specific needs and enhances your lifestyle.
8. Final Finishing and Quality Control: The Crucial Last Step in Your Kitchen Renovation Checklist
The final finishing and quality control stage, though sometimes overlooked, is arguably the most crucial step in your kitchen renovation checklist. This culminating phase ensures that all the hard work and investment put into the project result in a truly functional, beautiful, and high-quality kitchen. It's about dotting the i's and crossing the t's, transforming a construction zone into the heart of your home.
This stage involves installing those finishing touches that truly bring the design together, such as decorative hardware, backsplash, and trim work. It also encompasses rigorous quality inspections to ensure everything meets your expectations and functions flawlessly. Think of it as the final polish that makes your new kitchen shine.
How it Works:
Final finishing and quality control is a multi-faceted process. It begins with completing any remaining installations, like the aforementioned hardware, backsplash, and trim. This is followed by a thorough inspection of all aspects of the renovation. Every detail, from the alignment of cabinet doors to the functionality of appliances, is scrutinized. Any deficiencies are addressed, paint touch-ups are completed, and the entire space undergoes a deep clean to remove all traces of construction debris. Finally, all systems (plumbing, electrical, HVAC related to the kitchen) are tested and verified for proper operation.
Examples of Successful Implementation:
- A Toronto homeowner, understanding the importance of this phase, collaborated with their contractor to create a detailed 50-point inspection checklist. This comprehensive list ensured every aspect of the renovation, from the grout lines in the backsplash to the smooth operation of the garbage disposal, met their standards.
- Recognizing the value of a pristine handover, a Phoenix renovation project included professional cleaning services as part of the final process. This allowed the homeowners to immediately enjoy their new kitchen without the burden of post-construction cleanup.
Actionable Tips for Your Kitchen Renovation Checklist:
- Create a Comprehensive Inspection Checklist: Don’t rely on memory. A detailed checklist covering all aspects of the renovation – cabinets, countertops, appliances, plumbing, electrical, etc. – ensures nothing gets missed.
- Test Everything Thoroughly: Run all appliances, operate every fixture, and test all features. This includes checking water pressure, oven temperature accuracy, and refrigerator cooling.
- Inspect the Details: Pay close attention to cabinet door and drawer alignment, smooth opening and closing, and the functionality of all hardware. Verify all electrical outlets and switches work properly. Don't forget to inspect under-sink areas for potential leaks.
- Document Everything: Take photos of the completed project for your records. Obtain all warranty information and maintenance instructions for appliances and fixtures.
- Schedule a Follow-Up: Schedule a follow-up inspection 30 days after completion to address any settling issues or minor problems that might arise after regular use.
Pros:
- Ensures all work meets quality standards and your expectations.
- Addresses minor issues before they become major problems, saving you time and money in the long run.
- Creates a fully functional, ready-to-use kitchen.
- Provides an opportunity for final adjustments and fine-tuning.
Cons:
- Can potentially delay final project completion if unforeseen issues are discovered.
- May reveal overlooked details requiring additional work.
- Can sometimes be rushed due to project fatigue, so dedicate appropriate time and attention.
Why This Item Deserves Its Place in the List:
This stage acts as the final gatekeeper, ensuring your dream kitchen becomes a reality. Skipping or rushing this crucial step can lead to future headaches, costly repairs, and a kitchen that doesn't fully live up to its potential. Including "Final Finishing and Quality Control" in your kitchen renovation checklist guarantees a smooth transition into your beautifully renovated and fully functional space. It is the bridge between a construction project and a completed, high-quality kitchen ready to be enjoyed for years to come. This stage is popularized by home inspection professionals, project management software, professional cleaning services, and design-build firms, highlighting its crucial importance in the renovation process.
8-Point Kitchen Renovation Tasks Comparison
| Task | 🔄 Complexity | ⚡ Resources | 📊 Outcomes | 💡 Ideal Use Case | ⭐ Advantage |
|---|---|---|---|---|---|
| Budget Planning and Financial Preparation | Medium – extensive research required | Budgeting apps, spreadsheets, multiple quotes | Realistic project estimates and controlled spend | Projects needing detailed financial oversight | Prevents overspending and sets clear priorities |
| Design Planning and Layout Optimization | High – design iterations and analysis | Design software, professional consultations | Optimized workflow and enhanced spatial appeal | Renovations requiring functional yet aesthetic layouts | Coordinates all design elements cohesively |
| Contractor Selection and Hiring | Medium – involves detailed vetting | Contractor reviews, reference checks, multiple bids | Quality workmanship and reliable project progress | Projects needing certified professionals and clear contracts | Ensures expertise and legal protection |
| Material Selection and Procurement | Medium – numerous comparisons | Sample evaluations, cost analysis tools, supplier research | Balanced quality, durability, and budget management | Renovations focused on personalized aesthetics and performance | Customizable selections with cost-benefit balance |
| Demolition and Structural Preparation | High – disruptive and risk-prone | Heavy machinery, permits, debris management systems | Revealed hidden issues and prepared space for upgrades | Older structures needing complete overhaul | Identifies underlying problems and preps new installations |
| Mechanical Systems Installation and Upgrading | High – requires licensed specialists | Licensed professionals, permits, specialized equipment | Upgraded, safe, and energy-efficient kitchen systems | Home updates in older builds or for increased appliance loads | Enhances safety and energy efficiency |
| Cabinet and Countertop Installation | Medium-High – precision needed | Custom cabinetry, fabrication, skilled installers | Visually transformative and functional kitchen elements | Projects emphasizing custom aesthetics and storage solutions | Dramatically improves appearance and functionality |
| Final Finishing and Quality Control | Medium – detail-oriented inspections | Checklists, quality control tools, final finishing materials | Fully functional, quality-assured completed renovations | Final stages of renovation requiring thorough inspections | Ensures all work meets quality standards |
Enjoy Your Stunning, Newly Renovated Kitchen!
From initial budget planning and design layout to the final touches of installation and quality control, using a comprehensive kitchen renovation checklist is essential for a smooth and successful project. We've covered crucial steps, including contractor selection, material procurement, demolition, mechanical upgrades, and the all-important cabinet and countertop installation. Mastering these elements ensures not only a beautiful kitchen but also a functional and valuable addition to your home, whether you're a homeowner, interior designer, or luxury real estate developer. Remember, a well-planned kitchen renovation significantly increases your property value while simultaneously creating a more enjoyable and efficient space for everyday living.
Now, it's time to revel in the beauty and functionality of your transformed kitchen. From preparing delicious meals to gathering with loved ones, your new kitchen is ready to be the heart of your home. For exquisite custom cabinetry solutions and expert guidance to complement your kitchen renovation checklist, explore the offerings of Sinclair Cabinetry Inc., based in Cape Coral, Florida. Sinclair Cabinets offers a wide array of styles and finishes to create the kitchen you’ve always dreamed of, bringing over 35 years of experience crafting high-quality, real wood cabinets to your project. Visit Sinclair Cabinetry inc today to discover how their expertise can elevate your kitchen renovation.