
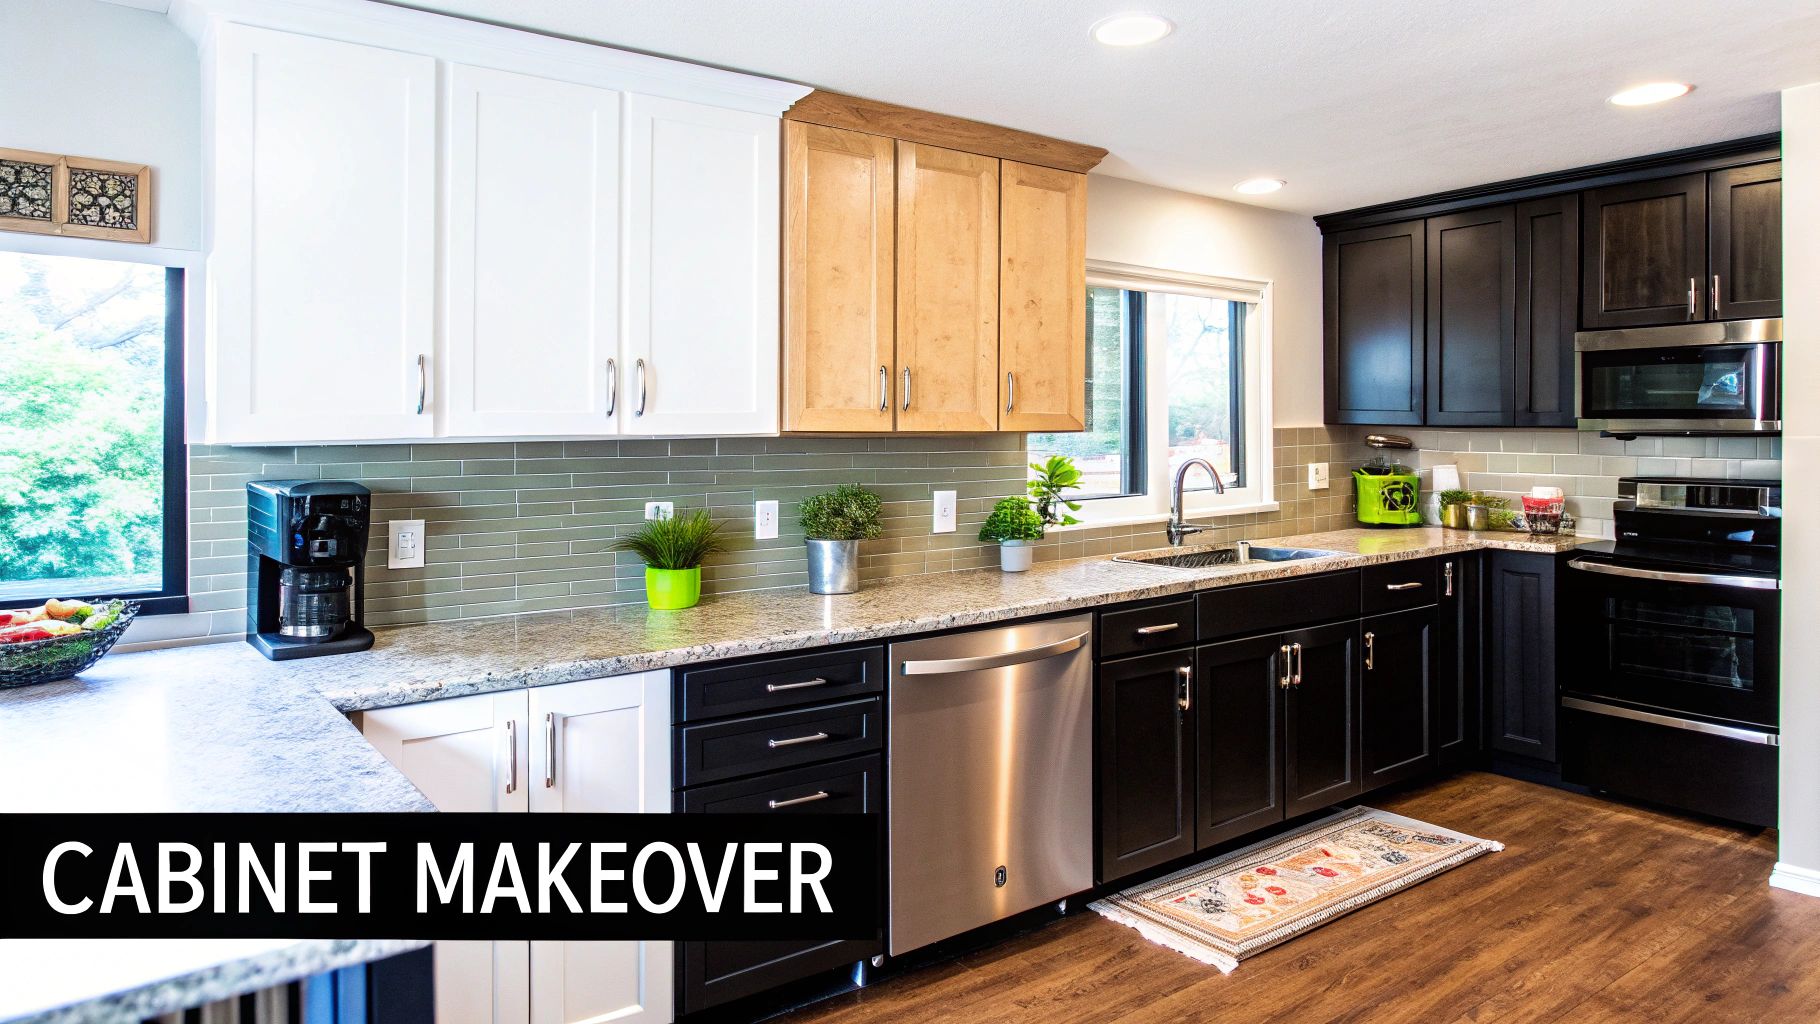
Kitchen cabinet resurfacing can feel like a mini makeover with maximum impact. You keep the existing boxes, swap out doors and drawer fronts, and apply a fresh veneer—giving you a completely new look without the hassle or expense of ripping everything out. In fact, many homeowners find they save 30-50% compared to a full replacement.
Why Resurface Your Kitchen Cabinets
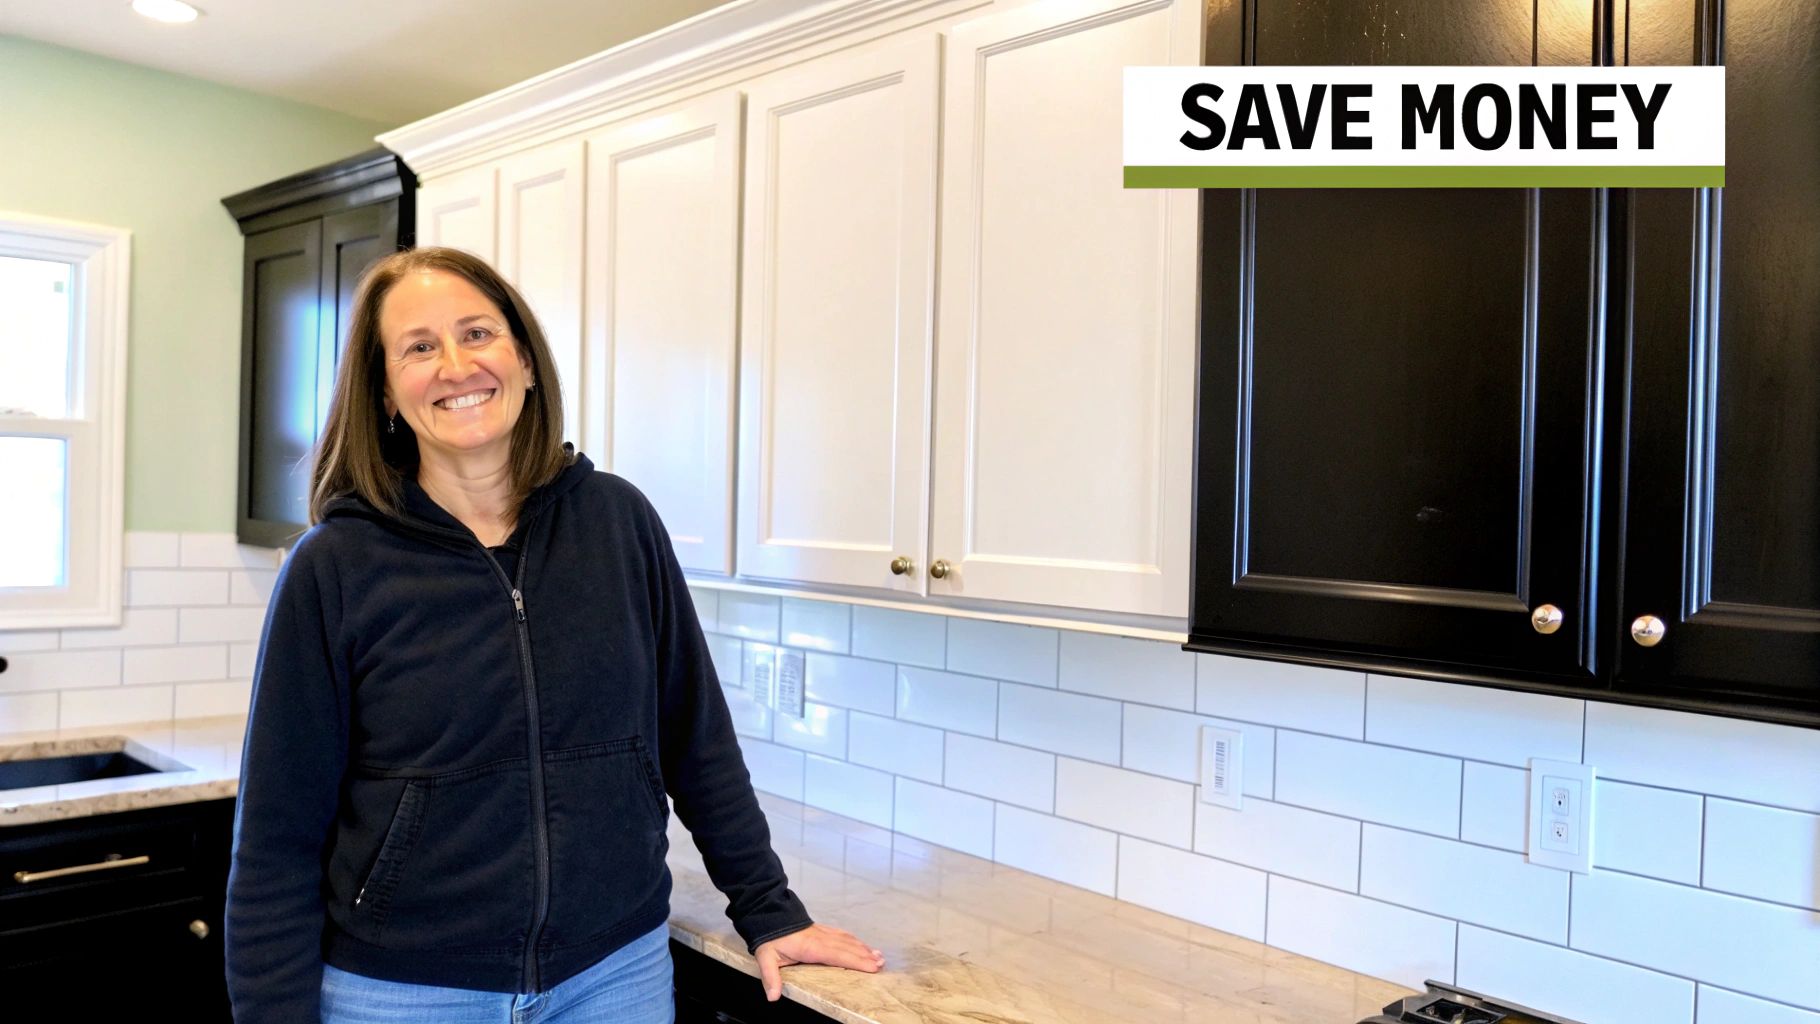
Before committing to a full kitchen overhaul, it’s worth exploring why resurfacing has become a go-to choice for savvy renovators. First off, the savings are hard to ignore. Redirecting funds from demolition and new cabinet boxes toward stylish finishes means you get the upgrade you crave without breaking the bank. For a closer look at the numbers, check out this detailed breakdown of cabinet resurfacing cost.
Beyond dollars and cents, resurfacing shrinks the disruption in your home. While a full replacement often leaves you without a functional kitchen for weeks, resurfacing teams usually work off-site and wrap up installation in just a few days. Less dust. Less noise. Fewer paper plate dinners.
The Sustainability Factor
Keeping your cabinet boxes out of a landfill is more than a feel-good bonus. It’s a deliberate choice to conserve resources and reduce waste.
Resurfacing preserves perfectly good structures, then dresses them up in a modern veneer—an eco-friendly renovation you can actually feel proud of.
A Growing Trend In Home Improvement
This isn’t just chatter among DIY bloggers. In 2024, the global kitchen cabinet resurfacing market topped USD 9.2 billion, and growth shows no sign of slowing down. For a deeper dive, see this cabinet resurfacing market growth report.
Ultimately, resurfacing combines:
- Aesthetic Transformation Endless door styles, finishes, and hardware options to match your design vision
- Practical Efficiency A quicker, cleaner process that gets your kitchen back in service fast
- Responsible Decision A renovation path that cuts waste and honors sustainable practices
Cabinet Resurfacing vs Full Replacement At A Glance
Here’s a side-by-side look at what matters most when you’re weighing your options.
| Factor | Cabinet Resurfacing | Full Replacement |
|---|---|---|
| Cost Savings | 30-50% less upfront | Higher material and labor costs |
| Project Timeline | Typically 3–5 days | Several weeks to months |
| Design Flexibility | Wide range of doors/finishes | Complete custom layouts |
| Waste and Disposal | Minimal—existing boxes reused | Large-scale demolition debris |
| Disruption Level | Low dust and noise | Major demolition, extended downtime |
This quick comparison shows how resurfacing keeps your project on budget and on schedule, while a full replacement gives you total control over layout and cabinetry style—albeit with greater expense and disruption.
Choosing Your Resurfacing Method
Kitchen cabinet resurfacing isn't a single solution. It’s more like a spectrum of options, each offering a different balance of transformation, cost, and effort. The right method for you really comes down to the condition of your cabinets, your budget, and the vision you have for your new kitchen.
Let's walk through the three main paths you can take. While each one provides a major visual upgrade, knowing the little differences will help you pick the one that truly fits your goals.
Painting and Refinishing for a Color Refresh
Painting is your most hands-on and budget-friendly route. This is the perfect choice if you actually like the style and layout of your cabinets but are just over the color or finish. It works best on solid wood or high-quality MDF cabinets that are still in good shape.
Just know that a great paint job is 90% preparation. We're talking about a deep clean to get rid of any grease, a light sanding so the primer has something to grab onto, and a careful application of high-quality primer and cabinet-grade paint. If you're a patient DIYer with a good eye for detail, you can get a finish that looks totally professional and will hold up for years.
This method gives you total freedom with color. Whether you're dreaming of classic whites or want to make a statement with a bold, modern hue, your imagination is the only limit. It’s the most direct way to put your personal touch on the kitchen.
Keep in mind, though, that paint won't hide a heavy wood grain or fix doors that are falling apart. It’s a surface-level update that demands patience, but the payoff is a kitchen that feels brand new. You can get into the nitty-gritty of different application styles in our guide on cabinet finishing techniques.
Cabinet Refacing for a Total Style Overhaul
Want the look of brand-new cabinets without tearing your kitchen apart? Refacing is your answer. With this process, your cabinet boxes stay right where they are, but you get entirely new doors and drawer fronts. The visible front edges of the cabinet boxes are then covered with a veneer that perfectly matches your new doors.
This method completely changes the style of your cabinetry. You can go from traditional raised-panel doors to sleek, modern slab doors, transforming your kitchen's whole vibe. Refacing is that perfect middle ground—it delivers a dramatic change for a fraction of what new custom cabinets would cost.
You can see how popular this is just by looking at the market. The cabinet refacing industry was valued at USD 4.5 billion in 2023 and is expected to hit around USD 7.8 billion by 2032. That kind of growth shows just how much homeowners appreciate this cost-effective and sustainable way to renovate.
Door and Drawer Front Replacement
For the quickest and simplest update, you might consider just replacing the doors and drawer fronts. Think of it as a streamlined version of refacing where you skip the veneer on the cabinet boxes. You simply order new doors and fronts, drill them for your hardware, and hang them.
This approach is ideal when your cabinet boxes are already a neutral color like white or black that will look good with a variety of new door styles. It's a fantastic choice if you're after a fast, high-impact change with hardly any mess.
So, how do these three methods compare? Here’s a quick breakdown:
| Factor | Painting/Refinishing | Cabinet Refacing | Door Replacement Only |
|---|---|---|---|
| Cost | Low | Medium to High | Medium |
| Effort | High (DIY) | Low (Pro) / High (DIY) | Medium |
| Transformation | Color & Finish | Total Style Overhaul | Door Style & Color |
| Best For | Sound cabinets, budget updates | Outdated styles, major changes | Quick updates, neutral boxes |
Ultimately, choosing how to resurface your kitchen cabinets is all about balancing what you want with what you have. Whether it’s a fresh coat of paint, a complete refacing, or a simple door swap, you’ve got great options to bring new life to the heart of your home.
Your Essential Toolkit and Shopping List
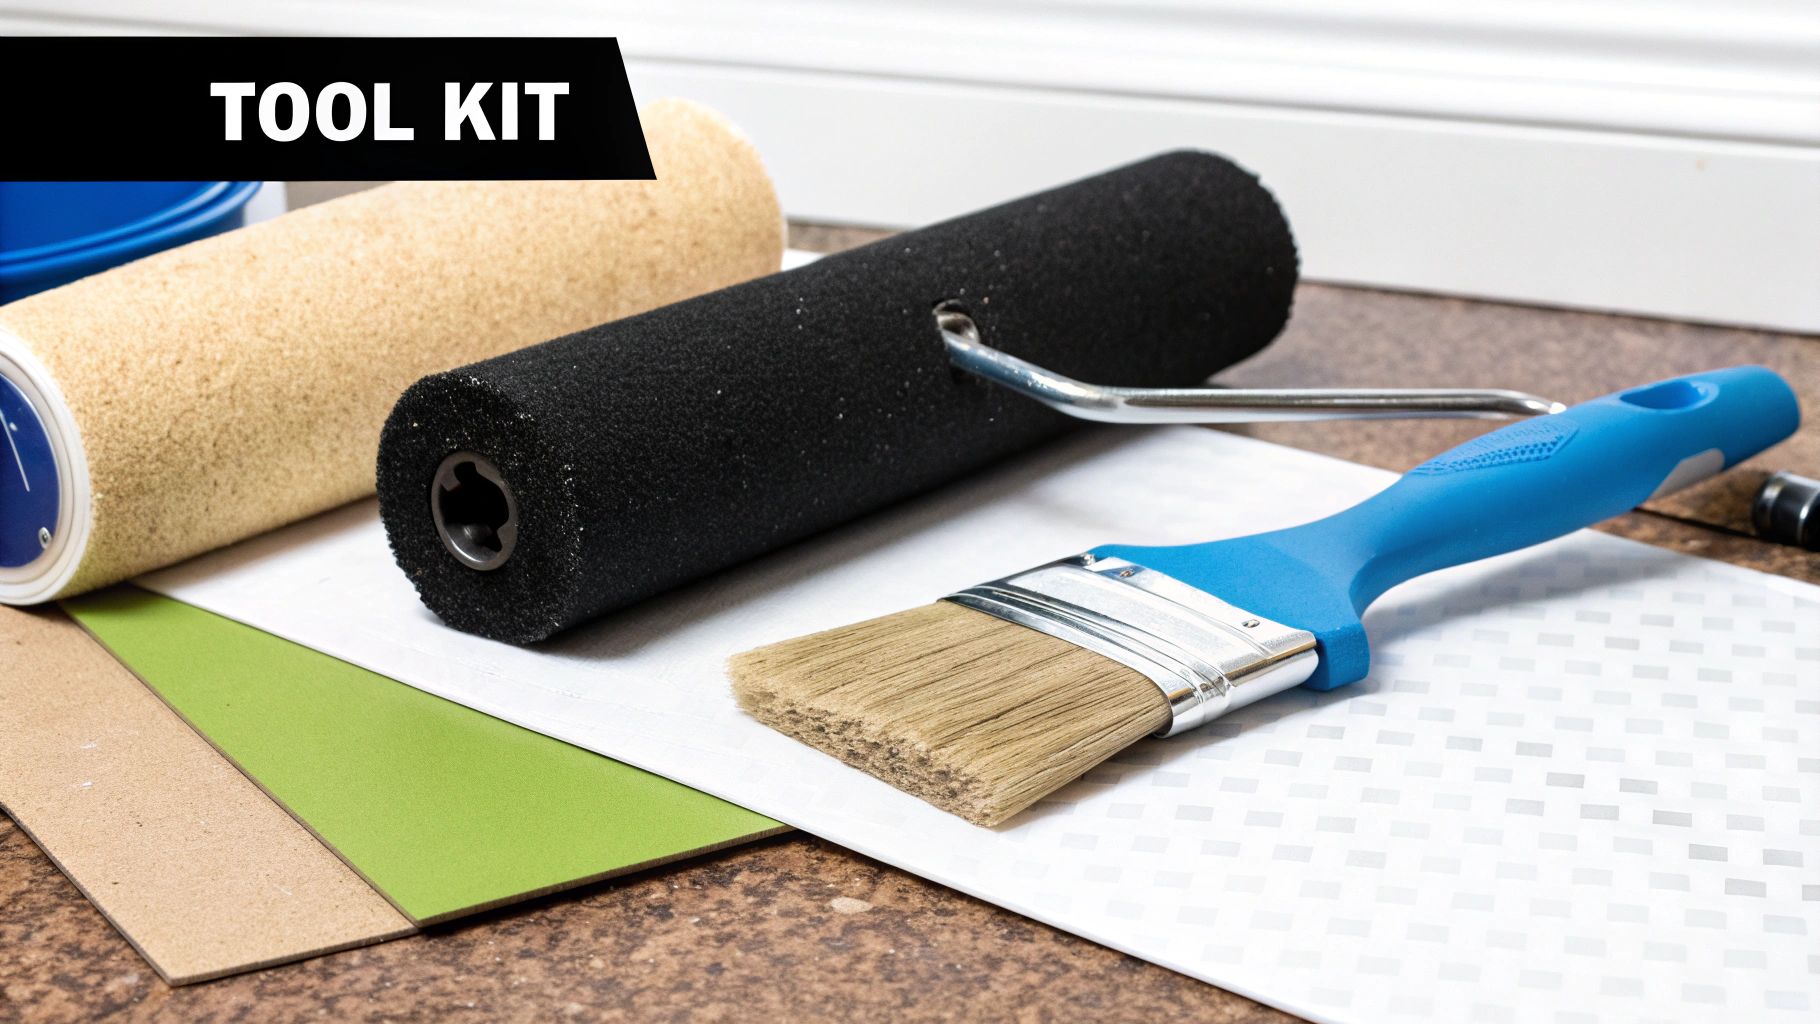
Walking into a hardware store without a plan for a cabinet resurfacing project is a surefire way to get overwhelmed and overspend. To avoid that aimless wandering down every aisle, you need a clear, organized list. This is about more than just grabbing paint and a brush; the real success of your project hinges on having the right tools for each specific phase of the job.
I find it easiest to think of the shopping trip in three stages: prep, application, and finishing. Grouping your list this way makes sure you don’t forget something critical and helps you understand exactly what each item is for. A well-stocked toolkit is your best defense against those common DIY headaches.
Tools for Meticulous Prep Work
I can't stress this enough: preparation is 90% of the work. The durability of your new finish is decided right here. Skimping on prep is a guarantee you’ll be dealing with peeling paint down the road. The goal is to create a perfectly clean, slightly roughened surface that primer and paint can grip onto for dear life.
Your prep toolkit should include:
- A Powerful Degreaser: Kitchen cabinets are covered in years of cooking grease and grime, even if you can't see it. Trisodium Phosphate (TSP) or a good TSP alternative is non-negotiable for cutting through it all.
- Sandpaper or Sanding Sponges: You'll want a medium grit (around 120-150) for the initial scuff sanding and a fine grit (220) to smooth things out between coats.
- Painter's Tape: Use a quality brand to protect your walls, countertops, and the inside edges of your cabinet boxes from any stray paint.
- Tack Cloth: This is absolutely essential for picking up every last speck of dust after sanding. A regular rag just pushes dust around, but a tack cloth grabs it.
Before you can even start this phase, you have to take everything apart. For a detailed walkthrough, our guide on how to remove cabinet doors covers the process, including how to label everything so you don't lose your mind during reassembly.
Supplies for a Flawless Application
Once your surfaces are prepped and pristine, the focus shifts to getting a smooth, professional-looking finish. The quality of your applicators is just as important as the quality of your paint. Trust me, cheap rollers and brushes will sabotage your hard work by leaving lint, bristles, and an ugly texture behind.
For this stage, you’ll need:
- High-Adhesion Primer: This is the secret weapon for a finish that lasts. Look for a bonding primer specifically made for glossy or hard-to-paint surfaces.
- High-Quality Cabinet Paint: I recommend an acrylic urethane enamel or a paint labeled specifically for cabinets. These formulas are designed to self-level, which minimizes brush strokes and cures to a hard, durable finish.
- Mini Foam Rollers: These are perfect for flat surfaces like cabinet doors and frames. They deliver a smooth, almost spray-like appearance without any stippling.
- A Quality Angled Brush: A 2-inch angled brush is your best friend for cutting in around edges and painting any detailed areas where a roller just can't reach.
Pro Tip: Invest in a set of painter's pyramids. These little plastic tripods are a game-changer. They elevate your cabinet doors so you can paint one side, flip it, and paint the other without waiting for it to dry completely. This will save you a massive amount of time.
Gear for the Finishing Touches and Safety
The final stage is all about putting everything back together, adding the finishing touches, and—most importantly—keeping yourself safe. Don't overlook the safety gear; sanding dust and paint fumes are no joke.
Your finishing list includes:
- New Hardware: Knobs and pulls are the jewelry for your kitchen. Fresh hardware is a small detail that makes a huge transformative impact.
- Soft-Close Hinges (Optional): If your budget allows, upgrading your old hinges to a soft-close mechanism adds a touch of modern luxury you'll appreciate every day.
- Drill or Screwdriver: You'll need this for taking off and putting back on all your doors and hardware.
- Safety Gear: A dust mask, safety glasses, and some nitrile gloves are essential. Protect yourself throughout the entire process.
With this organized list in hand, you can walk into that hardware store with confidence, knowing you've got everything you need to pull off a fantastic kitchen cabinet resurfacing project.
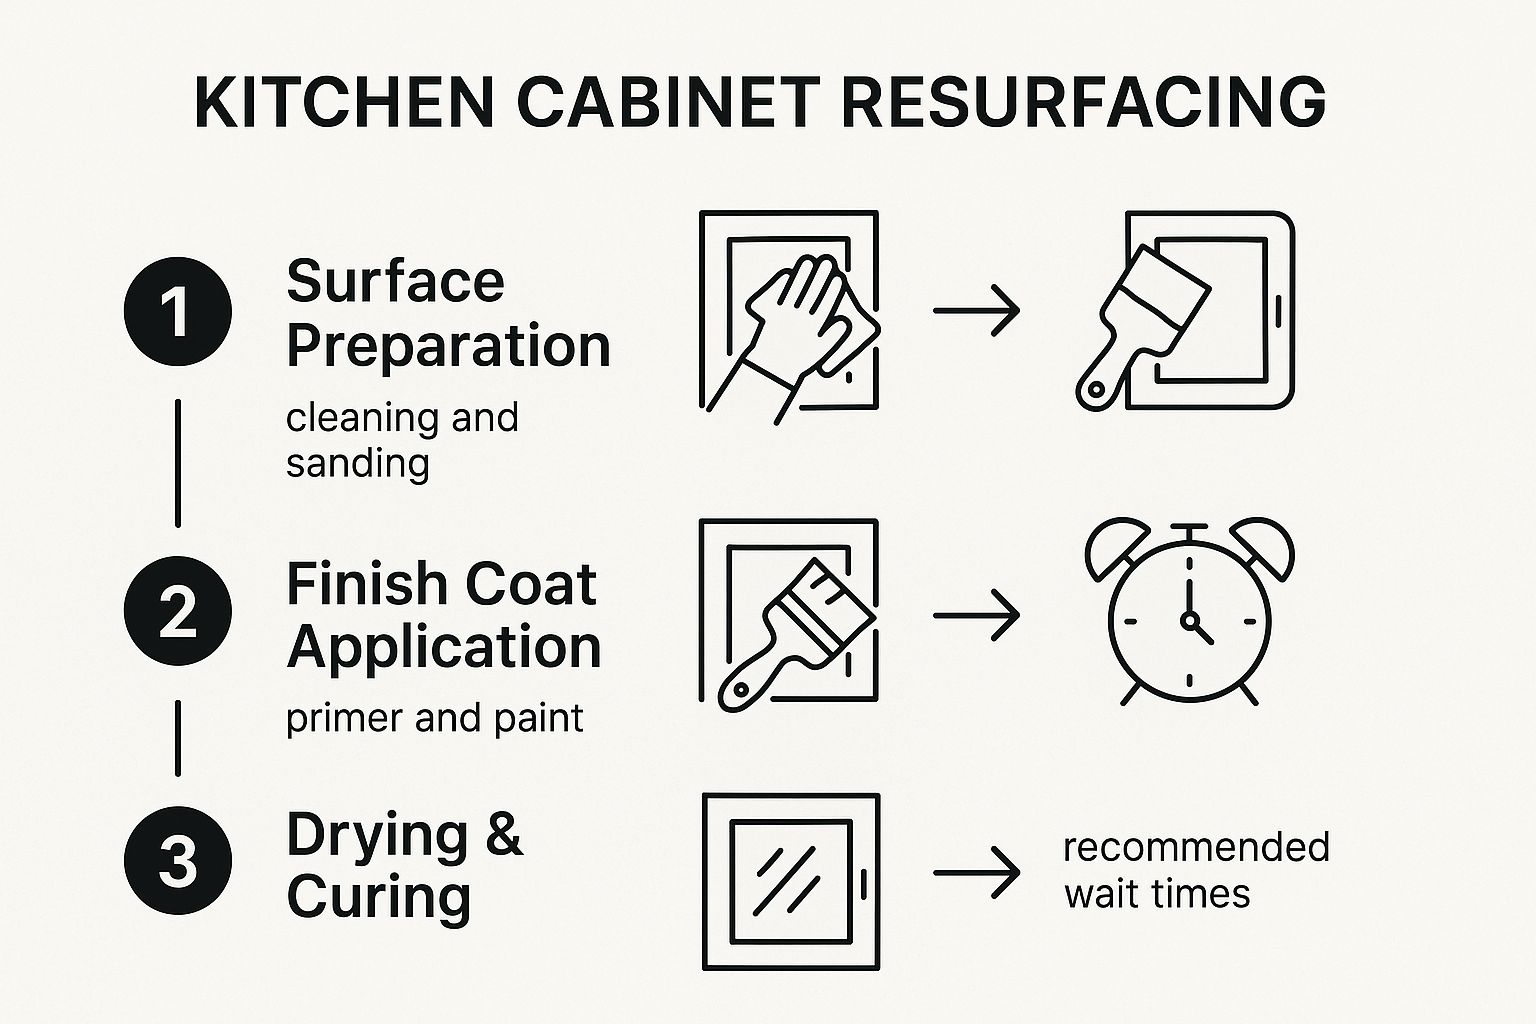
The Complete Kitchen Cabinet Resurfacing Process
This is where your vision truly starts to take shape. Forget generic instructions; we're about to walk through the entire kitchen cabinet resurfacing process with the kind of detail that only comes from getting your hands dirty.
The secret to a finish that looks professional—and actually lasts—isn't in the final coat of paint. It's in the meticulous, patient work that comes before it. We'll start with the non-negotiable prep phase, move into proven application techniques, and finish with the final details that pull it all together. Let's get it right the first time.
Meticulous Preparation: The Foundation of a Lasting Finish
The single most common DIY failure is rushing the prep work. It’s so tempting to jump straight to the exciting part—the color—but the durability of your resurfaced cabinets is 90% dependent on what you do right here. Think of it like a painter’s canvas; you can't create a masterpiece on a dirty, unprepared surface.
Your first move is disassembly and organization. Systematically remove all doors, drawer fronts, and hardware. Before you do anything else, create a simple labeling system. A piece of painter's tape with a number inside each cabinet box and on its corresponding door will save you a massive headache during reassembly. Trust me on this one.
Once everything is disassembled, the real work begins. Kitchen cabinets accumulate years of grease and grime that are often invisible, and this layer is paint's worst enemy.
- Degrease Everything: Clean all surfaces—cabinet boxes, doors, and drawer fronts—with a strong degreaser like Trisodium Phosphate (TSP). This isn't just a quick wipe; it's a crucial step that removes the residue that causes paint to peel down the road.
- Scuff Sanding: After cleaning, it's time to sand. Your goal isn't to strip the old finish, but to "scuff" it up to give the primer something to grip. A 120 to 150-grit sandpaper is perfect for this.
- Wipe Down Meticulously: After sanding, use a vacuum with a brush attachment followed by a tack cloth to remove every last particle of dust. Any dust left behind will create a gritty, unprofessional texture in your final finish.
A common mistake is to think a quick wipe-down is enough. Real degreasing requires scrubbing with a product designed to dissolve oils. This single step is the difference between a finish that lasts a decade and one that starts chipping in a year.
Applying Primer and Paint Like a Professional
With your surfaces perfectly prepped, it's time for the application. The key here is patience and using the right tools. A high-adhesion bonding primer is your best friend, especially for slick or previously finished surfaces. It creates a tenacious bond that ensures your topcoat stays put. Apply one even coat of primer to all surfaces and let it dry completely.
For the flattest, smoothest finish possible, use a high-quality mini foam roller on flat areas like door panels and cabinet frames. Reserve a 2-inch angled brush for detailed areas and corners where a roller can't reach. This combination gives you a near-spray-like finish without the complexity of a sprayer.
Apply two thin, even coats of your cabinet paint, allowing for adequate drying time between coats as recommended by the manufacturer. Rushing this will lead to a tacky, uneven surface. For an exceptionally smooth result, lightly sand with 220-grit sandpaper between coats, remembering to wipe away the dust with a tack cloth each time.
This visual roadmap highlights a critical point: the bulk of your effort is front-loaded in preparation. That hard work is what directly enables a flawless application and a durable final product.
The Importance of Patience: Drying and Curing
Paint might feel dry to the touch in a few hours, but it's not fully cured. Curing is the chemical process where the paint hardens to its maximum durability, and it can take anywhere from 7 to 30 days, depending on the paint and environmental conditions like humidity.
Here's a look at how that time breaks down in a real-world project.
Project Timeline and Curing Guide
| Phase | Estimated Time | Key Considerations |
|---|---|---|
| Preparation & Disassembly | 1-2 Days | Labeling is critical. Thoroughly clean and degrease every surface before sanding. |
| Priming | 1 Day | Allow at least 4-6 hours of dry time before applying the first coat of paint. |
| Painting (2 Coats) | 2 Days | Wait 24 hours between coats. A light sanding with 220-grit sandpaper in between creates a smoother finish. |
| Initial Drying | 2-3 Days | Let doors and drawers dry undisturbed before reassembly to avoid smudges or dents. |
| Curing Period | 7-30 Days | The paint is still hardening. Be gentle and avoid harsh cleaning products during this time. |
During this curing period, be gentle with your newly painted surfaces. You worked way too hard to chip them now! Patience here is what ensures the hard, resilient finish you were aiming for.
Reassembly and Final Touches
Once your cabinets have had sufficient time to dry (check the paint can for specifics!), you can begin the final, rewarding stage of reassembly. This is where your careful labeling system pays off. Start by reattaching the hinges to the doors and then hanging them back on the corresponding cabinet boxes.
Adjusting the hinges to get perfect alignment can be tricky. Most modern hinges have adjustment screws that allow you to move the door up/down, left/right, and in/out. Take your time with this step to ensure all your gaps are even and the doors close properly. It’s a small detail that makes a huge difference in the final look.
Finally, it's time for the "jewelry" of your kitchen makeover—the hardware. For some great pointers, check out these DIY tips for installing building hardware in home renovation projects. Installing new knobs or pulls is the perfect finishing touch and can completely elevate the final aesthetic.
Common Mistakes to Sidestep for a Flawless Finish
The difference between a DIY project that looks like a million bucks and one that’s a total dud often boils down to a few common, but totally avoidable, mistakes. I've seen it happen time and time again—homeowners with the best intentions end up with a frustrating, costly mess.
Let's walk through the biggest tripwires so you can steer clear of them. Success here isn’t about having fancy tools or being a natural-born artist. It’s all about respecting the process and refusing to cut corners on the steps that truly count. If you know where others have gone wrong, you can make sure your project looks polished, professional, and is built to last.
The #1 Mistake: Skipping a Serious Deep Clean
I can’t stress this enough: this is, without a doubt, the biggest mistake you can make. Your kitchen cabinets are ground zero for cooking grease, airborne oils, and years of grime. Even if they look clean, trust me, there's an invisible film clinging to the surface. Trying to paint over that is like trying to get paint to stick to a greasy frying pan—it just won't happen.
It doesn’t matter how amazing your primer or paint is; it simply cannot bond to a dirty surface. The result is always the same: peeling, chipping, and bubbling that can show up within weeks.
The Fix: Before you even think about picking up a piece of sandpaper, you have to degrease every single inch of your cabinet boxes, doors, and drawer fronts. Grab a heavy-duty cleaner like Trisodium Phosphate (TSP) or a good TSP alternative and get scrubbing. This one step is the single most important investment you'll make in the life of your new finish.
Underestimating the Power of a Good Primer
It’s so tempting to grab one of those "paint and primer in one" cans to save a step. For kitchen cabinets, though, this is a huge gamble. A dedicated, high-adhesion bonding primer does a very specific job: it creates a death grip on the old surface and gives your paint the perfect, uniform foundation to stick to.
Skimping on a quality primer almost always leads to blotchy coverage, meaning you'll need more coats of your expensive paint just to hide the old color. Even worse, it seriously compromises the durability of your topcoat, leaving it vulnerable to scratches and dings from everyday life.
A cheap or unsuitable primer will end up costing you more in the long run when you’re repainting everything in a year or two. Think of it as the foundation of your project—if it's weak, everything you build on top of it will be, too.
Rushing the Job and Not Letting Coats Dry
Patience is a painter's best friend. Every layer of primer and paint needs enough time to properly dry and cure, and you'll find the specific instructions right on the can. Slapping on a new coat before the last one is ready is a recipe for disaster.
When you rush it, you can trap solvents under the new layer, leading to a soft, tacky finish that never fully hardens. It can also cause the new paint to literally pull up the still-wet paint underneath, creating a streaky, goopy mess that’s a nightmare to fix without starting over.
To get it right, just follow these simple rules:
- Read the Can: Always check the manufacturer’s recommended recoat times.
- Watch the Weather: High humidity and cold temperatures will slow down drying times, sometimes by a lot.
- When in Doubt, Wait It Out: It’s always better to wait a few extra hours than to ruin your hard work by getting impatient.
Sanding Wrong (Or Not at All)
Sanding is usually the part of the job everyone dreads, but its purpose is often misunderstood. You're not trying to strip the old finish down to bare wood. The goal of "scuff sanding" is just to rough up the surface a little, knocking down the gloss and creating thousands of tiny grooves for the primer to bite into.
If you don't sand at all, your primer has nothing to grab onto, which leads to weak adhesion. On the flip side, getting too aggressive with a coarse grit sandpaper can leave deep scratches that will telegraph right through your final paint job. Your cabinets might end up looking worse than when you started.
For that initial scuff, a medium 120 to 150-grit sandpaper is almost always the perfect choice. It's just enough to create that "tooth" for the primer without damaging the surface.
Answering Your Top Cabinet Resurfacing Questions
Even when you feel ready to tackle a kitchen cabinet refresh, a few lingering questions can hold you back. Let's clear up some of the most common concerns that pop up during a resurfacing project, so you can move forward with confidence and make sure all that hard work pays off.
How Long Does DIY Cabinet Resurfacing Really Take?
It’s easy to picture this as a quick weekend project, but the reality is a little more involved. For a kitchen of average size, you should set aside four to seven days from the very beginning to the final coat. That timeline is non-negotiable because it includes the drying and curing times that are absolutely essential for a durable, long-lasting finish.
Sure, you can probably knock out the bulk of the manual labor—the cleaning, sanding, and first coats of paint—over a long weekend. But rushing is the single biggest mistake you can make. It's what leads to a subpar job that won't hold up. Professionals get it done faster because they have spray equipment and larger crews, not because they're skipping crucial steps.
Can I Resurface Any Type of Cabinet?
The short answer is: almost! The cabinet material is the biggest factor here. Solid wood, MDF, and wood veneer are perfect candidates for a new finish. They sand down nicely and grab onto paint beautifully once they’re prepped the right way.
Laminate and thermofoil cabinets are a bit trickier. You can paint them, but you’ll need a seriously good high-adhesion bonding primer to give the paint a fighting chance. Even then, the finish might not be as durable as one on a solid wood cabinet. If you have laminate that's already peeling or damaged, it has to be stripped off completely before you can even think about starting.
Here's the bottom line: The structural integrity of your cabinet boxes is what matters most. If the boxes are warped, showing signs of water damage, or just plain falling apart, no amount of paint or veneer will fix the root problem. In that situation, a full replacement is a much smarter investment for the long haul.
Should I Hire a Pro or Do It Myself?
This is a classic dilemma, and it really comes down to a trade-off between your budget, your time, and how comfortable you are with detail-oriented work. Going the DIY route can save you thousands of dollars, and there’s a huge sense of accomplishment when you pull it off.
On the other hand, getting that flawless, factory-smooth finish without professional spray equipment is tough. Hiring a professional all but guarantees a durable, high-quality result. They'll also get it done in a fraction of the time and often provide a warranty. If you don't have a dedicated space to work or can't live with your kitchen in chaos for a week, calling in a pro is often the best move.
How Durable Is a Resurfaced Cabinet Finish?
The durability of your new finish is 100% tied to your prep work and the quality of the materials you choose. When you do it right—meaning meticulous degreasing, proper sanding, a high-quality bonding primer, and cabinet-grade paint—a resurfaced finish can easily last 8-15 years without any major problems.
Skipping steps is what leads to those horror stories of cabinets chipping and peeling within a year. Using cheap all-in-one products or, worse, not cleaning and sanding properly is a recipe for disaster. The effort you put into the prep work will directly translate to how long your beautiful new cabinets will last.
Ready to transform your kitchen with cabinetry that's built to last? The experts at Sinclair Cabinetry inc have over 35 years of experience crafting custom, high-quality real wood cabinets. Explore our stunning gallery and schedule your consultation today!