
Getting your kitchen cabinets perfectly level is about so much more than just how they look. It’s the absolute bedrock of a durable, functional, and professional-looking kitchen. This single step is what ensures your doors will hang straight, your drawers will glide like butter, and those beautiful, expensive countertops are properly supported so they don't crack under pressure.
Honestly, it's the non-negotiable first move for any successful cabinet installation.
Why Perfectly Level Cabinets Are a Must

Before you even think about grabbing a shim or a drill, let's talk about why this part of the job carries so much weight. Taking the time to get your cabinets perfectly level is the single best investment you can make in your kitchen’s lifespan and day-to-day usability. It's what separates a kitchen that looks good for a year from one that works flawlessly for decades.
Cutting corners here will lead to a whole cascade of frustrating problems later on. You’re not just trying to avoid a crooked look; you’re actively preventing real, everyday annoyances and some seriously expensive damage.
The Real Cost of Cutting Corners
Picture this: you've just installed a stunning set of new cabinets and a gorgeous quartz countertop. But six months down the line, a tiny hairline crack appears right near the sink. This is an all-too-common (and costly) nightmare that happens when cabinets aren't perfectly level. The uneven surface puts a massive amount of stress on the rigid countertop material, which eventually just gives up and fails under its own weight.
And it’s not just about the countertops. Improper leveling triggers a bunch of other headaches:
- Wonky Doors: Cabinet doors will simply refuse to hang straight. You’ll be left with uneven gaps that no amount of hinge adjusting can ever fix.
- Sticking Drawers: You'll find drawers that scrape and bind against their frames, making them a pain to open and close smoothly.
- Ghost Doors: On cabinets that are even slightly tilted, you might find the doors swing open all by themselves—a constant, nagging little problem.
- Ugly Gaps: You’ll see uneven lines and gaps between cabinets, where they meet the walls, and under the countertop. It completely ruins that clean, built-in look you were going for.
I once consulted on a DIY job where the homeowner skipped the crucial step of finding the high point of the floor before starting. The kitchen looked beautiful at first, but it was a functional mess. The dishwasher wouldn't fit under the counter properly, and their $5,000 granite slab cracked within a year. They had to start all over.
This isn’t just a one-off story. Uneven surfaces are behind roughly 15% of all installation errors that cause structural problems or premature wear and tear on cabinetry. These are the kinds of mistakes that can blow up a renovation budget by an extra 10-20% just to cover the repairs and replacements. If you want to dig deeper, you can explore a full kitchen cabinet market report to see more about installation trends.
So, try not to think of leveling as a chore. It's the structural foundation for your entire kitchen. Get this right, and every single component, from the doors to the countertop, will work together just as it should.
Gathering Your Tools for the Job
There's nothing worse than getting into a good workflow only to realize you’re missing a critical tool. That mid-project run to the hardware store is a real momentum killer. A smooth installation is all about prep, so let's get your toolkit sorted out before you even think about moving a single cabinet.
This isn't just about having a pile of tools; it's about having the right ones. For instance, knowing how to level kitchen cabinets properly often comes down to the quality and length of your level. A little torpedo level has its place, but for this job, you need something with more reach.
Your Core Leveling Arsenal
First things first, you absolutely need a good level. A 4-foot or even 6-foot spirit level is your best friend here. Its length is crucial because it lets you span across multiple cabinets at once, giving you a true read that a shorter level just can't provide. If you’re a pro or tackling a big kitchen with wonky floors, a self-leveling laser level is a game-changer, casting a perfect line across the entire room.
You'll also need a dependable drill and driver, along with a box of cabinet installation screws. These aren't just any screws; they have a wide, washer-like head designed to grip the cabinet securely without pulling through the wood. A good stud finder is non-negotiable—your cabinets need to be anchored solidly to the wall framing. And grab a few clamps to hold cabinet face frames tight while you join them together. It makes all the difference.
Finally, get shims. A lot of them.
Shims: The Unsung Heroes
Shims are the little wedges that do all the real work in leveling cabinets. You'll see wood shims everywhere, but I always recommend using plastic composite shims. Trust me on this one.
- They don’t compress. Under the weight of a heavy granite or quartz countertop, wood shims can slowly crush over time. That means your perfectly level cabinets will eventually start to sag.
- They’re waterproof. In a kitchen, spills and leaks are inevitable. Wood shims can swell up or even rot if they get wet, throwing everything off-kilter.
- They snap cleanly. Most plastic shims are scored, so you can easily snap off the excess for a tidy, professional finish. No splintering, no fuss.
Having the right tools isn't just a suggestion; it directly impacts the quality of your finished project. It's the difference between a frustrating, amateur-looking job and a smooth, professional installation that will stand strong for decades.
Before we dive in, let’s quickly round up everything you’ll need in one place.
Essential Tools and Materials for Leveling Cabinets
Here’s a detailed breakdown of the items you'll need, their main role, and a pro tip for using each one effectively.
| Item | Primary Purpose | Pro Tip |
|---|---|---|
| 4- or 6-Foot Level | Checking level across multiple cabinets. | Don't just rely on the bubble. Flip the level end-for-end on the same surface to double-check its accuracy before you start. |
| Drill/Driver | Driving screws for mounting and joining cabinets. | Use a drill with a clutch setting to avoid over-tightening screws and stripping the wood. |
| Cabinet Screws | Securing cabinets to the wall studs. | The built-in washer head provides a much stronger hold than standard wood screws. Don't substitute these. |
| Plastic Shims | Filling gaps to level cabinets on uneven floors/walls. | Keep a utility knife handy. Scoring the shim before you snap it gives you an even cleaner break. |
| Stud Finder | Locating wall studs for secure anchoring. | Mark both edges of the stud, then find the center. This gives you the strongest point for your screws. |
| Clamps | Holding face frames together for a flush connection. | Use a piece of scrap wood or a rag under the clamp pads to protect the cabinet finish from being marred. |
| Tape Measure | Measuring distances for layout and placement. | "Measure twice, cut once" is a cliché for a reason. Double-check all your critical measurements. |
With the right gear in hand, the entire process becomes less of a headache and more of a satisfying project.
Beyond these core items, a tape measure, pencil, and a good layout square will make marking your lines precise and simple. Making sure your tools are ready is just as critical as the initial planning stage itself. A well-thought-out strategy is fundamental, and you can explore more on how to approach your kitchen cabinet design layout to see how these practical steps fit into the bigger picture.
Now that your tools are gathered, you're ready to find your starting point.
Finding Your Floor's High Point and Marking Your Lines
This is the moment where we shift from prep work to pure precision. Let me tell you, no floor is perfectly flat—not even in a brand-new build. They all have their own little hills and valleys. Our job is to find the single highest point along the walls where the cabinets will sit. From this point on, every single measurement will reference this one critical spot.
Trying to level cabinets by starting in a low spot or a random corner is a fast track to a headache. You'll find yourself trapped in a frustrating loop of trimming cabinet toe kicks or stacking a ridiculous number of shims. When you start at the highest point, you guarantee every other cabinet can be shimmed up to meet a perfectly level line. It’s a much cleaner, more stable way to work.
Locating the Crucial High Point
Grab your longest level—a 4-foot or 6-foot one is ideal for this. Lay it flat on the floor right up against the wall where your first run of cabinets will go.
Now, gently rock it back and forth, sweeping it across the floor. You're looking for the spot where it pivots, like a seesaw. That pivot point? That's a high spot. Mark it with a pencil. Keep doing this along every wall that's getting base cabinets. Once you’ve covered the whole perimeter, you’ll have a few pencil marks. The highest one of the bunch is your official starting point.
If you happen to have a self-leveling laser, this part is even quicker. Just set it up in the middle of the room and measure the distance from the laser line down to the floor in several spots. The place with the shortest measurement is your winner—that's the floor's high point.
Marking Your Base Cabinet Guideline
With the absolute high point identified, it's time to draw your master reference line. The standard finished height for base cabinets, including the countertop, is 36 inches.
Here's how you get that line on the wall:
- From the high point you just found, measure straight up the wall exactly 34.5 inches. Make a crisp, clear pencil mark. This measurement accounts for the cabinet box, leaving room for a standard countertop.
- If you have a laser level, aim it so the beam hits that mark perfectly. It will cast a level line around the entire room for you. Easy.
- Working with a spirit level? No problem. Place it at your 34.5-inch mark and draw a short, level line. Then, just "leapfrog" the level across the wall, connecting the dots until the line wraps around your entire kitchen workspace.
This 34.5-inch line is your golden rule. The top edge of every single base cabinet you install must touch this line perfectly. It takes all the guesswork out of the equation and ensures your countertops will sit dead flat, fully supported.
Establishing the Upper Cabinet Lines
Once your base cabinet line is set, marking the lines for your uppers is pretty straightforward. The industry standard is an 18-inch gap between the top of the counter and the bottom of the wall cabinets. This leaves plenty of workspace and fits most coffee makers and other small appliances.
To mark your upper cabinet line, measure up 19.5 inches from your base cabinet guideline. That extra 1.5 inches accounts for the thickness of the countertop you'll be adding later. Mark this new line around the room; this is where the bottom of your uppers will sit.
From there, just measure up from that bottom line to the height of your upper cabinets—whether that's 30, 36, or 42 inches—and mark the top line. These layout lines are your roadmap, ensuring everything aligns flawlessly.
After the installation looks sharp, the final professional touch often comes down to perfecting the doors. For a deep dive into getting them just right, you can learn more about adjusting cabinet doors for a flawless finish.
Mastering the Art of Shimming Your Base Cabinets
Alright, with your layout lines marked, it's time to get hands-on. This is where the real magic happens—transforming a stack of boxes into a rock-solid, functional kitchen. And it all starts with the most important cabinet of the bunch: the corner unit.
Every successful installation pivots on getting this first cabinet perfect. Think of it as the anchor for the entire run. If your corner cabinet is dead-on level and plumb, every other cabinet has a reliable reference point, making the rest of the job worlds easier.
Setting Your First Cabinet
Start by sliding your corner cabinet (or the first cabinet at the end of a straight run) roughly into place. Gently nudge it back until its top edge is flush with that 34.5-inch high point line you drew on the wall.
Now, grab your 4-foot level. Lay it across the top of the cabinet, first front-to-back, then side-to-side. The bubble will tell you exactly what’s going on. If it slides to the left, the right side is high. If it drifts toward the back of the cabinet, the front is high. This is your cue to break out the shims.
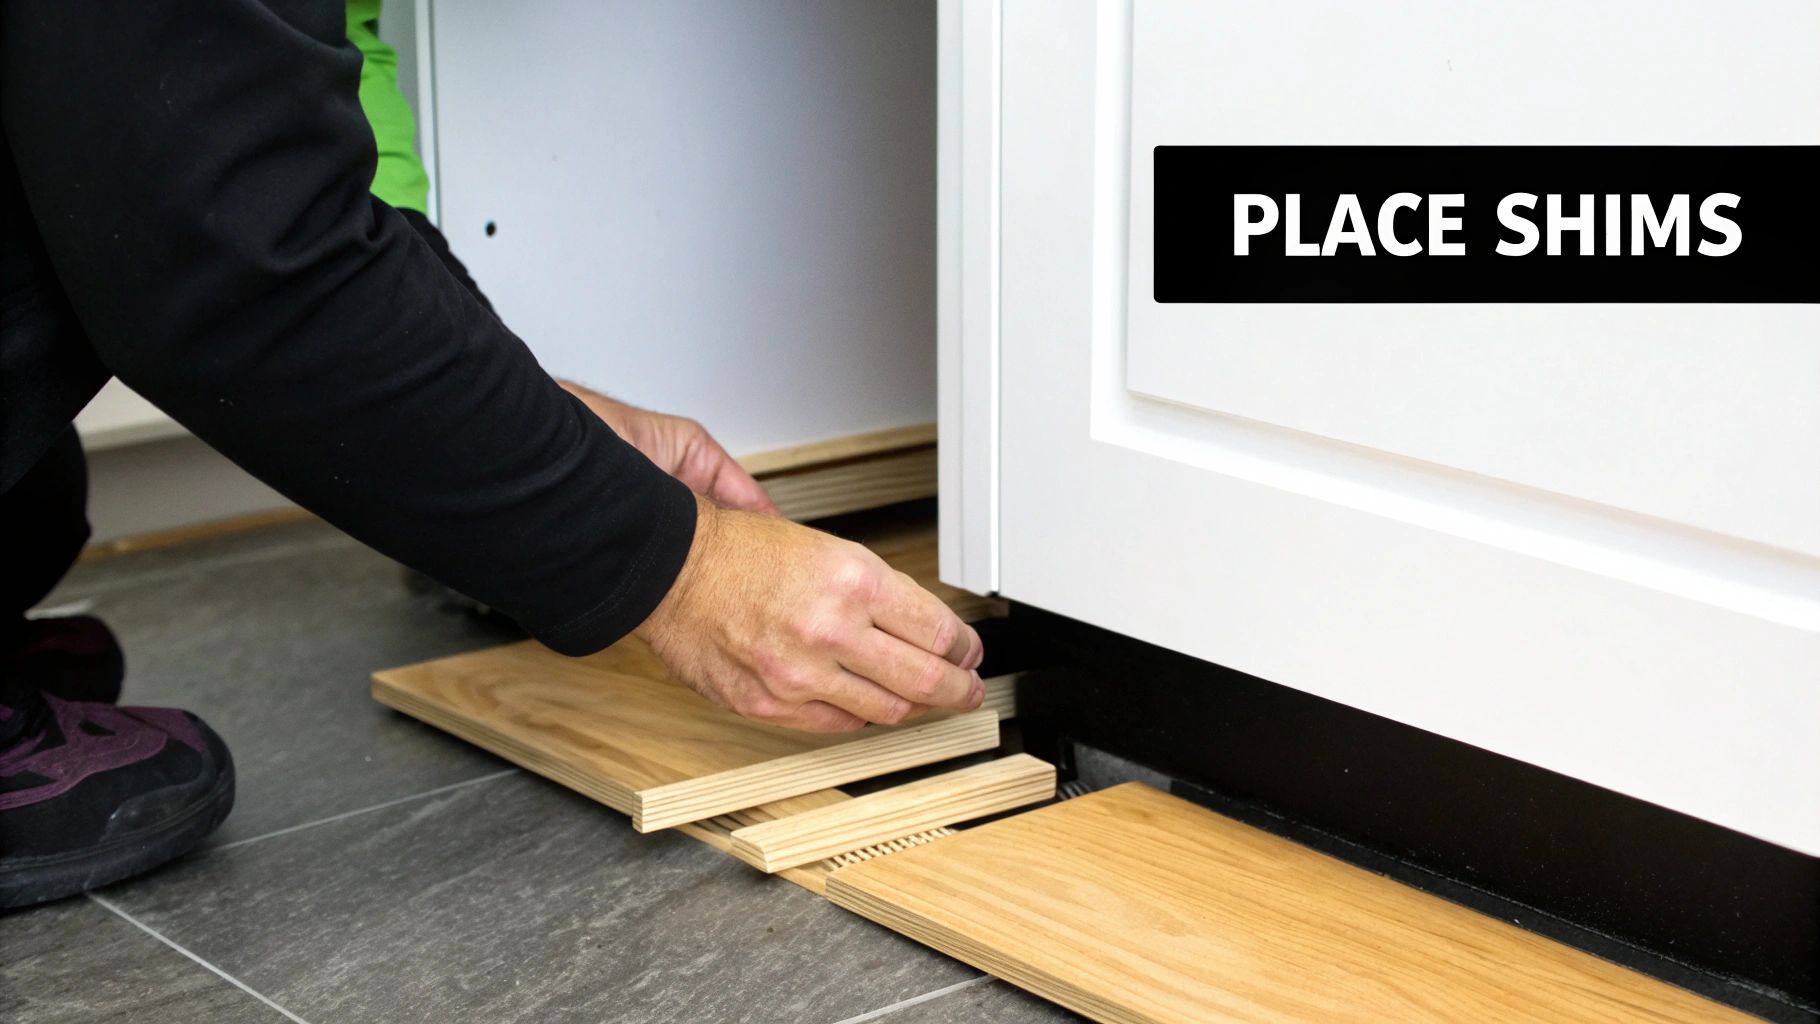
Carefully lift the low corners and slide composite plastic shims underneath until that bubble sits perfectly centered in its vial, no matter which way you orient the level. Don’t be afraid to stack a couple of shims if you’ve got a bigger gap to fill.
Pro Tip: I always place shims near the corners and directly under the cabinet’s vertical face frame stiles. This is especially crucial where you plan to drive your mounting screws. It provides unyielding support and stops the cabinet from twisting or rocking when you tighten everything down.
Once you’ve got it perfectly level, drive a single cabinet screw through the back hanging rail and into a wall stud. Just sink it most of the way—don't crank it down tight just yet. This keeps it in place but gives you a little wiggle room for fine-tuning later.
Joining Cabinets for a Seamless Look
With your first cabinet loosely anchored, bring the next one into position right beside it. Get it leveled front-to-back and side-to-side using the same shimming method, making sure its top edge also aligns perfectly with your guideline.
Here’s the step that separates a DIY job from a professional one. Before you even think about screwing that second cabinet to the wall, you need to join their face frames together. This is non-negotiable for a seamless look.
This diagram shows the basic rhythm you'll follow for each cabinet in the run.
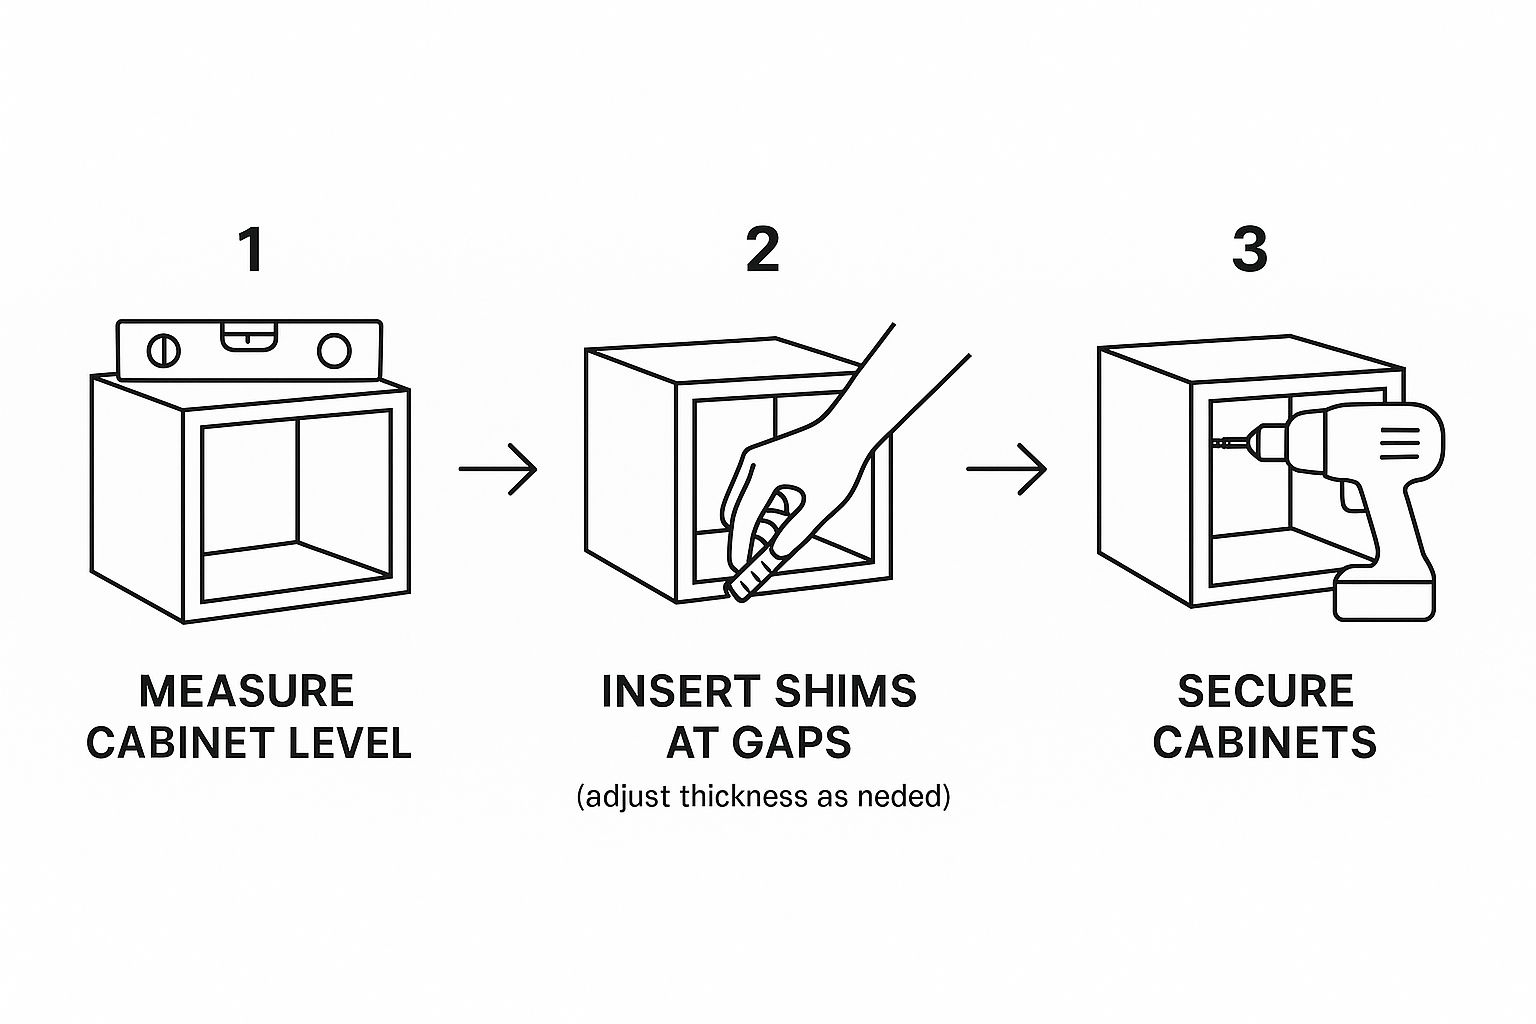
As you can see, it’s a simple loop: measure, adjust with shims, and secure. Getting this rhythm down is the key to a smooth installation.
Use a couple of cabinet clamps to pull the face frames of the two cabinets tight against each other. Now, run your hand over the seam. It should feel like one continuous piece of wood—no lip, no uneven edge. If it’s not perfect, tweak the clamps or slip a thin shim between the cabinet boxes (not the face frames) to get them perfectly flush.
Once they're perfectly aligned, it’s time to make the connection permanent.
- Drill pilot holes: Use a small bit to drill two or three pilot holes through the side of the first cabinet’s face frame and into the second. If you can, place these where the door hinges will eventually hide them.
- Drive connection screws: Use 2.5-inch cabinet screws to fasten the frames together. The clamps are doing the important job here, preventing the cabinets from shifting an inch as the screws go in.
Only after the cabinets are clamped, flush, and screwed to each other should you secure that second cabinet to the wall studs. This method guarantees that all your cabinet fronts form a single, unbroken plane—the true hallmark of a quality installation.
From here, you just repeat the process: position the next cabinet, level it, clamp it, connect it, and secure it to the wall. Keep this rhythm going all the way down the line.
Installing Upper Cabinets Without the Struggle
Trying to lift and hold a heavy upper cabinet against the wall while keeping it perfectly level is a recipe for frustration. It's awkward, exhausting, and honestly, a bit risky if you're working alone. This is the exact moment where many DIY installations start to go sideways—literally.
But I'm going to let you in on a simple, game-changing trick that turns this struggle into a calm, controlled process: the temporary support ledger.
All this is is a straight 2×4 that you temporarily screw to the wall, right along the bottom guideline you marked for your upper cabinets. It acts as a perfect little shelf, taking the entire weight of the cabinets. Now, you can stop focusing on the bicep workout and put all your attention on getting the alignment just right.
This one technique turns a tough two-person job into something you can easily handle on your own. It's probably the most valuable tip for anyone learning how to level kitchen cabinets without a helper.
Setting Up Your Support Ledger
First things first, grab your stud finder and locate all the studs along the wall where your uppers will go. Mark each one clearly. Your ledger board absolutely has to be anchored into these studs to be strong and safe.
Now, line up the top edge of your 2×4 perfectly with that 19.5-inch line you marked earlier—the line that shows where the bottom of your upper cabinets will sit. Pop your level on top of the 2×4 to make sure it's dead-on straight, then drive a few screws through it and into the studs. Just like that, you've built a foolproof guide for a perfectly level installation.
Hanging the First Upper Cabinet
With your ledger firmly in place, lifting that first upper cabinet is a breeze. Just hoist it up and rest it right on top of the board. The ledger takes the full weight, freeing up both of your hands to do the important work.
Now you can focus on the fine-tuning:
- Positioning: Slide the cabinet into place, which is usually starting from a corner.
- Checking for Plumb: Press the cabinet back flush against the wall. Now, place your level on the side of the cabinet to make sure it’s perfectly vertical, or plumb. If your wall isn't perfectly flat (and they rarely are), you might need to tuck a thin shim behind the top or bottom hanging rail to get it just right.
- Securing: Once it's plumb and in position, drive two cabinet screws through the top hanging rail and into the wall studs. Follow up with two more through the bottom rail.
The ledger board gets you perfectly level side-to-side, but don't forget to check for plumb. A cabinet that leans even slightly forward or backward will throw off the alignment of all your doors and create major headaches down the line.
Connecting Adjacent Cabinets for a Unified Look
Lift your next cabinet and set it on the ledger right beside the first one. Just like we did with the base cabinets, the goal here is to make them look like a single, seamless unit. Before you even think about screwing it to the wall, grab your clamps and pull the face frames of the two cabinets tightly together.
Run your hand over the seam—it should feel perfectly flush. Once you're happy with it, fasten the face frames together using 2.5-inch screws. Only after they are securely joined should you fasten the second cabinet to the wall studs. This methodical approach is what separates a professional job from an amateur one.
Repeat this process for all your uppers, letting the ledger do the heavy lifting every step of the way. For a complete walkthrough of the entire project, check out our full guide on how to install kitchen cabinets.
Answering Your Top Cabinet Leveling Questions
Even the best-laid plans run into a few hiccups. It’s just part of the process. Getting ahead of the most common cabinet leveling snags will save you a ton of time and keep the frustration at bay. Here are the real-world answers to the questions we hear most often from folks learning the ropes.
What Do I Do If My Kitchen Floor Is Super Uneven?
First off, don't sweat it—this is probably the most common challenge in any kitchen remodel, especially in older homes. The trick is to always, always start your cabinet run at the highest point of the floor. That spot becomes your benchmark.
For floors with a serious slope, you'll just end up using more shims as you work your way toward the low spot. If you find a gap under a cabinet that’s bigger than half an inch, it’s time to ditch the stack of thin plastic shims. Instead, use solid, tapered wood blocks for a much more stable base.
The goal is to make sure every cabinet is solidly supported at all four corners and anywhere it meets a wall stud. This eliminates any chance of rocking. Don't worry about the big gap you'll see at the lowest point; your toe-kick molding will hide it completely when you're done.
Wood or Plastic Shims: Does It Really Matter?
While either can get the job done, plastic composite shims are hands-down the better choice. They're waterproof—a huge plus in a kitchen—and they won’t compress or crush under the incredible weight of granite or quartz countertops over time. Plus, most have handy snap-off segments, so you can get a clean break every time.
If you have to use wood shims, make sure they’re hardwood, like cedar. Soft pine shims are notorious for compressing, which means your perfectly level cabinets might not stay that way for long.
Pro Tip: This seems like a small detail, but choosing the right shim has a massive impact on the long-term stability and durability of your entire kitchen. Don't cut corners here.
How Do I Get Cabinet Faces Perfectly Flush?
This is the step that separates an amateur job from a professional one. It's an absolute must for a clean, seamless look.
Once your first cabinet is set and perfectly level, bring the next one into place and level it, too. But before you even think about screwing it to the wall, clamp the face frames of both cabinets together. Pull them tight.
Now, run your hand across the seam where they meet. It should feel like a single, smooth piece of wood with no lip or edge. If it’s perfect, drive screws through the face frames to connect them. Only then should you anchor that second cabinet to the wall studs. Repeat this process for every cabinet in the run.
At Sinclair Cabinetry inc, we believe a quality kitchen is built on a perfect foundation. If you’re looking for expert craftsmanship and custom solutions for your home, explore our services at https://sinclaircabinets.com.