
Learning how to install your own kitchen cabinets is one of those projects that's less about raw strength and more about careful planning and precision. It really boils down to a methodical process: getting your room prepped, establishing perfectly level guidelines, hanging the upper cabinets first, and then bringing in the base cabinets. Stick to that order, and you're setting yourself up for a professional-looking result that will last.
Your Blueprint for a Flawless Installation

So, you're ready to do more than just screw a few boxes to the wall. Good. A truly successful cabinet installation is all about achieving that seamless, high-quality finish that looks like it was done by a seasoned pro. This guide is designed to walk you through the project with a strategic approach, giving you the foresight needed to tackle the job with real confidence.
The Core Principles of Cabinet Installation
The secret to any great cabinet install lies in a few foundational principles that professionals live and die by. It all starts with establishing a perfectly level baseline that wraps around the entire room. This single line becomes your unwavering point of reference, making sure every cabinet hangs straight, even if your floors have other ideas.
From there, the name of the game is making sure every single cabinet is perfectly plumb (that's vertically level) and level (horizontally, of course). It might feel tedious, but this is what prevents those frustrating misaligned doors and guarantees your countertops will sit perfectly flat later on.
As you get into the thick of it, it helps to keep the big picture in mind. Thinking about all the elements of a dreamy kitchen renovation will ensure your new cabinets blend beautifully with your overall vision. Think of this as your project briefing, getting you ready for every phase.
Pro Tip: Always, always hang your upper cabinets first. It might seem counterintuitive, but it gives you unobstructed access without having to lean awkwardly over the base cabinets. It’s safer, easier, and just plain smarter.
Cabinet Installation Phases and Essential Tools
To help you get organized, it’s best to break the project down into distinct phases. Before you even think about picking up a cabinet, you need to have the right tools ready to go—this is non-negotiable and will make every step feel infinitely smoother. This table lays out a clear roadmap from start to finish.
| Installation Phase | Objective | Essential Tools |
|---|---|---|
| Preparation & Layout | Create accurate guidelines for all cabinets | Tape Measure, 4-Foot Level, Laser Level, Stud Finder |
| Hanging Upper Cabinets | Securely mount wall cabinets starting from a corner | Drill, Cabinet Screws, Clamps, Temporary Ledger Board |
| Setting Base Cabinets | Level and secure base cabinets on the floor | Shims, Level, Drill, Clamps, Cabinet Screws |
| Finishing Touches | Install doors, hardware, and trim for a polished look | Screwdriver, Hardware Jig, Miter Saw |
Having this overview in front of you helps you visualize the entire workflow, so you can gather everything you need and tackle the job one logical step at a time.
Mastering Your Kitchen Layout and Wall Prep

A professional cabinet installation isn't just about driving screws—it's built on a rock-solid foundation of prep work. This is where you get your hands dirty, creating a foolproof template right on your walls to guarantee every cabinet hangs securely and looks perfectly aligned. Skip this, and you're just asking for trouble later.
The very first thing you need to do is find the absolute high point of your floor. Trust me, almost every floor has a slight slope, and starting from the highest spot prevents major leveling headaches down the road. Once you find it, measure up 34.5 inches (the standard height for base cabinets) and draw a dead-level line around the room. This line is now your new "floor."
Mapping Your Cabinet Layout
With your base cabinet line established, it's time to map out the uppers. From that first line, measure up another 19.5 inches and draw a second level line. This marks where the bottom of your wall cabinets will sit, giving you that standard 18-inch backsplash area. For a deeper dive into planning these crucial spaces, check out our guide on creating a functional kitchen cabinet design layout.
Next, grab a stud finder and locate every single wall stud. Mark the center of each one with a vertical line that crosses both your upper and lower layout lines. These marks are non-negotiable—they are the only places you should anchor your cabinets for a truly secure installation. If you're working off a set of plans, knowing how to read blueprints is a huge advantage here for ensuring everything lands exactly where it should.
Takeaway: Your level lines and stud marks are the most important part of the entire installation. Rushing this prep work is the single biggest mistake you can make. Take your time, double-check everything, and be precise.
Preparing for Real-World Challenges
Even with perfect lines, you have to be ready for what the real world throws at you. Houses settle, and walls are rarely perfectly plumb or flat.
Here’s what to look for:
- Out-of-Plumb Walls: Put your level on the wall vertically. If it leans in or out, you'll need to have shims ready to fill those gaps behind the cabinets when you install them.
- Bowed Walls: Hold a long straightedge against the wall. Any significant dips or bows will also require shimming to make sure the cabinets sit flat and don't get torqued out of shape.
This attention to detail is what separates a DIY job from a professional one. As more and more homeowners opt for modern, customized kitchens, getting these fundamental prep steps right has become absolutely essential for achieving that high-end finish.
Securely Hanging Your Wall Cabinets
With your layout lines marked and studs located, you're ready to get the wall cabinets up. There's a reason the pros always tackle the uppers first: it gives you wide-open access without having to lean over base cabinets. It’s just safer and a whole lot less awkward.
Your secret weapon for this part of the job is a temporary support ledger. This is simply a straight 1×4 board you screw to the wall along the bottom line you marked for your upper cabinets. Think of it as a temporary shelf. It holds the full weight of the cabinet, freeing you up to focus on getting it perfectly level and plumb. If you're working solo, this trick is an absolute game-changer.
This quick visual breaks down the simple but critical prep work you need to do before a single cabinet goes on the wall.
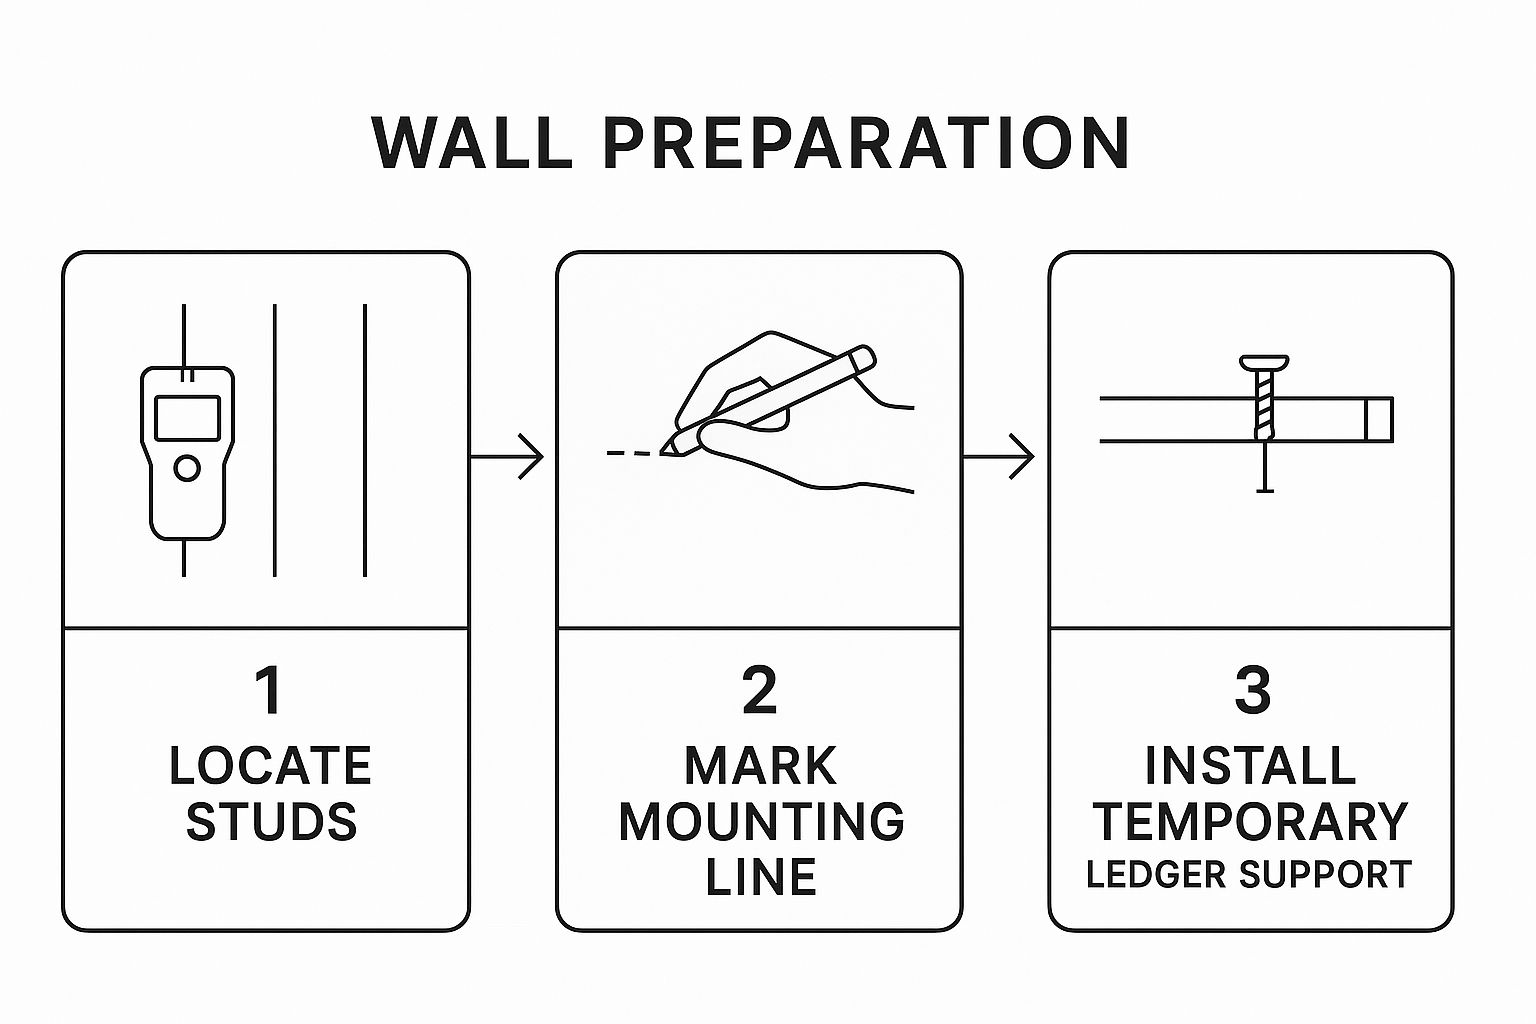
Following this sequence—finding studs, drawing lines, and installing the ledger—creates a solid, foolproof foundation for a professional-looking installation.
Positioning and Securing the First Cabinet
You'll want to start your installation in a corner. Hoist your first corner cabinet up and rest it right on that ledger board. Grab your level and check that it's perfectly plumb (that's vertically straight) and level from front to back. Walls are rarely perfectly flat, so if you see gaps, slide shims between the cabinet back and the wall at the stud locations until it’s perfectly plumb.
Once it’s sitting pretty, drive 3-inch cabinet screws through the cabinet's mounting rail and into the wall studs. A good rule of thumb is to use at least two screws per stud—one near the top and one near the bottom. Don't crank them down all the way just yet; leave them slightly loose to allow for tiny adjustments as you add more cabinets.
The support ledger does all the heavy lifting for you. It guarantees your cabinets start at the right height and stay aligned while you work, taking most of the muscle and guesswork out of the equation.
With the first cabinet hung, it's time to add its neighbor. Lift the next cabinet into place and use clamps to join the face frames of the two cabinets together. The goal here is to get the fronts perfectly flush with each other. Once they're lined up, screw the cabinets together through the stiles (the vertical parts of the face frame) before you secure the second cabinet to the wall. This methodical approach is how you get that seamless, unbroken look.
Before you start hanging, you want to be absolutely sure your prep work is flawless. For a quick refresher, check out our expert guide to measure kitchen cabinets to double-check your work.
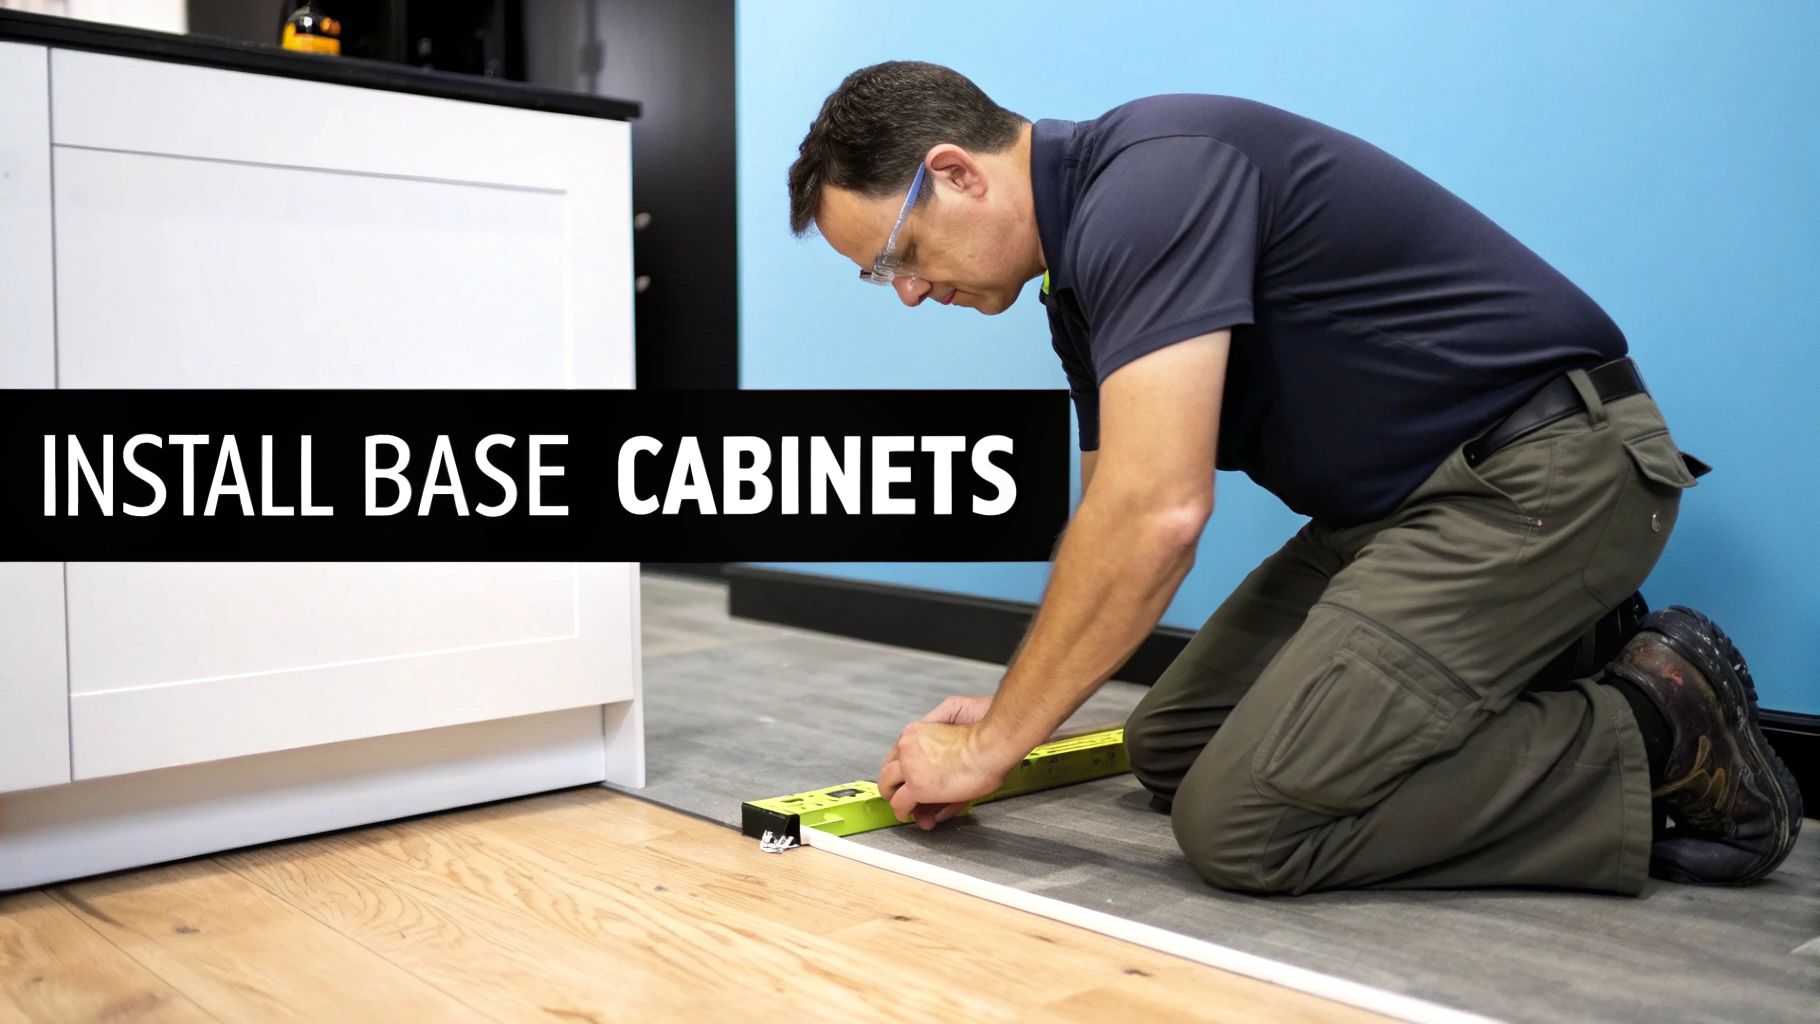
Setting the Base Cabinets for a Solid Foundation
With your wall cabinets hung and looking sharp, it’s time to move to the floor and build out the base. This is where the kitchen really starts to take shape. Getting this part right is all about building a rock-solid foundation, and it all begins from that high point on the floor you found earlier.
Grab your first base cabinet—I always recommend starting with a corner unit if you have one—and set it roughly in position.
Now, your best friends for this phase are a good level and a pack of shims. Place your level right on top of the cabinet and check it both front-to-back and side-to-side. You're aiming for perfectly level. If the bubble isn’t dead center, slide shims under the low spots until it is. Don't rush this. A perfectly level base is non-negotiable if you want your countertops to sit flat and your doors to hang straight.
Aligning and Joining Cabinets
Once that first cabinet is perfectly level and sitting pretty on your layout line, you can bring in its neighbor. Set the second cabinet next to the first, and repeat the leveling process with your shims. Once it’s also level, clamp the face frames of the two cabinets together. You’re looking for a tight, completely flush seam between them.
Before you even think about screwing the second cabinet to the wall, you need to join it to the first one. This is key to creating a single, strong unit.
- Drill pilot holes through the stiles (the vertical wood pieces on the face frame).
- Use 1 1/4-inch cabinet screws to pull the two face frames together.
- Keep a close eye on the faces as you tighten the screws—you want them to stay perfectly flush.
This process turns individual boxes into a unified block of cabinetry. After they’re joined, you can secure that second cabinet to the wall studs using 3-inch screws, just like you did with the first one. Keep repeating this process—level, clamp, join, and secure—for every base cabinet as you work your way around the kitchen.
Take your time leveling each cabinet. A base that is even slightly off can cause a cascade of problems, from uneven countertop support to misaligned doors and drawers. Precision here pays off immensely in the final look and function of your kitchen.
It’s no surprise that with the home renovation boom, knowing how to do this right is a valuable skill. In fact, the global kitchen cabinet installation market is growing, driven by new construction and homeowners looking to upgrade. This just shows there's a steady demand for quality installation, whether you're a pro or a determined DIYer. You can read more about kitchen cabinet market trends on datainsightsmarket.com.
Perfecting the Final Details and Hardware
The difference between a pretty good cabinet installation and a great one truly comes down to the finishing touches. This is the stage where your collection of boxes finally transforms into what looks like a seamless, custom-built kitchen. It all starts by tackling those pesky, inevitable gaps between your cabinets and the walls.
This is where filler strips become your best friend. Carefully measure the widest part of any gap, then cut your filler strip to fit. You’ll often need to scribe a slight angle to get a perfect match against an uneven wall, which is completely normal in most homes. For a clean, invisible look, secure the strip from inside the adjacent cabinet.
Hanging Doors and Attaching Hardware
With the cabinet boxes locked in, it’s time for the most satisfying part: hanging the doors and drawer fronts. I always recommend attaching the hinges to the doors first, then mounting the assemblies to the cabinet frames. Most modern hinges offer three-way adjustability, and learning to use it is crucial for achieving that perfect, professional alignment.
- Up and Down: Loosen the screws connecting the hinge plate to the frame. This allows you to shift the door vertically.
- Left and Right: A turn of the main hinge screw moves the door side-to-side, letting you create those uniform gaps.
- In and Out: A rear screw adjusts the door's depth, making sure it sits perfectly flush with the cabinet face.
Take your time with hinge adjustments. I can't stress this enough. Small, incremental tweaks are the secret. Step back frequently to check your work from a distance, because you're aiming for consistent 1/8-inch gaps around every single door and drawer front.
Once every door is hanging perfectly, the final step is installing your hardware. This is the jewelry of your kitchen, and consistent placement is absolutely non-negotiable. A simple hardware jig is a low-cost tool that I consider essential—it guarantees every knob and pull is installed in the exact same spot, delivering that polished, high-end look. As you consider these final elements, our guide on how to choose cabinet hardware can help you select the perfect style.
As you wrap up, you might also be integrating new appliances. For instance, if you're outfitting a new sink base cabinet, understanding the process for a new garbage disposal installation can be a huge help.
Tackling Common Cabinet Installation Questions
No matter how airtight your plan is, you're almost guaranteed to hit a snag or two during a cabinet installation. It just comes with the territory. Knowing how to handle these common hiccups ahead of time can be the difference between a smooth project and a major headache.
Let's talk about one of the most frequent challenges: walls that aren't perfectly straight. You'll find that most walls bow or aren't perfectly plumb. Your first instinct might be to just screw the cabinet tight and force it to conform, but don't do it! Instead, grab some thin wood shims. Slide them into the gaps between the cabinet back and the wall right where the studs are. This keeps the cabinet itself perfectly level and square, which is what really matters.
Working Around Plumbing and Flooring
Cutting into a brand-new cabinet to make room for plumbing or electrical lines can definitely feel a little nerve-wracking. The secret here is to measure meticulously. Once you've carefully marked where the pipes or outlets need to come through on the back of the cabinet, use a hole saw or a jigsaw for the cuts. Here's a pro tip: make the hole just a little bit bigger than you need. That extra wiggle room makes lining everything up a whole lot easier.
A big debate I see all the time is whether to install the flooring before or after the cabinets. The pros will almost always tell you to put the flooring in first. This is especially critical for floating floors like LVT or laminate. It just gives you a much cleaner, more professional finish and prevents you from "trapping" the floor, which can cause huge problems down the line if you ever decide to remodel again.
Ultimately, getting comfortable with these real-world curveballs is a huge part of learning how to install kitchen cabinets like a pro. Being ready for imperfect walls and knowing the right order of operations for flooring and cabinets will give you the confidence you need to get a fantastic result.
Ready to bring your dream kitchen to life with cabinetry that’s built to last? The experts at Sinclair Cabinetry inc have over 35 years of experience crafting and installing high-quality, real wood cabinets. Explore our custom kitchen solutions and get started today!