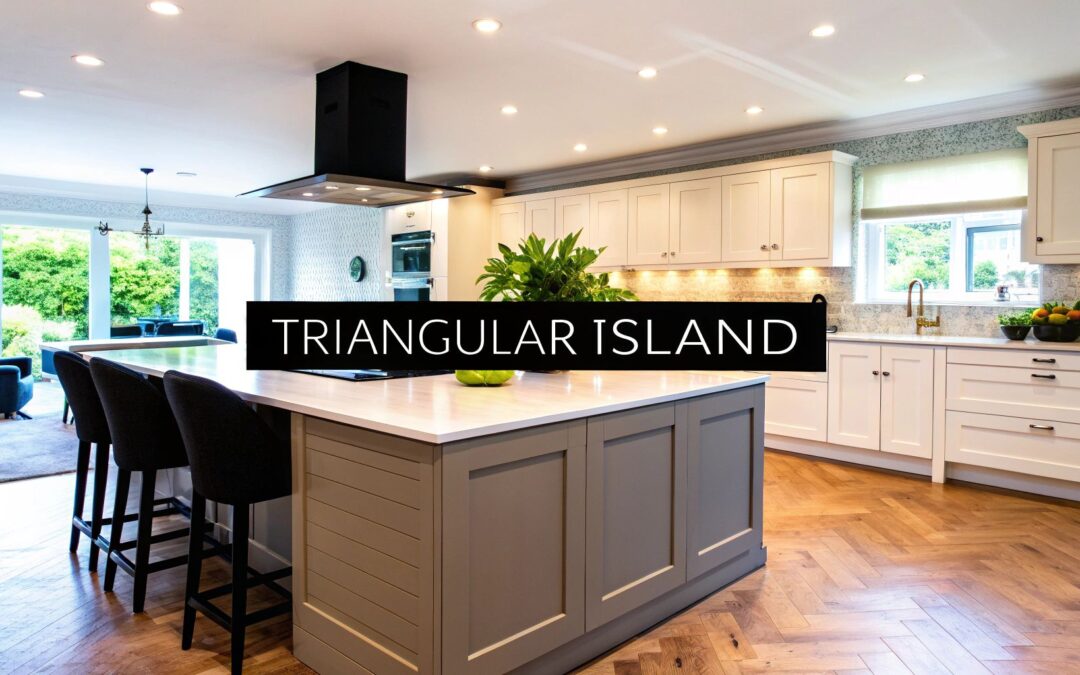
A triangular kitchen island is one of those design choices that feels both unexpected and incredibly smart. More than just a striking centerpiece, it's a functional powerhouse, especially in U-shaped layouts or open-concept spaces where a typical rectangular island just doesn't feel right. It’s a clever solution that can turn an awkward corner into the efficient hub of your kitchen.
Why a Triangular Kitchen Island Might Be Your Perfect Fit
Moving past the standard boxy island is a big step, but a triangular shape offers some serious ergonomic perks. This isn’t just about making a visual statement; it’s a strategic move to solve common layout headaches and completely change how you move and work in your kitchen. For many homeowners I've worked with, it's the missing piece that finally makes their kitchen feel open, intuitive, and truly efficient.
Here are a few ways this unique configuration can completely transform your kitchen:
- Unlocks Traffic Flow: The angled sides of a triangle naturally direct foot traffic, preventing the frustrating bottlenecks that bulky rectangular islands often create. This is a game-changer in smaller or oddly shaped kitchens.
- Supercharges the Work Triangle: It can line up perfectly with the classic kitchen work triangle—the path between your sink, stove, and refrigerator—creating a much more direct and efficient workspace.
- Creates Clear, Distinct Zones: The three sides are perfect for dedicating to different tasks. Imagine one side for prep, another for a casual seating nook, and the third as a storage command center. It brings a natural order to a busy, multi-use space.
The Science of an Efficient Layout
The real magic of a triangular island is how it works with the core functions of your kitchen, not against them. Kitchen planning guidelines have long championed the work triangle, recommending the total distance between its three points be between 13 and 26 feet. What's fascinating is how a well-placed triangular island fits into this. Modern design analyses show it can cut down the steps you take during meal prep by an estimated 10–20% compared to a poorly positioned linear island.
It’s all about creating shorter, more direct paths between your main appliances and prep surfaces. The triangular shape does this instinctively, saving you time and energy every single day. It turns a kitchen from a series of separate stations into one cohesive, fluid workspace.
Before you get too deep into the specifics, it's always a good idea to browse some general kitchen design ideas to get your creative juices flowing.
But if you’re looking for a solution built precisely for your kitchen's unique challenges, exploring a custom kitchen island design is your best next step. A bespoke approach guarantees your island isn’t just another piece of furniture, but the true functional heart of your home.
Measuring Your Kitchen for a Triangular Island
Before you get too attached to a particular design, we need to talk about the most crucial step: making sure a triangular island will actually work in your kitchen. This is about more than just square footage. It's about preserving the easy, natural movement that makes a kitchen a joy to be in. An island that creates a traffic jam, no matter how beautiful, is a design fail.
The first rule of kitchen design is giving yourself enough room to breathe—and work. You need clear, safe walkways. We, along with most designers, recommend an absolute minimum of 42 inches of clearance between the island and any surrounding counters, appliances, or walls.
If you have a busy household or often have more than one person cooking, pushing that to 48 inches is a game-changer. That extra space ensures appliance doors can swing open all the way and people can walk past without a constant chorus of "excuse me."
Visualize the Footprint
Measurements on a blueprint can be really deceiving. The single best way to get a feel for how a triangular island will impact your space is to map it out right on your floor. Seriously, grab a roll of painter's tape and outline the island's proposed dimensions.
This little trick is incredibly revealing. You can physically walk around the outline, mimicking your daily routine. Swing open the refrigerator door. Pretend to load the dishwasher. Carry an imaginary pot from the sink to the stove. Does the corner of the taped-off triangle create a bottleneck? This hands-on test is the most effective way to catch potential flow problems before you’ve committed a dollar.
This diagram shows the classic kitchen work triangle in action—a concept a triangular island is perfectly suited to enhance.
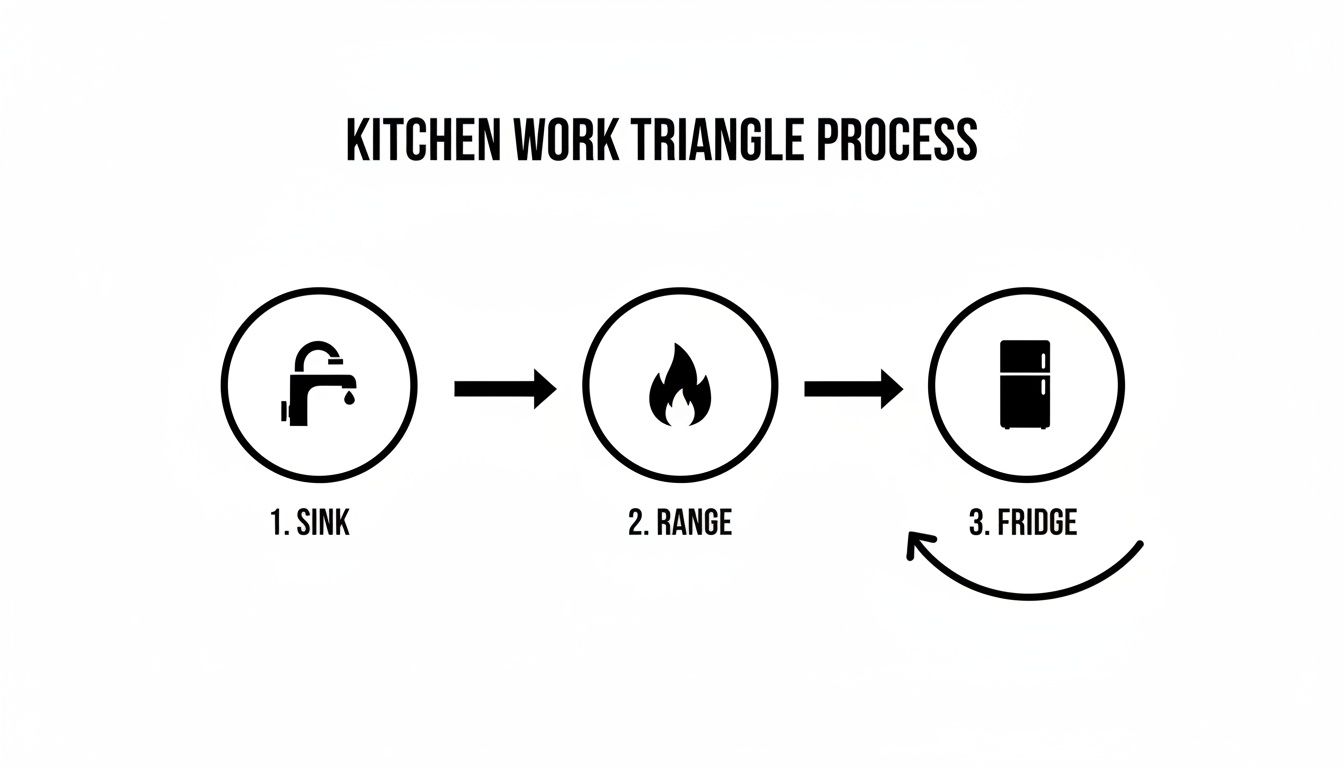
As you can see, the path between the sink, range, and fridge should be clear and efficient, which is exactly what this island shape can achieve.
Solving Layout Challenges
A triangular island isn't just a quirky aesthetic choice; it's a brilliant problem-solver for specific layouts where a standard rectangle would feel clunky.
- For U-Shaped Kitchens: It opens up the center of the room, getting rid of that "boxed-in" feeling. It creates a central prep station that’s easy to get to from all three sides.
- For Open-Concept Spaces: Its unique shape can act as a subtle but effective divider, defining the kitchen area from the living or dining room without putting up a visual wall.
To help you get started, here is a quick guide to the clearances we follow in our designs.
Minimum Clearance Guidelines for Kitchen Islands
| Area of Clearance | Recommended Minimum Distance (Inches) | Reason for Clearance |
|---|---|---|
| Main Walkways/Work Aisles | 42" | Allows one person to work or walk comfortably. |
| Two-Cook Kitchens/Busy Paths | 48" | Provides enough space for two people to pass or work back-to-back. |
| Seating Area (Counter Height) | 36" | Allows for seated guests with room for others to walk behind. |
| Appliance Door Swing | 36" – 48" | Ensures doors (oven, dishwasher, fridge) can open fully without blocking traffic. |
These numbers are a starting point, but every kitchen has its own unique quirks and flow.
By thinking carefully about its placement, an island’s angled sides can guide foot traffic smoothly around the main work zone instead of obstructing it. It becomes a functional sculpture that actually improves the room's natural pathways.
Getting these measurements right is where the art of kitchen design meets the science of ergonomics. To make sure you capture every important dimension, we've put together a detailed guide on the essential kitchen design measurements. It’s the same step-by-step process we use to ensure a flawless fit.
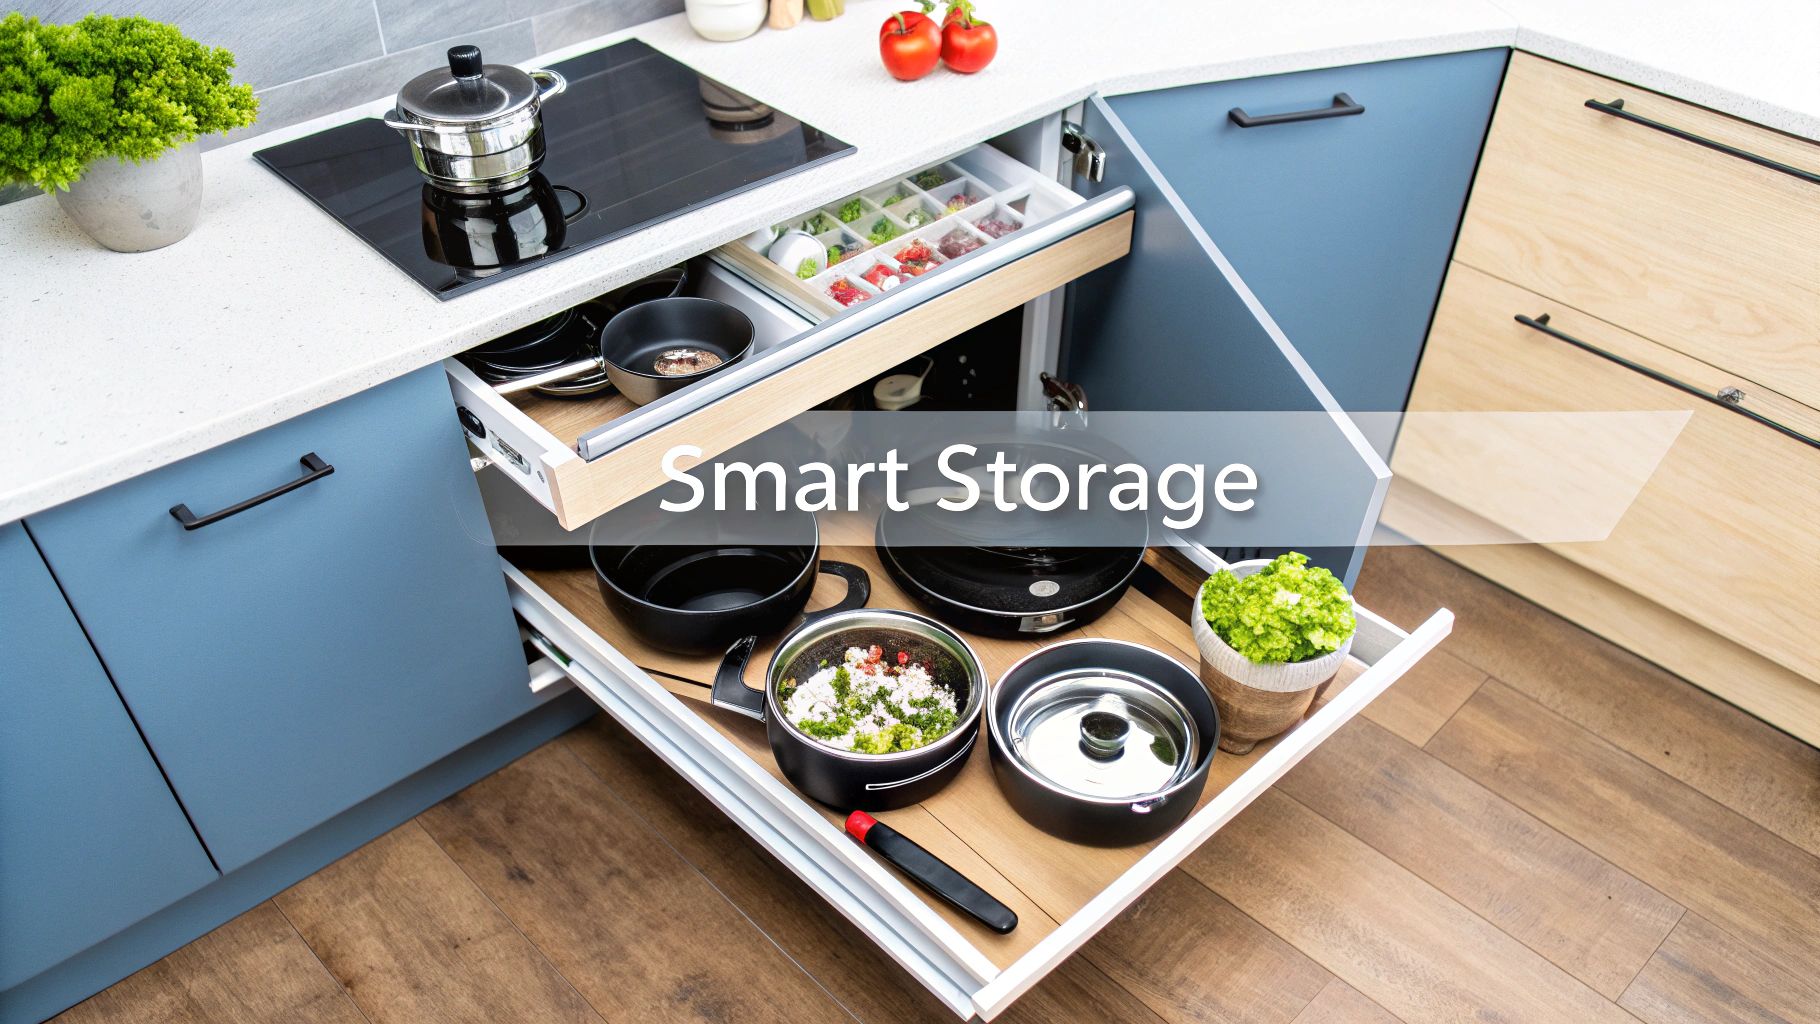
Designing Smart Storage for Angled Cabinetry
The real beauty of a triangular island for kitchen design isn't just its striking shape, but the incredible storage potential hiding inside its angles. Standard rectangular islands often leave you with awkward, hard-to-reach corner cabinets. A triangular island, on the other hand, turns this problem on its head, transforming those geometric challenges into highly functional, bespoke storage zones.
This is where custom cabinetry truly shines. Instead of forcing standard boxes into an unconventional footprint, we design every cabinet and drawer to maximize the unique depths and corners created by the island's three sides. It’s an opportunity to create a place for everything, making your kitchen more organized and a genuine joy to use.
Maximizing Every Angle with Custom Solutions
Let’s be honest: the non-traditional shape of a triangular island means off-the-shelf solutions simply won't cut it. Bespoke design allows for innovative storage that perfectly fits the space.
- Deep Angled Drawers: That "point" of the triangle, which might seem like wasted space, is perfect for extra-deep drawers. These are ideal for storing bulky pots, pans, and small appliances that are otherwise tough to tuck away.
- Pull-Out Organizers: We can fit the narrower sections of the island with slim, vertical pull-outs for spice racks, baking sheets, or cutting boards. These clever mechanisms ensure no sliver of space goes unused.
- Appliance Garages: A custom-built appliance garage with a lift-up or retractable door can be seamlessly integrated into one of the island's sides, keeping your countertop clear of clutter.
The goal is to see the angles not as a limitation, but as a blueprint for smarter storage. By thinking creatively, you can design a system where your most-used items are exactly where you need them, precisely when you need them.
Tackling tricky corners is a common puzzle in kitchen design, but with the right approach, they can become incredibly useful. You can learn more about turning these awkward spots into functional assets by exploring our guide to cabinet corner solutions.
Dedicating Each Side to a Specific Function
One of the most practical ways to organize a triangular island is to assign a primary role to each of its three faces. This creates distinct "zones" that support different activities, streamlining your kitchen’s workflow and preventing traffic jams.
Think about it in a real-world scenario:
- The Prep Side: This face, likely the longest and closest to your main work triangle, is all about food preparation. It might feature a large, uninterrupted countertop with deep drawers below for mixing bowls and a pull-out bin for compost and recycling.
- The Seating Side: The side facing your living or dining area becomes the social hub. We can build in a countertop overhang for bar stools and shallow cabinets underneath, perfect for storing placemats, napkins, or even homework supplies.
- The Utility Side: The third side could house a secondary prep sink, a built-in microwave drawer, or a wine fridge. This keeps specialized tasks contained and away from the main cooking action.
This zoning approach makes the island incredibly intuitive. Family members and guests know exactly where to sit without getting in the cook's way, and all your tools are organized by task. It’s a thoughtful design strategy that transforms your triangular island from a simple countertop into the command center of your kitchen.
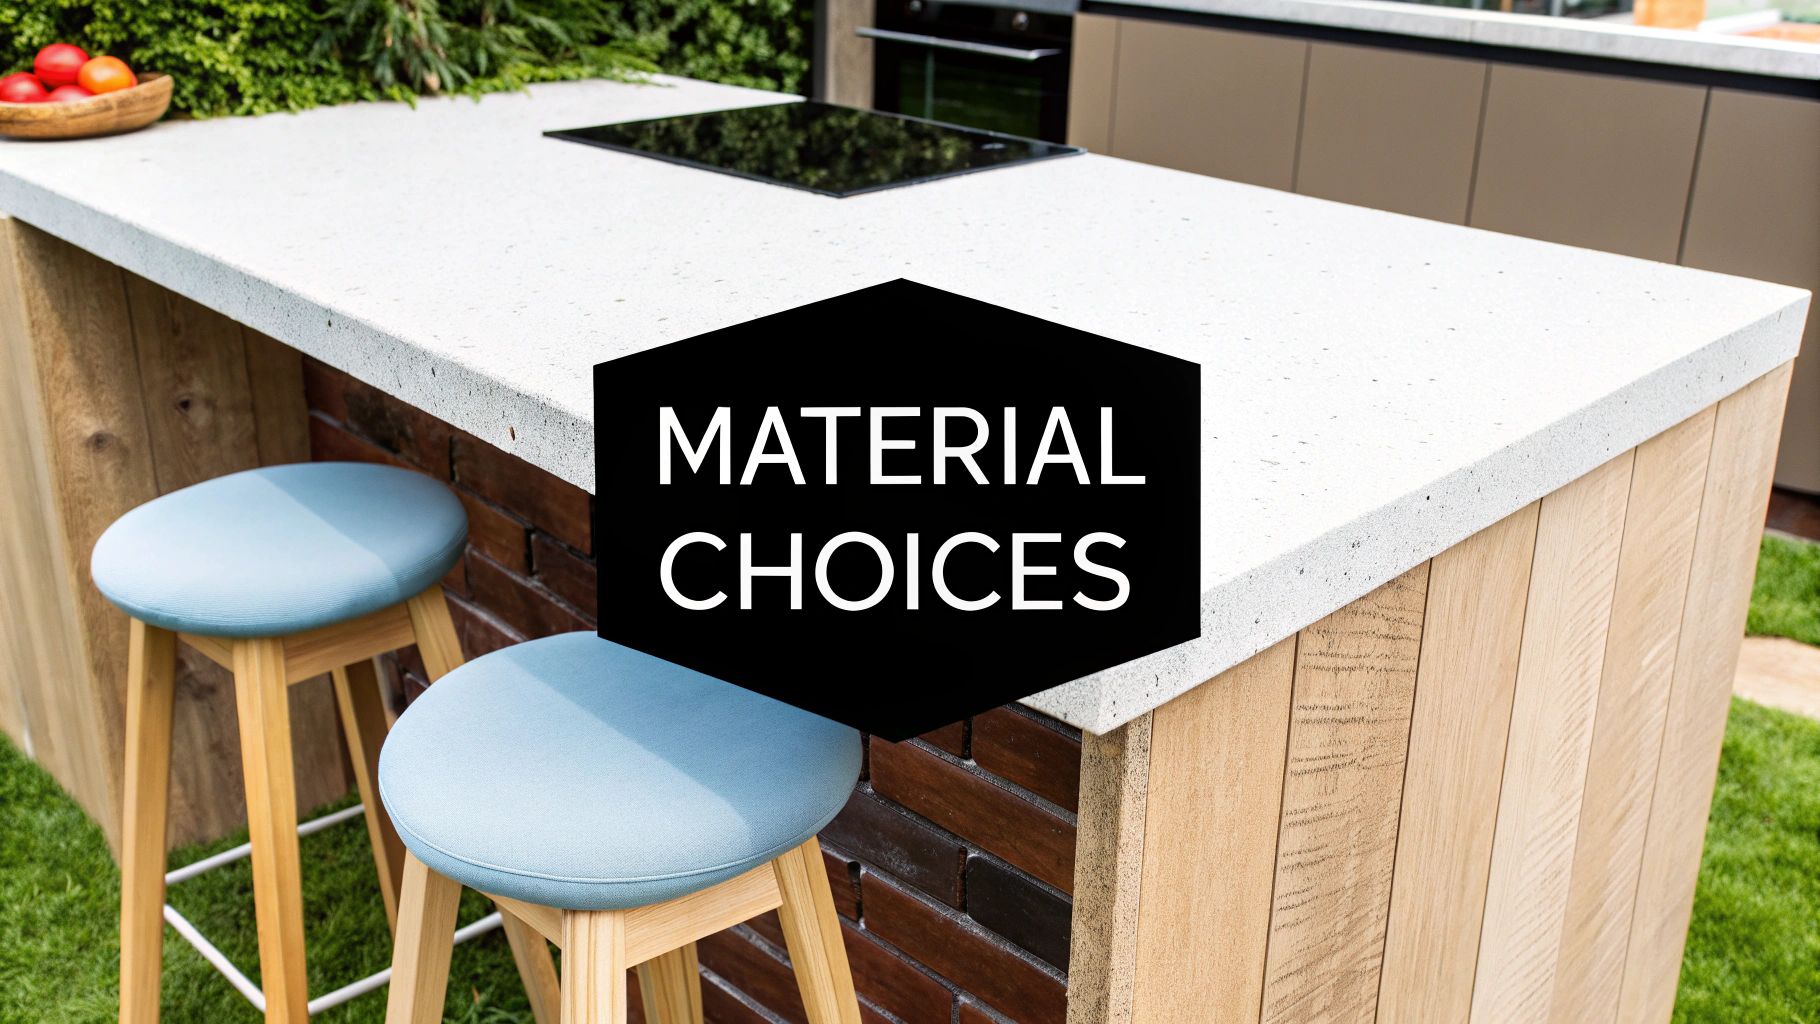
Choosing Materials, Finishes, and Seating
This is where the magic really happens. The materials you choose will give your triangular island its soul, turning it from a simple workspace into the heart of your kitchen. The unique angles of this design demand careful thought—it’s not just about looks, but about expert craftsmanship. Your countertop and cabinetry are going to either highlight those crisp, geometric lines or soften them for a more relaxed, organic vibe.
Ultimately, the goal is to create a cohesive look that feels completely integrated with the rest of your kitchen. Whether you’re going for a bold statement piece or something that blends in seamlessly, the right mix of materials, finishes, and seating is what pulls it all together.
Selecting the Perfect Countertop
Let's be honest: the countertop is the star of the show. It's the most visible part of your island and takes the most abuse. The material needs to be tough, but it also has to be workable enough to handle the precise cuts a triangular shape demands.
- Quartz: This is a fantastic choice for a clean, contemporary look. It's incredibly durable and non-porous, but the real win for a triangular design is its uniform pattern. This makes it much easier to create seams that are practically invisible.
- Granite: Nothing beats granite for a one-of-a-kind, natural stone look. It’s absolutely timeless. The challenge here lies in its natural veins and patterns; you’ll need an expert fabricator to make sure the seams along the angles match up beautifully.
- Butcher Block: If you want to add warmth and soften the island's geometry, a solid wood countertop is a perfect choice. It’s also incredibly forgiving—you can sand and refinish it over the years to keep it looking fresh.
For a triangular island, a skilled fabricator isn't just a good idea—it's non-negotiable. Their ability to minimize seams and execute flawless cuts is what will make your island look exceptional, not just acceptable.
Cabinetry Finishes That Complement the Shape
The cabinetry is the foundation of your island’s entire personality. The finish you pick can completely change its presence in the room. A painted finish in a striking color can turn your triangular island for kitchen into an immediate focal point, while a classic wood stain can tie it into a more traditional or rustic design.
At Sinclair Cabinetry, we work with real wood because it offers both timeless beauty and serious longevity. A smooth, light-colored finish can make the island feel airy and expansive. On the other hand, a darker wood grain with a rich texture adds a sense of depth and permanence.
Designing an Inviting Seating Area
Seating is what transforms your island from a prep station into a social hub where friends and family actually want to hang out. A triangular shape opens up some really interesting possibilities for seating arrangements. In most cases, the longest side of the triangle—the hypotenuse—is the perfect spot for an overhang to tuck in a few bar stools.
This layout is also incredibly efficient. Recent industry data shows that a right-angled triangular island can comfortably seat two to three people while using 15–30% less floor space than a rectangular island designed for the same number. Why? The shape naturally separates the prep and seating zones without demanding the wide, clunky clearance paths a traditional island requires. North America, which makes up about 42% of the global market, is catching on to these smart, space-saving designs. You can dive deeper into the 2025 kitchen island design trends on NewHomeSource.com to see what else is on the horizon.
By gently curving the overhang or choosing backless stools that slide completely underneath, you can create a comfortable gathering spot that never gets in the way of the kitchen's main traffic flow.
Integrating Utilities and Planning Your Lighting
A stunning triangular island is more than just a beautiful centerpiece; it has to work for you. That means getting the power, water, and light right where you need them. It's easy to get caught up in the visuals, but planning for these technical details early is a non-negotiable. Running wires and pipes under the floor and into the island is the hidden framework that brings all the modern conveniences to life.
The best way to start is by thinking through exactly how you’ll use each side of your new island. Are you picturing a dedicated spot for charging laptops and phones? Will you be pulling out a stand mixer or blender regularly? Answering these questions now will tell you exactly where your electrical outlets need to go—and how many you’ll need.
Planning Electrical and Plumbing
These days, a kitchen without accessible power just doesn’t function. For a super clean, uninterrupted countertop, we often recommend installing pop-up electrical outlets. These clever fixtures stay recessed and hidden until you need them, preserving the sleek lines of your triangular design without sacrificing convenience.
If your dream island includes under-counter appliances like a microwave drawer or a wine fridge, you'll need dedicated wiring for those, too. It’s absolutely critical to map this out with your electrician to ensure each appliance has the correct amperage and its own circuit if needed.
One of the most common mistakes I see is underestimating the need for outlets. People plan for one or two, but a busy island can easily demand three or four at once—think blending a smoothie while a tablet charges and someone else plugs in a laptop. My rule of thumb? Always plan for one more outlet than you think you'll need. You’ll thank me later.
Adding a small prep sink is another game-changing upgrade that makes an island so much more functional. This, of course, means running hot and cold water supply lines and a drainpipe. Coordinating this job between your cabinet installer and plumber is vital to make sure everything lines up perfectly before the countertops go on. To keep all these moving parts straight, using an essential kitchen installation checklist can be a real lifesaver.
Illuminating Your Workspace
The right lighting is what transforms your island from a piece of furniture into a safe, inviting, and truly functional workspace. A single, central light fixture just won’t cut it with a triangular island; it almost always casts weird shadows on the corners of your work surface.
A much better approach is to layer your lighting. Here are a few strategies that work beautifully:
- Pendant Lights: A series of two or three smaller pendants hung in a triangle or in a line along the longest side can provide gorgeous, targeted illumination right where you need it.
- Recessed Lighting: Installing several recessed or "can" lights in the ceiling directly above the island is a great way to guarantee the entire surface is evenly lit without any dark spots.
- Under-Cabinet Lighting: If your design includes an elevated tier or open shelving, tucking some subtle LED strip lighting underneath can add both practical task lighting and a lovely ambient glow.
When you put this much thought into your utilities and lighting, you’re not just building an island. You’re creating a dynamic, multi-functional hub for your entire kitchen.
Common Questions About Triangular Kitchen Islands
When you're thinking about a design as unique as a triangular kitchen island, it’s completely normal to have a few questions pop into your head. It’s a brilliant shape for solving tricky layout problems, but you absolutely want to get the details right before you commit.
Let's walk through the most common questions we hear from homeowners. The goal here is to clear things up and give you the confidence that you're making a great choice.
Is a Triangular Kitchen Island More Expensive?
This is usually the first question on everyone's mind, and the answer is: not necessarily. The cost is often very close to what you'd pay for a custom rectangular island of the same size and quality. What really drives the price are your choices in countertops, wood species, how complex you want your storage, and whether you're adding a sink or electrical outlets.
Sure, the angled cuts might require a bit more finesse from your cabinet maker and countertop fabricator. But sometimes, the unique shape actually allows for a more efficient use of materials, which can help balance out the cost.
Think of a triangular island for kitchen layouts as an investment in a perfectly tailored solution for your space. Its real value comes from its superior function and the way it’s custom-fit to your home.
The key is to focus on the end result: a highly functional, beautiful centerpiece that solves a specific layout challenge. The cost is a reflection of the custom work, not just the shape itself.
What Is the Best Countertop Material for This Shape?
The best material really boils down to your lifestyle and the aesthetic you're going for. For a triangular island, some materials just handle the angles and seams with more grace than others.
Here are a few top contenders we often recommend:
- Quartz: This is a fantastic choice. It’s incredibly durable, and its uniform patterns mean any seams where the pieces meet are nearly invisible, giving you a clean, precise look at the island’s angles.
- Granite: If you want one-of-a-kind, natural veining, nothing beats granite. It does require some careful planning with your fabricator to make sure the patterns flow beautifully across the seams.
- Butcher Block: A solid wood countertop is a wonderful way to add warmth and soften the island's geometric lines. It brings a really inviting, organic feel to the kitchen that many people love.
No matter what you choose, the most important thing is to work with a skilled fabricator. Someone who knows how to handle the angles and minimize seam visibility is essential for achieving that high-end, seamless finish.
How Do I Ensure It Looks Intentional and Not Awkward?
This is probably the most critical question of all. Getting it right comes down to two things: scale and placement. A triangular island needs to feel like a natural, integrated part of your kitchen's flow, not like an obstacle that was just dropped in the middle.
It has to create clear, generous pathways for traffic and align logically with your main work zones—the sink, stove, and fridge. One tip I always give clients is to use painter's tape to mark the island's footprint on the floor. This is a non-negotiable step. It lets you physically walk around it and get a real feel for the flow.
Ultimately, professional design is the surest way to guarantee a beautiful result. Using 3D renderings, a designer can show you exactly how the island will look and function in your space, letting you fine-tune its proportions and position before a single piece of wood is cut.
At Sinclair Cabinetry inc, we use state-of-the-art design software to bring your vision for a custom triangular island to life, ensuring it's both stunning and perfectly functional. Explore our custom cabinetry options and schedule a consultation today.