
Before you even think about grabbing a screwdriver, you need to play detective. Why is your cabinet door acting up? A door that sags, won't quite shut, or scrapes against its neighbor is telling you something specific about its hinges. More often than not, the fix is a simple adjustment.
Diagnosing Your Cabinet Hinge Problems
Figuring out the real problem is the most important part of any cabinet hinge repair. It saves you from chasing your tail and ensures you get it right the first time without accidentally making things worse. A quick look will usually tell you if you're dealing with a loose screw, a bent hinge, or a stripped screw hole that's lost its grip.
Most issues fall into just a few buckets. If a door is hanging crooked or has an uneven gap, it’s probably a side-to-side or height problem. If it swings open on its own, the depth setting might be off, or the closing mechanism is just worn out.
Of course, sometimes the hinge isn't the problem at all. If you suspect moisture has caused the wood to swell or twist, that's a whole different ballgame. For those situations, our guide on warped cabinet door repair has you covered.
Key Takeaway: Don't jump to conclusions and buy new hinges. Over 90% of the time, a few quick turns of a screwdriver is all it takes to solve common cabinet door problems, saving you a trip to the hardware store.
Common Issues and Their Causes
To get started, just open and close the door a few times. Watch it closely. Where does it stick? Where does it sag? This simple observation is all the diagnostic work you need to do, and it will point you straight to the solution.
This quick reference table should help you match what you're seeing with the most likely culprit.
Common Cabinet Door Problems and Likely Hinge Causes
This chart is your cheat sheet for diagnosing cabinet door issues. Just find the symptom you're experiencing to see the most common cause and what you should try first.
| Symptom | Likely Hinge Problem | First Action to Take |
|---|---|---|
| Door sags or hangs crooked | Loose mounting screws or height misalignment | Tighten all screws and adjust the height screw |
| Door won't stay closed | Depth screw is misaligned or hinge is bent | Adjust the depth screw; inspect hinge for damage |
| Door scrapes the frame or another door | Side-to-side alignment is off | Adjust the side-to-side screw to create an even gap |
| Door feels wobbly or loose | Screws are stripped in the wood | Fill the screw hole and re-drill for a secure fit |
Most of the time, the "First Action" listed here will solve your problem in just a minute or two. If it doesn't, you'll know it's time to dig a little deeper into the hinge itself.
Your Toolkit and How to Tell Your Hinges Apart
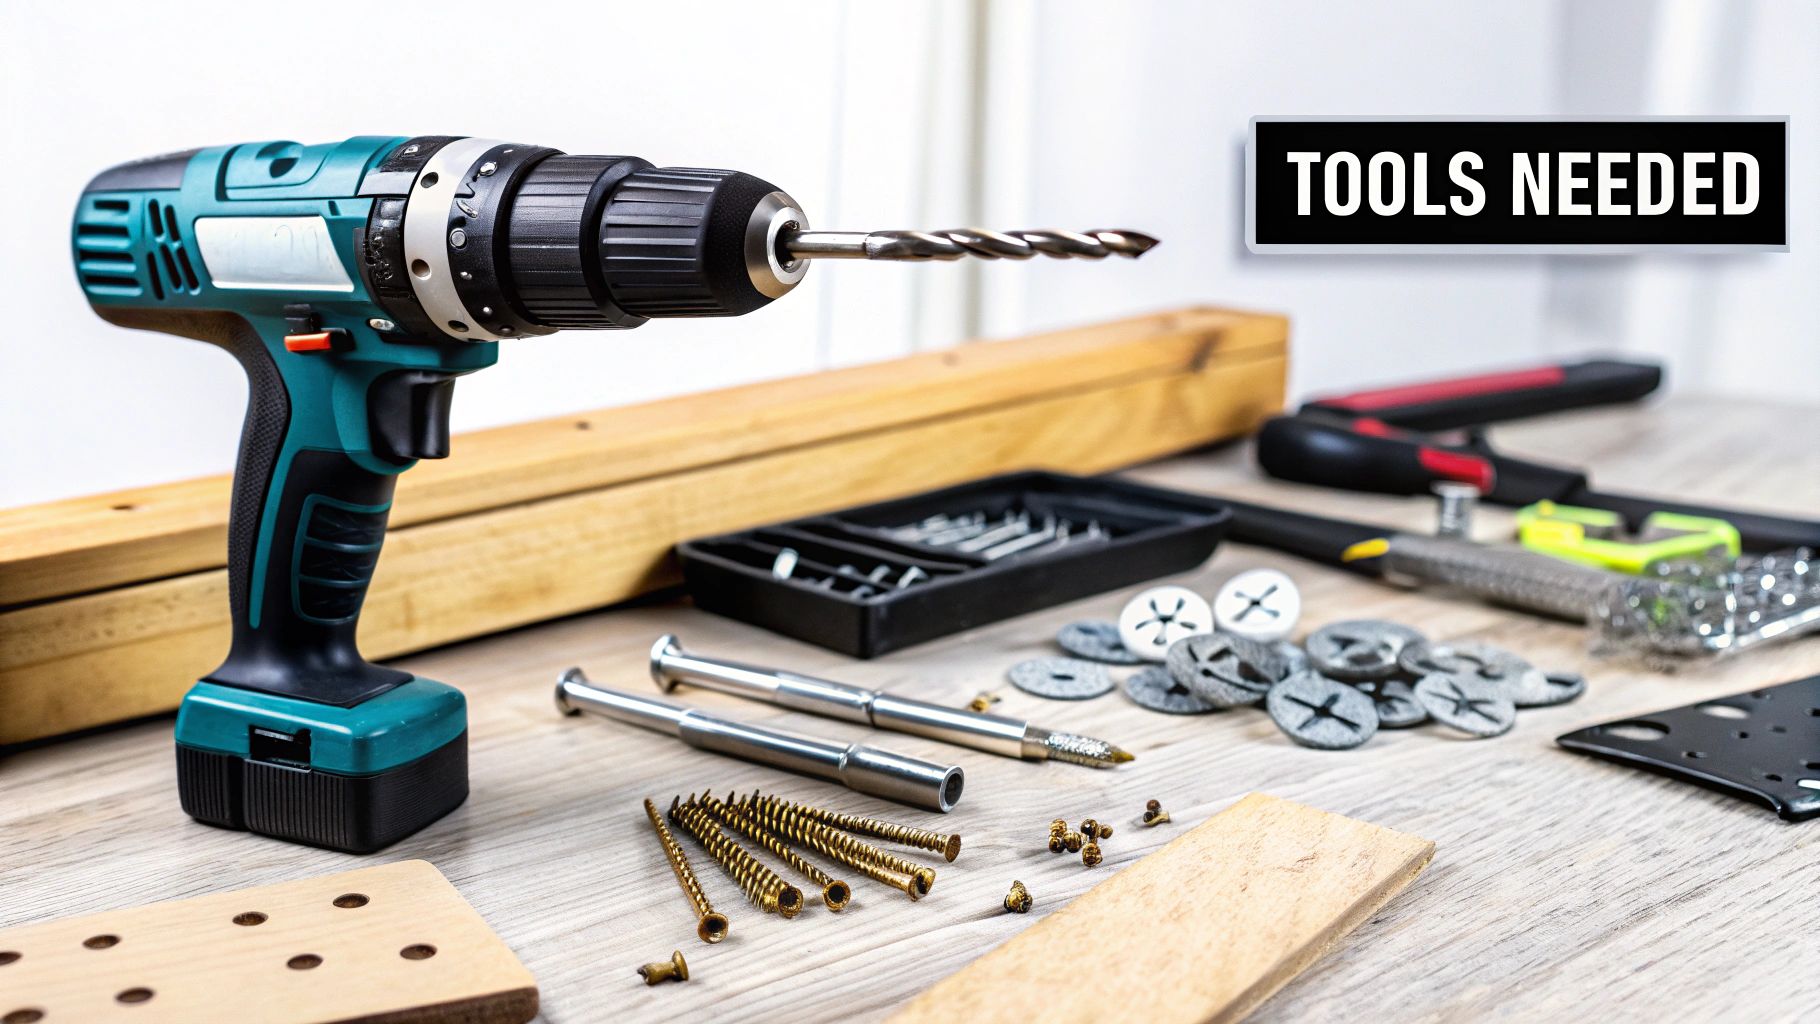
Before you even think about touching a screw, let's get you set up for success. A smooth fix is all about preparation, not brute force. The good news? You don't need a pro-level workshop for this. Most cabinet hinge jobs just require a few basic tools you probably already have lying around.
Your essential toolkit is pretty simple. The main thing you'll need is a good multi-bit screwdriver, since hinge screws come in different sizes, but a Phillips head will handle most of them. It’s also smart to grab a tape measure, a pencil for any new markings, and some wood filler just in case you run into a stripped screw hole—it happens to the best of us.
Pro Tip: Find a small bowl or magnetic tray for your screws. Trust me, there's nothing worse than hearing that tiny tink-tink-tink of a screw rolling away under the cabinet, lost forever. A simple container keeps everything in one place.
Assembling Your Hinge Repair Kit
To make this go as smoothly as possible, gather these items before you start:
- Screwdriver: A Phillips head is a must. A small flathead screwdriver can also be surprisingly handy for prying off old hinge covers or making tiny adjustments.
- Wood Filler or Toothpicks & Glue: This is the classic, old-school trick for giving screws a fresh, tight grip in a stripped hole.
- Drill with a Small Bit (Optional): You'll only really need this if you're installing a brand-new hinge and need to create fresh pilot holes.
- Tape Measure: Absolutely critical for making sure doors are aligned and new hinges are positioned perfectly.
Identifying Your Hinge Type
Knowing what kind of hinge you’re dealing with is half the battle, because the fix is completely different for each one. Most homes have one of two types: European (or concealed) hinges and traditional butt hinges.
European hinges are the ones you can't see when the cabinet door is closed. They’re hidden inside and offer a fantastic range of three-way adjustment. Butt hinges, on the other hand, are the simple, visible hinges you see along the cabinet frame. They get the job done but offer way less wiggle room for adjustments.
This difference is huge because it dictates exactly how you'll approach the repair. The entire cabinet hinge market, which is valued at around $1.9 billion, has really leaned into these modern, adjustable designs for a reason. If you're curious about all the different styles out there, our detailed guide on kitchen cabinet hinge types is a great place to start. Understanding how we got from simple metal flaps to today's sophisticated hardware makes it clear why modern adjustments are so specific. You can learn more about this growing market from recent industry analysis.
How to Adjust and Tighten Cabinet Hinges
A cabinet door that sags, scrapes, or just won't close right isn't necessarily broken. More often than not, it's just out of alignment. Before you even think about replacing the whole thing, a few simple tweaks can solve most of these common headaches. Honestly, learning how to adjust your cabinet door hinges is one of the most satisfying quick fixes a homeowner can master.
The first thing to try is always the simplest: tightening the screws. Over time, the daily grind of opening and closing doors can work the screws loose—both on the door and on the cabinet frame. Grab a Phillips head screwdriver and give every single hinge screw a firm turn to tighten it. You'd be amazed how often this one simple action is all it takes to fix a wobbly or slightly sagging door.
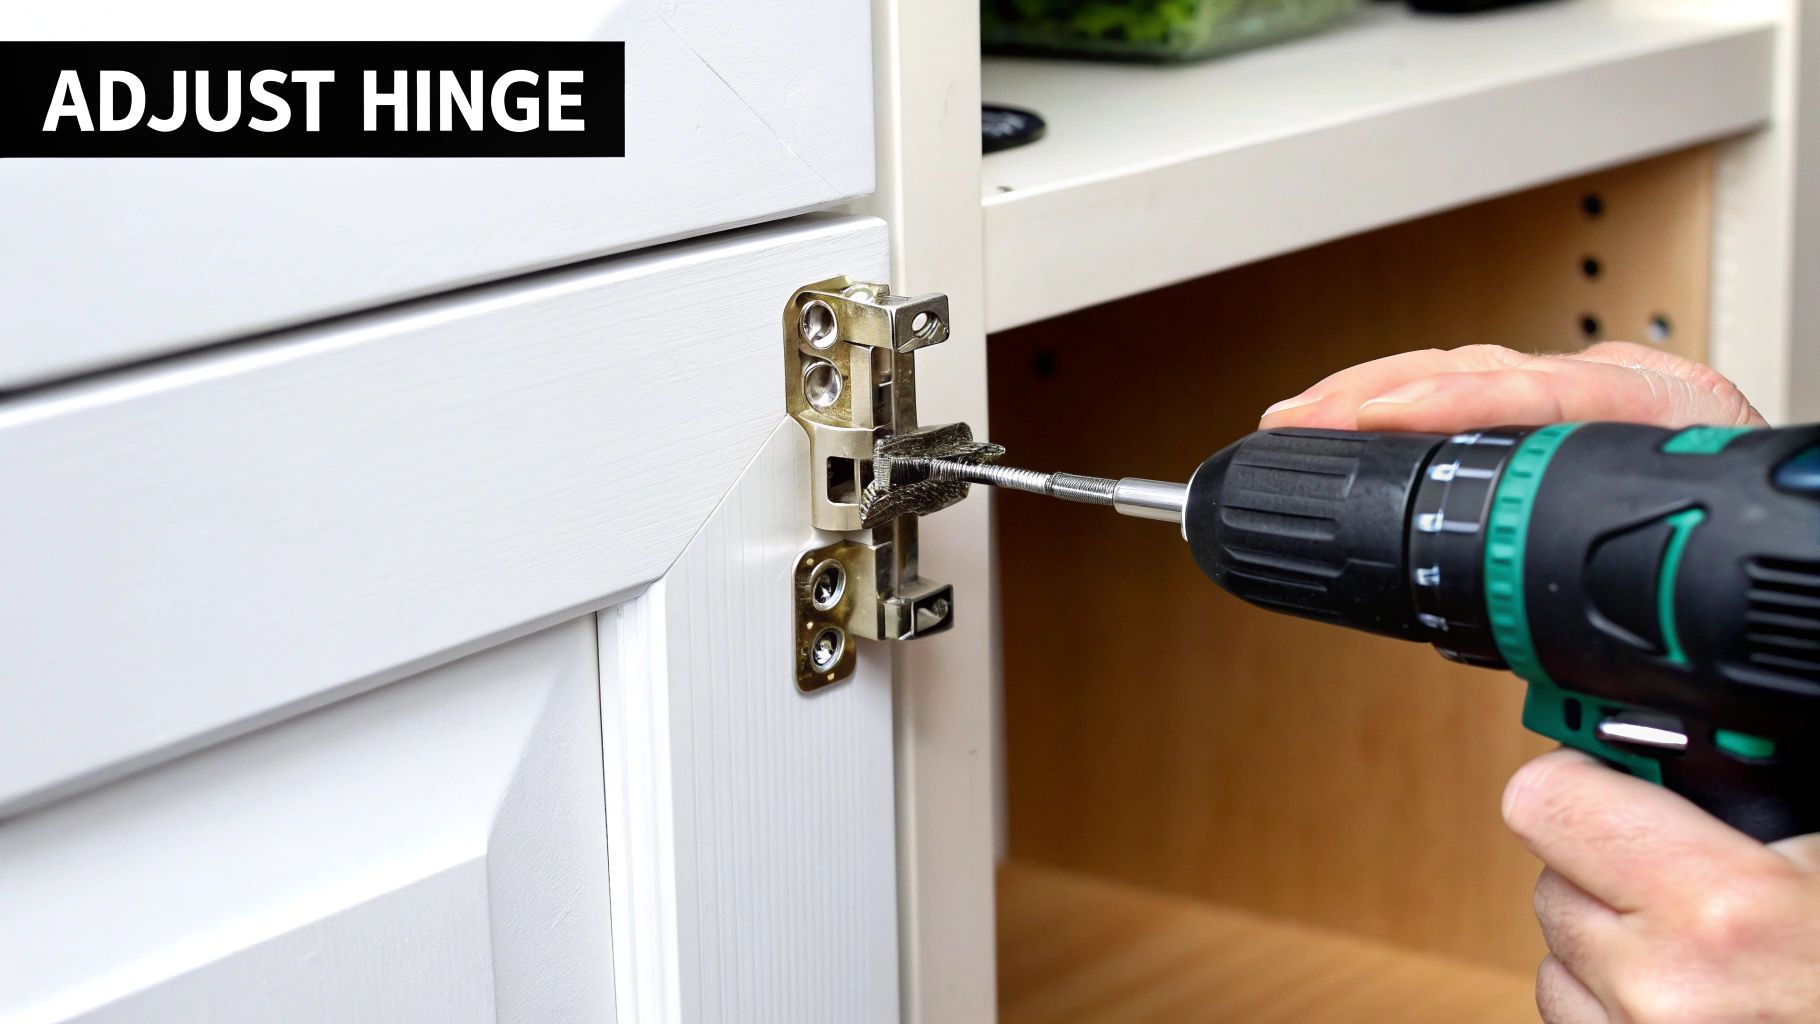
If that doesn't solve it, it’s time to get into the adjustments. This is where modern European-style concealed hinges really shine, as they're literally built for this kind of fine-tuning.
The Three Key Hinge Adjustments
European hinges are brilliantly designed with three separate screws, each controlling the door’s position in a different direction: up and down, in and out, and side to side. It’s a lot like tuning a guitar; small, deliberate turns can make all the difference.
- Side-to-Side Adjustment: This screw is usually the one closest to the cabinet door. Turning it shifts the door left or right, which is the perfect fix for evening out the gaps between a pair of doors. Turn it clockwise to pull the door in toward the hinge, and counter-clockwise to push it away.
- Height Adjustment: Look for the screws on the mounting plate—that’s the part attached directly to the cabinet frame. These control the vertical position. You’ll need to loosen them just a bit, then lift or lower the door until it’s perfectly level before tightening them back up. This is your go-to move for a door that’s starting to sag.
- Depth Adjustment: This screw is typically the one furthest back in the hinge mechanism. It moves the door closer to or further away from the cabinet frame when it's closed. If your door isn't sitting flush with the cabinet face, a quick turn here will pull it right into alignment.
Before you start loosening anything, though, make sure you're supporting the door's weight.
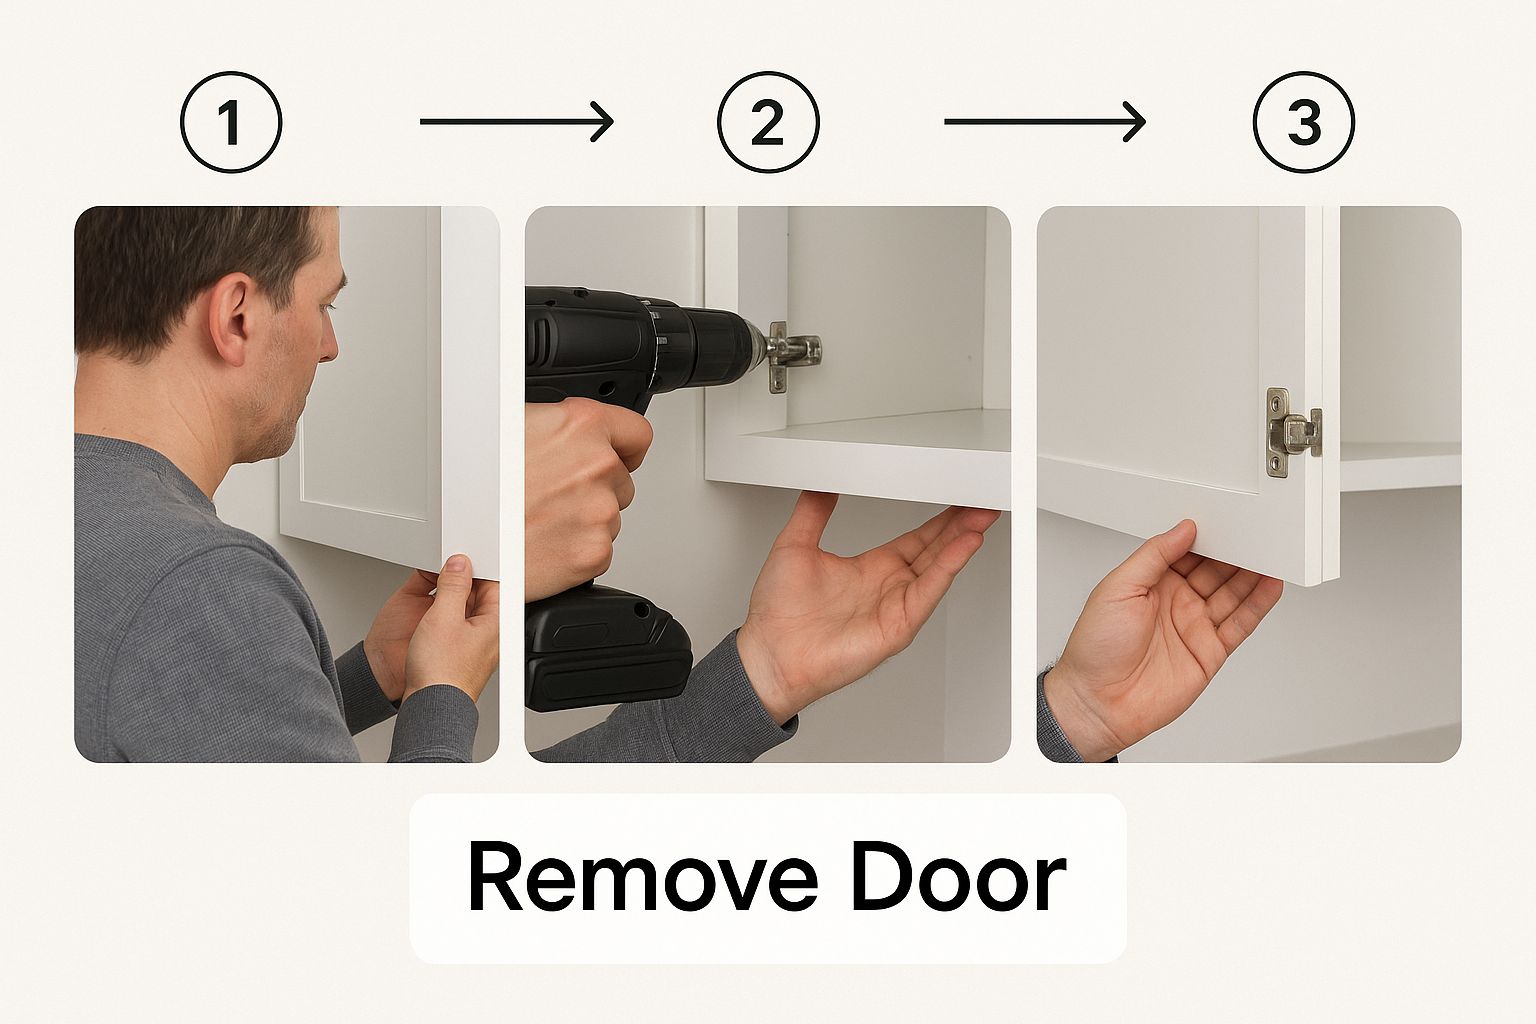
As this image shows, taking the weight off the hinges is critical. It prevents you from accidentally stripping the screws or putting extra strain on the wood while you work.
Real-World Scenarios and Fixes
Let's put this into practice. Say one of your upper cabinet doors is scraping the top of the frame every time you open it. This is a classic height problem.
Just loosen the mounting plate screws on both the top and bottom hinges, nudge the door down a millimeter or two, and then tighten everything back up. Problem solved.
Pro Tip: Make tiny adjustments—a quarter-turn at a time is plenty—and then close the door to check your work. It's so easy to overcorrect and create a new problem. Patience is what gets you that perfect, factory-fresh alignment.
What if two doors in a pair are knocking into each other when you close them? That’s a side-to-side issue. Start by turning the adjustment screw on one door's top hinge, then check the gap. Follow up with the bottom hinge on the same door until the gap is even from top to bottom.
Once you get the hang of these small tweaks, you'll be able to keep all your cabinets looking and working like new.
Fixing Stripped Screw Holes and Replacing Hinges
Sometimes, no amount of tightening will fix a loose hinge. If the screw just spins and spins without grabbing, you’re dealing with a stripped screw hole. It’s a really common problem that happens when the wood fibers get worn out and can't grip the screw anymore, but the fix is surprisingly simple.
The classic DIY trick involves nothing more than wood glue and toothpicks. Just dip a few wooden toothpicks (a golf tee works great, too) in wood glue, jam them into the hole until it’s packed tight, and then snap them off flush with the cabinet surface. Give the glue plenty of time to dry, and you’ve created a solid new foundation for the screw to bite into.
For a more heavy-duty fix, especially on doors that get a lot of action, I’d recommend using wood filler or even a small dowel rod. Clean any loose wood shavings out of the hole, apply your filler, and let it cure completely. Once it's rock-hard, you can drill a fresh pilot hole for a connection that’s as good as new.
When It's Time to Replace a Hinge Entirely
Adjustments and hole repairs solve most issues, but there are times when a hinge is just done for. If it’s visibly bent out of shape, covered in rust, or the internal spring mechanism has given up, a full replacement is your only real option. Trying to force a busted hinge to work will only end up damaging the cabinet door or the frame itself.
Before you start unscrewing anything, make sure you know how to remove cabinet doors safely. The last thing you want is a door crashing to the floor. Always support the door’s weight with one hand while you remove the screws from the cabinet frame and the door.
Key Insight: When you go to buy a replacement, always bring the old hinge with you to the hardware store. This is the only surefire way to get an exact match for the size, screw hole pattern, and overlay, which will save you a world of frustration during installation.
Choosing and Installing Your New Hinge
While you're picking out a replacement, think about upgrading the material. Stainless steel is my go-to recommendation for its durability and corrosion resistance—there's a reason it holds a dominant 40% share of the door hinge market. Spending a little extra on quality material now means you won't have to do this repair again anytime soon. You can find more details about high-performance hinge materials at market.us.
Putting the new hinge on is straightforward. Just use the old screw holes as your guide. I find it’s easiest to attach the new hinge to the door first, then hang the door by screwing the hinge plate onto the cabinet frame. Once it’s up, you can dial in the final side-to-side, height, and depth adjustments for that perfect, seamless fit.
A Little Upkeep Goes a Long Way
Fixing a busted hinge is one thing, but keeping it from breaking in the first place is the real win. A few simple habits can add years to the life of your cabinet hardware, ensuring your doors swing smoothly long after you've installed them. It’s all about getting ahead of the problem.
Your first line of defense is just keeping them clean. Think about it—especially in the kitchen, your hinges are constantly exposed to grease, steam, and food particles. All that gunk builds up over time, making the mechanisms sticky and sluggish. You don't need anything fancy; just a quick wipe with a damp cloth every few months will do the trick.
The Six-Month Hinge Checkup
I recommend setting a reminder to give your most-used cabinet doors a quick once-over twice a year. This little routine can catch small issues before they snowball into a full-blown repair job.
Here’s what you’re looking for:
- Loose Screws: Grab a screwdriver and gently check the mounting screws. Day-to-day use can vibrate them loose over time. A quick tighten is all it takes.
- Door Alignment: Swing the door open and shut a few times. Do you notice any new sagging, or does it scrape against the frame? Catching this early means a simple adjustment now instead of a major fix later.
- Squeaks and Groans: If you have older, non-concealed hinges that are starting to complain, a single drop of household lubricant is often enough to quiet them down. Don't overdo it!
This kind of proactive care is becoming more important than ever. As hinge technology improves, particularly with innovations coming out of the Asia Pacific region, the focus is shifting toward durable, low-maintenance hardware. Homeowners everywhere are demanding products that last, which is driving the market for better, stronger hinges. You can actually see some of these global market trends on dataintelo.com if you're curious.
Got Questions About Hinge Repairs? We've Got Answers
Even with a solid guide, it’s normal to hit a snag or two when you’re figuring out how to repair cabinet door hinges. Let's tackle some of the most common questions that pop up when you're in the middle of a DIY fix.
What If the Adjustment Screws Don't Do Anything?
This is a classic problem. You’ve been turning those tiny screws, but the door just won't line up. When this happens, it’s usually a sign of a bigger issue than just alignment.
More often than not, the hinge itself is bent out of shape, or worse, the screw holes in the cabinet frame are completely stripped. If the wood is stripped, the screws have nothing to bite into, making any adjustment useless.
How Do I Pick the Right Replacement Hinge?
Walking into the hardware store and seeing a wall of hinges can be overwhelming. The single most important thing to get right is the overlay—that’s the measurement of how much the cabinet door overlaps the cabinet frame when it's closed.
To make sure you get it right the first time:
- Measure your existing hinge's overlay before you even think about buying a new one. Don't guess.
- Bring the old hinge with you. This is the easiest way to find an exact match for both the overlay and the screw hole pattern.
- Think about an upgrade. If you’re going through the trouble of replacing a hinge, why not switch to a soft-close model? Your ears will thank you.
A huge mistake people make is buying a replacement hinge just because it looks the same. If the overlay is wrong, you'll never get the door to hang straight, no matter how much you fuss with the adjustment screws. Measure first, buy once.
Should I Attach the New Hinge to the Door or the Frame First?
Great question, and there's a definite right answer here: always attach the hinge to the door first.
It’s so much easier to handle and align the door when the hinge is already securely fastened to it. From there, you can prop the door up, position it against the frame, and then drive in the final screws. Trying to do it the other way around is a recipe for frustration and scratched cabinet finishes.
For cabinetry that's built to last, with expert craftsmanship and premium hardware, trust the professionals at Sinclair Cabinetry inc. Explore our custom solutions at https://sinclaircabinets.com.