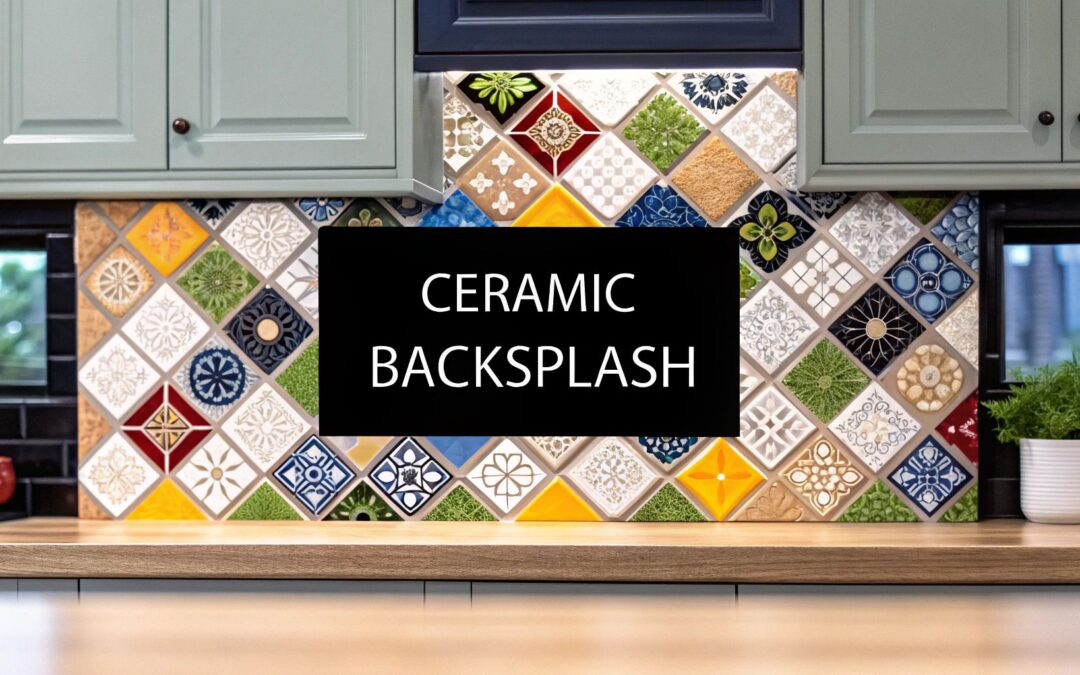
When you're sorting through all the material choices for your kitchen, ceramic backsplash tiles consistently come out on top. They're a classic for a reason—hitting that sweet spot of being tough, affordable, and incredibly versatile in design. A ceramic backsplash is both a workhorse protecting your walls and a design statement that can pull the whole room together.
Why Ceramic Tiles Are Perfect for Your Kitchen Backsplash
Let's be honest, a backsplash isn't just for looks. It's the silent guardian of your kitchen walls, bravely facing down every spaghetti sauce splatter and greasy pop from the frying pan. Think of it as the armor behind your stove and sink, and in that role, ceramic is a true champion.
The key is its non-porous, glazed surface. This finish creates a nearly impenetrable barrier, so moisture and food bits can't sneak their way into your drywall. That makes cleanup a breeze; a simple wipe is usually all it takes to make it look brand new. This practical, no-fuss nature is a huge part of why ceramic has been a kitchen staple for decades.
Setting the Tone of Your Kitchen
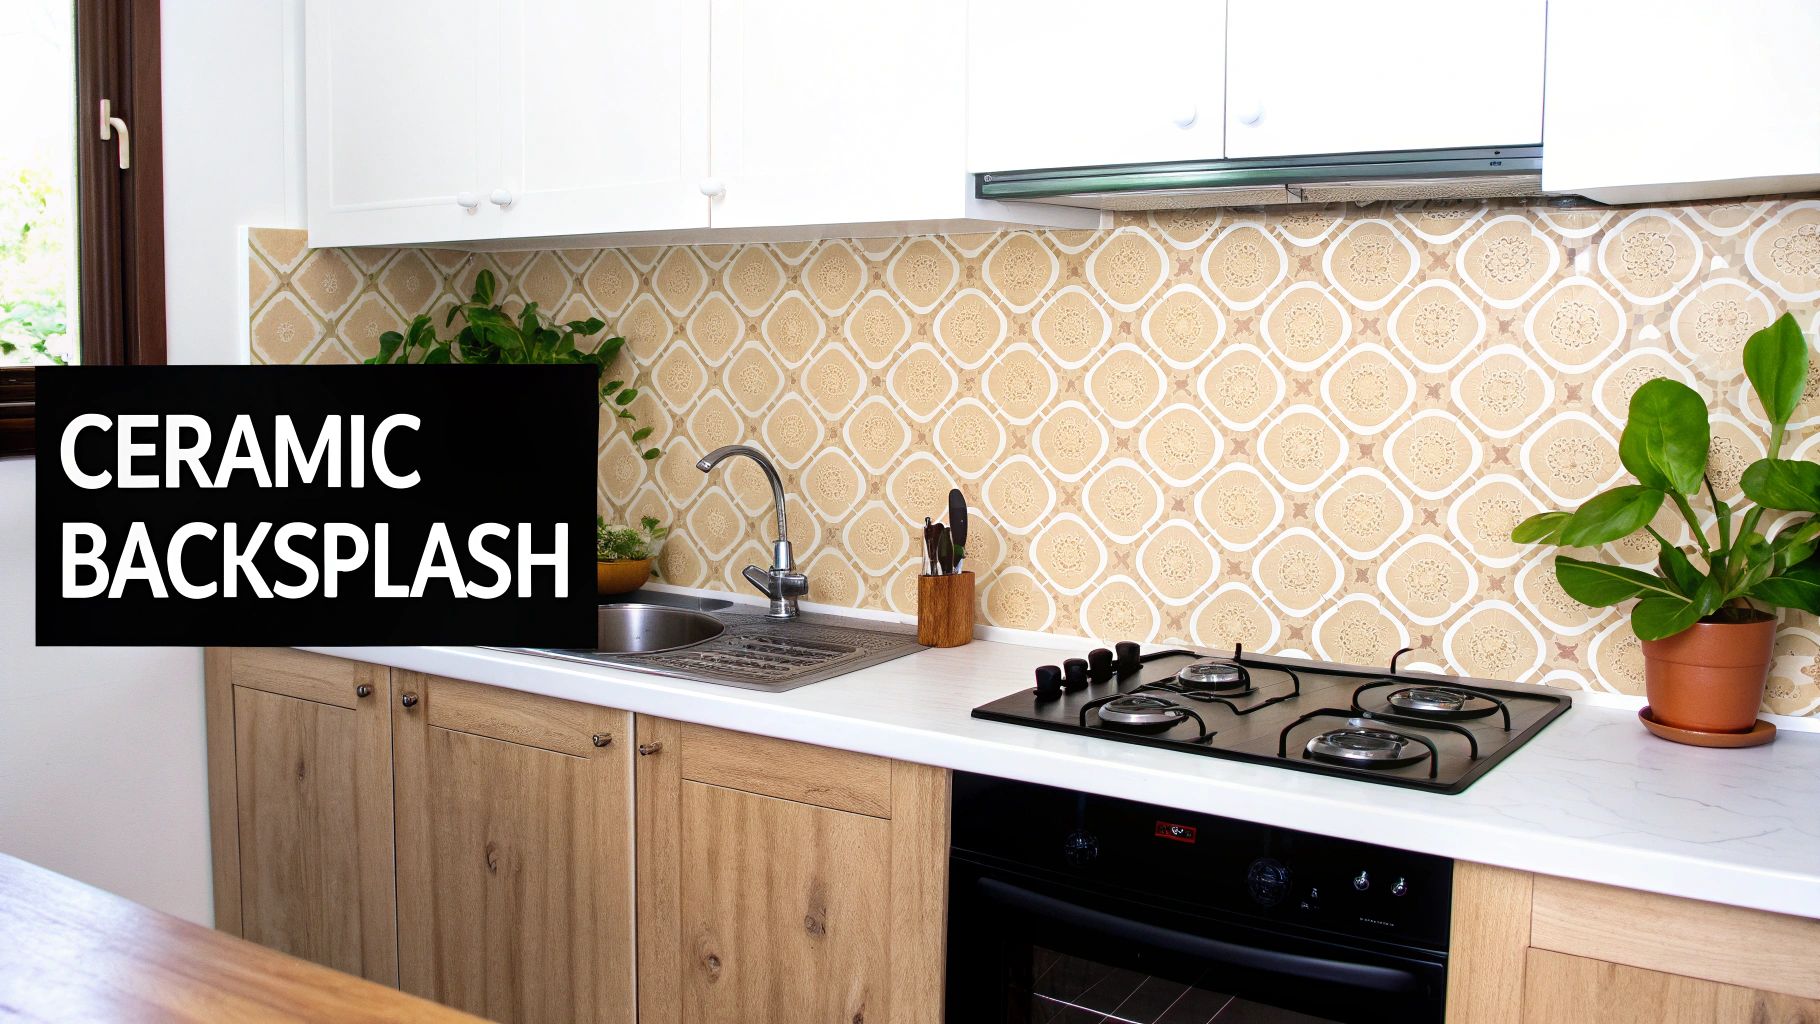
Beyond its toughness, a ceramic backsplash is one of your most powerful design tools. The right tile can instantly set the mood for the entire kitchen, becoming the glue that connects your cabinets, countertops, and flooring into one cohesive look.
- Classic and Bright: You can never go wrong with crisp, white subway tiles. They create a clean, timeless feel that makes any space feel bigger and more open.
- Modern and Bold: Want to make a statement? Go for deep, saturated colors or eye-catching geometric patterns to create a dramatic focal point.
- Warm and Rustic: Earthy, handcrafted-style tiles bring in texture and a cozy, artisanal charm that’s perfect for a farmhouse or traditional kitchen.
The sheer variety available in ceramic is astounding. Whether you want a sleek, uniform look or tiles with subtle, handmade variations, you'll find an option that brings your vision to life.
A well-chosen backsplash doesn't just complete a kitchen; it elevates it. It's your chance to inject personality and style into the heart of your home, making it feel truly yours.
This isn't just a trend; it's a huge market. The global ceramic tiles market was valued at around USD 83.30 billion in a recent year, which really speaks to how popular it is for home projects like kitchen remodels. You can find more details about the growth of the ceramic tile market on fortunebusinessinsights.com.
Finding the Right Ceramic Tile Type and Finish
When you start looking at ceramic tiles for your backsplash, you’ll quickly discover a world of options. It's not just about color; the type of ceramic and its finish are two of the biggest decisions you'll make. Getting this right means your backsplash won't just look incredible on day one—it will stand up to the daily grind of a busy kitchen.
The universe of ceramic tile is huge, but for a kitchen backsplash, it really boils down to two main players, distinguished by the clay used and how they're fired. Knowing the difference is your first step to choosing with confidence. To really get a handle on it, it helps to understand the fundamental difference between ceramic and stoneware, as they bring different strengths to the table.
Ceramic vs. Porcelain: What's the Real Difference?
Think of porcelain as ceramic’s tougher, more sophisticated cousin. It’s made from a finer, denser clay and fired at a blistering-hot temperature. This process makes it incredibly dense, non-porous, and a real champion against moisture, stains, and wear and tear. If you're planning a backsplash behind a busy sink or a high-heat stove, porcelain is the heavy-duty hero you want.
Standard ceramic tile, on the other hand, uses a slightly coarser clay and is fired at a lower temperature. This makes it a bit more porous (before the glaze goes on) and not quite as hard as porcelain. But let's be clear: for a backsplash, a good quality glazed ceramic is more than tough enough. Plus, it opens up a massive world of colors and patterns, often at a friendlier price.
The bottom line is this: Porcelain gives you maximum toughness for high-traffic, high-mess kitchens. Standard ceramic delivers fantastic design flexibility and value, making it a perfect fit for the vast majority of backsplash projects.
If you want to get more granular, you can explore the different types of tile for your backsplash to see how each stacks up for different styles and functional needs.
Getting a Feel for Tile Finishes
The finish is where your tile’s personality really shines through. It dictates how light plays across the surface, how deep the colors look, and, crucially, how easy it is to clean up spaghetti sauce splatters. It’s every bit as important as the tile’s color or shape.
A quick way to compare your options is to see their key features side-by-side.
Ceramic Tile Finishes at a Glance
| Finish Type | Key Feature | Ideal For | Maintenance Level |
|---|---|---|---|
| Glossy | Highly reflective, smooth surface | Small or dark kitchens needing a light boost; classic and modern styles | Low (very easy to wipe clean) |
| Matte | Non-reflective, soft, and muted look | Contemporary and minimalist designs; hiding smudges and water spots | Low to Medium (textured matte can take more effort) |
| Artisanal/Textured | Handcrafted feel, crackle glaze, 3D patterns | Creating a focal point; rustic, eclectic, or bespoke kitchens | Medium (grout lines and textures can trap grime) |
| Satin | A "happy medium" with a soft sheen | Any space where you want to avoid high shine but still have an easy-to-clean surface | Low |
Each finish brings a completely different vibe and set of practical considerations to your kitchen design.
A Closer Look at Common Finishes
Glossy Finish: A glossy tile has that classic, shiny surface that bounces light all over the place. It’s a fantastic trick for making a smaller kitchen feel bigger and brighter. That high-shine glaze also creates a slick, non-porous surface that’s incredibly easy to wipe clean—a huge win behind the stove.
Matte Finish: In contrast, a matte finish absorbs light, giving you a soft, contemporary look that feels very grounded and sophisticated. These tiles are brilliant at hiding fingerprints and water spots. Just know that a heavily textured matte tile might need a little extra scrubbing compared to a smooth, glossy one.
Artisanal and Textured Finishes: If you want your backsplash to be a true showstopper, this is where you look. From tiles with a subtle crackle glaze (called crazing) to those with bold, three-dimensional patterns, these options add a layer of depth and character that feels custom and unique. They turn a functional surface into a work of art.
It's no surprise that practical features drive homeowner choices. In fact, glazed ceramic tiles, loved for their non-porous surfaces and design versatility, accounted for roughly 57.9% of the ceramic tile market's value in a recent analysis. This shows just how much people value a finish that is both beautiful and easy to live with.
Designing with Tile Shapes, Sizes, and Patterns
Once you've landed on the right ceramic tile and finish, the real fun begins. This is where you shift from just picking materials to actually creating a look. The shape, size, and pattern of your backsplash tiles are the tools you'll use to define your kitchen's personality, turning a practical wall into a true focal point.
Think of tile shapes as the building blocks of your kitchen's vibe. Each one has its own distinct personality and can push your design in a certain direction. They're the words you'll use to tell your unique style story.
Finding the Perfect Tile Shape
The shape you choose makes an instant, powerful statement. It’s what people notice first, and it sets the tone for everything else. Let's walk through some of the most popular choices for ceramic backsplash tiles.
-
Classic Subway Tiles: The undisputed champ of backsplashes. Subway tiles (usually 3×6 inches) deliver a clean, timeless look that just works with almost any style, from an industrial loft to a classic farmhouse. Their simple rectangular shape is the perfect canvas for getting creative with patterns.
-
Modern Hexagons: If you want to add a bit of geometric flair, hexagon tiles are a fantastic pick. They create a cool honeycomb effect that feels both modern and a little bit organic, adding some dynamic energy without being too loud.
-
Elegant Arabesque and Fan Shapes: To introduce some graceful curves and a touch of luxury, look no further than arabesque (or lantern) and fan (or fish scale) shapes. These bring a softer, more ornate feel to the backsplash, making them perfect for classic, transitional, or even eclectic designs.
These shapes give you a great foundation, but how you scale them can make all the difference in the world.
How Tile Size Changes Everything
One of the best-kept secrets in interior design is the power of scale. The size of your ceramic tiles can completely change the feel of your entire kitchen. This isn’t just about looks; it's about playing with perception.
For instance, using large-format tiles (think 12×24 inches or bigger) is a brilliant move in smaller kitchens. With fewer grout lines chopping up the view, the wall feels more seamless and spacious. It's a simple trick to make the room feel less cluttered and more open.
On the flip side, small tiles or mosaics create a rich, detailed texture. They draw your eye in, adding an intricate layer of detail that can easily become the star of the show. While they do have more grout lines, you can turn that into a design feature by using a contrasting grout color to really make the pattern pop.
The right tile size doesn't just fit your wall; it reshapes it. A large tile can make a small kitchen breathe, while a small tile can give a large kitchen a cozy, detailed focal point.
This infographic breaks down the key finishes that pair with these shapes and sizes, influencing the final look.
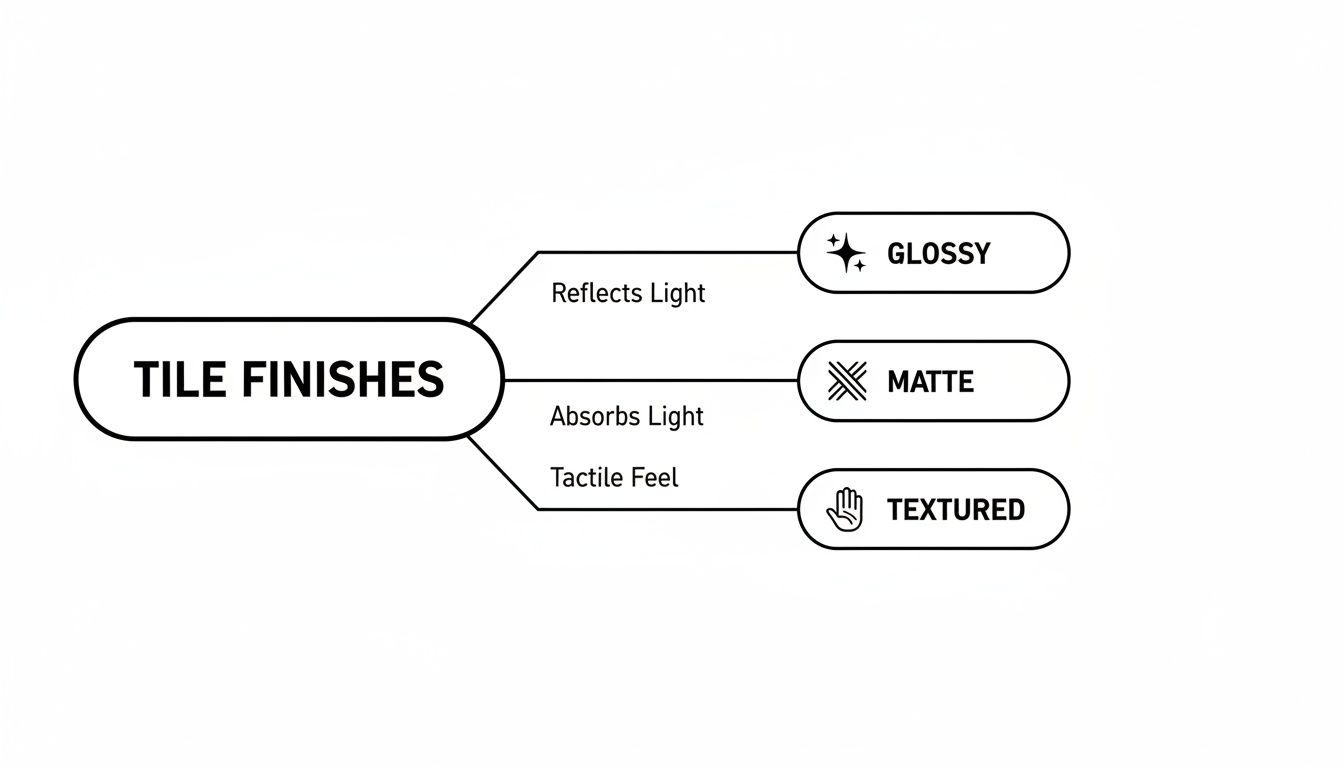
This visual guide shows how glossy finishes reflect light, matte finishes absorb it for a softer look, and textured finishes add physical depth, each interacting uniquely with different tile shapes and patterns.
Creating Impact with Tile Patterns
Finally, the layout pattern is how you put it all together. This is where you can truly make the design your own. Even a simple subway tile can look completely different depending on how you lay it out.
Some of the most iconic patterns include:
-
Herringbone: This classic pattern involves laying rectangular tiles at a 45-degree angle to create a distinct "V" shape. It’s a sophisticated layout that adds a beautiful sense of movement and elegance, working just as well in traditional kitchens as it does in modern ones.
-
Chevron: Similar to herringbone, the chevron pattern also creates a "V" shape. The key difference is that the tiles are cut at an angle, so they meet at a perfect point. This creates a sharp, continuous zigzag that feels incredibly clean and contemporary.
-
Vertical Stack (or Stack Bond): For a seriously modern and streamlined look, stacking tiles vertically is a great choice. This arrangement draws the eye upward, which can help make your ceilings feel higher. It's a simple but powerful way to make a bold, graphic statement.
By thoughtfully combining shape, size, and pattern, you can design a ceramic tile backsplash that is uniquely you. It’s a creative process that allows you to control the flow, feeling, and focus of your entire kitchen design.
How to Pair Backsplash Tiles with Your Cabinetry
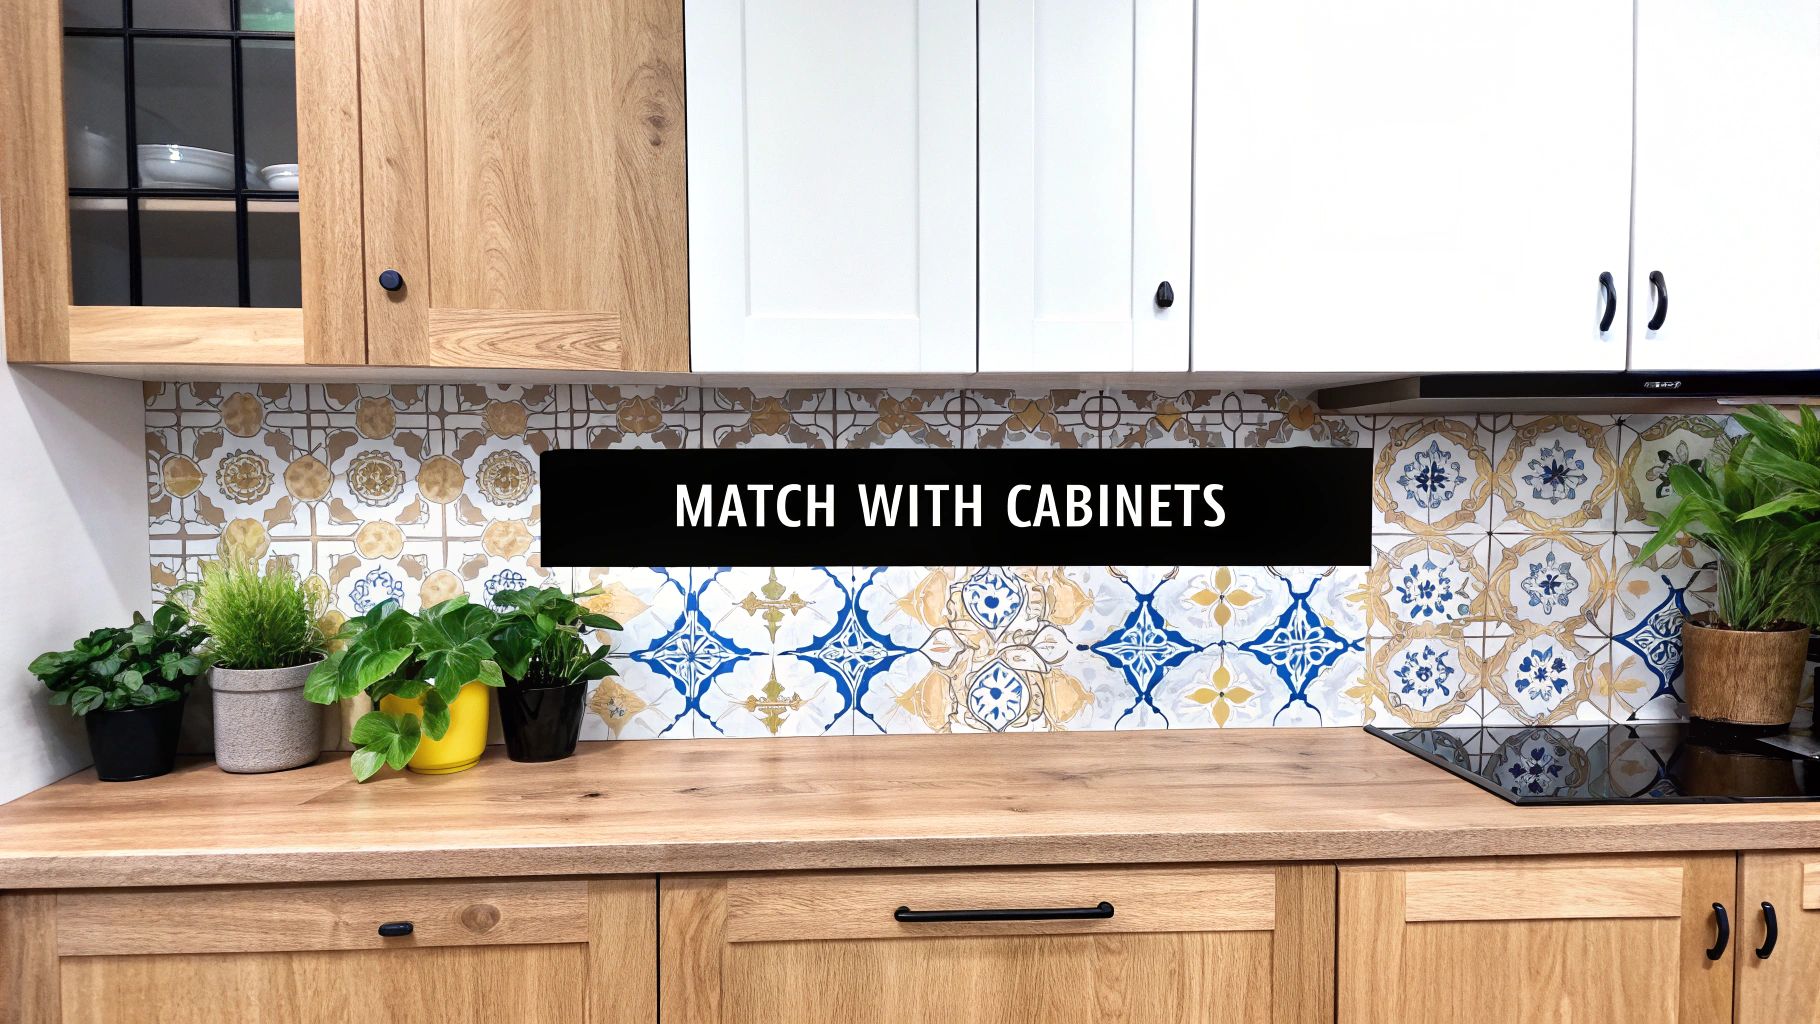
Choosing your cabinets is a huge decision. Picking the perfect backsplash tile is another. But the real art is making them look like they were made for each other. Your backsplash and cabinetry are the power couple of your kitchen's design; they need to either get along perfectly or create a dynamic, intentional contrast that turns heads.
This relationship is what sets the entire mood. A great tile can pull out the subtle undertones in your cabinet finish, and the right cabinet color can make your backsplash pattern sing. It's a classic design balancing act—you want both elements to shine without one stealing the whole show.
Creating Harmony with Color
The most straightforward path is to aim for harmony. This doesn't mean matching everything perfectly. Instead, think about colors that share the same family or undertone. The goal is a cohesive look that feels calm and put-together.
-
For white cabinets: You’re working with a clean slate, which is fantastic. Soft gray or warm beige subway tiles create a timeless, gentle look. For a super crisp, modern vibe, you can even go with a glossy white tile to create a seamless, light-reflecting wall.
-
For wood cabinets: Wood already brings so much warmth and texture. Lean into that by choosing earthy ceramic tiles in shades of cream, terracotta, or a soft, muted green. These colors will complement the wood's natural grain beautifully.
-
For gray cabinets: Cool-toned gray cabinets are a perfect match for tiles in shades of blue, a classic crisp white, or even a deep charcoal for a dramatic, monochromatic feel. If your gray leans warmer (often called "greige"), it will look stunning with off-white or taupe tiles.
Daring to Create Contrast
Let’s be honest, sometimes the most exciting designs are the ones that take a risk. A bold contrast creates energy and gives your kitchen a clear focal point. If your cabinets are playing it safe, a showstopper backsplash can bring the whole room to life.
Picture a kitchen with deep, dark espresso cabinets. Now, imagine a bright, intricately patterned ceramic tile behind them. That backsplash isn't just a surface; it's a piece of art. The same goes for classic white Shaker cabinets—they provide the perfect neutral backdrop for a splash of dramatic color, like a deep emerald green or a rich navy blue tile. That’s a look with confidence.
A great pairing is all about balance. Whether you go for harmony or contrast, the goal is to make it look intentional. Your backsplash and cabinetry should feel like they're telling the same design story, together.
Matching Styles and Textures
Color is just one piece of the puzzle. The style and texture of your choices matter just as much. Sleek, large-format tiles with a glossy finish feel right at home with modern, flat-panel cabinets. On the flip side, rustic, handmade Zellige tiles, with all their beautiful imperfections, are a dream pairing for farmhouse or traditional cabinet doors.
Don't forget about texture! If you have smooth, painted cabinets, a tile with a bit of surface interest—like a subtle crackle glaze or a beveled edge—can add wonderful depth. But if your cabinets have a prominent wood grain, a simpler, smoother tile often works best to keep the space from feeling too busy.
Getting a feel for different kitchen cabinet color combinations is a great way to spark ideas and find that perfect match, ensuring your final design is cohesive from top to bottom.
Navigating Installation: DIY or Professional?
You’ve found the perfect ceramic backsplash tiles. Now comes the fun part: getting them out of the box and onto your wall. This is where you hit a fork in the road. Do you roll up your sleeves and tackle it yourself, or is this a job best left to a professional tile setter?
Honestly, there’s no single right answer. It really boils down to your own comfort level, the time you have, and your budget. Both paths lead to a beautiful new backsplash, but knowing what you’re getting into will help you make the best choice for your kitchen project.
The DIY Approach: What You Need to Know
Going the DIY route can be incredibly satisfying. There's a real sense of pride in stepping back and knowing you did that, not to mention the money you can save. But be warned: it’s a job that demands patience and a steady hand. It’s definitely more than just gluing tiles to a wall.
A successful DIY installation is a multi-step craft. You'll need to handle:
- Wall Prep: This is critical. Your wall needs to be clean, totally smooth, and level before you even think about tile.
- Layout and Measuring: You have to plan out your tile pattern meticulously, especially for those tricky cuts around outlets and windows.
- Applying Adhesive: Spreading the thin-set mortar evenly with a notched trowel is an art in itself.
- Setting the Tile: Each tile needs to be placed carefully, using spacers to keep your grout lines perfectly consistent.
- Cutting Tiles: You'll need a tile saw or snapper to make precise cuts for corners and any obstacles.
- Grouting and Sealing: After the tiles are set, you'll fill the gaps with grout and then seal it to protect against future stains.
If you’re feeling adventurous, this detailed DIY ceramic tile backsplash installation guide is a fantastic resource with practical, step-by-step instructions.
A successful DIY backsplash is a testament to careful planning and execution. The biggest pitfalls aren't a lack of effort but a lack of preparation, leading to crooked lines or uneven surfaces that are difficult to correct later.
When to Hire a Professional Installer
While the allure of DIY is strong, there are plenty of times when hiring a pro is the smartest move you can make. A seasoned tile setter brings years of experience to the table—the kind of expertise that can’t be learned from a single YouTube video. They have an expert eye for detail and the muscle memory that only comes from setting thousands of tiles.
You should seriously consider hiring a pro if:
- Your Design is Complex: If you've picked out an intricate pattern like herringbone, a delicate mosaic, or tiles that need lots of tricky cuts, a pro is your best bet.
- Your Walls Aren't Perfect: An experienced installer knows all the tricks to prep an uneven wall, guaranteeing a flawless, level finish you'd struggle to achieve otherwise.
- Time is of the Essence: A professional can knock out a backsplash in a fraction of the time it would take a beginner. This means less disruption in your kitchen.
- You Want a Guarantee: Good installers stand by their work. That peace of mind, knowing the job is done right and built to last, is often worth every penny.
Ultimately, what you're paying for with a professional is precision and efficiency. They have all the right tools, they know how to troubleshoot problems on the fly, and they deliver that polished, high-end finish that can truly elevate the look of your entire kitchen. Finding a great installer through referrals or local reviews is the final step to ensuring your backsplash vision comes to life perfectly.
Cost, Care, and Why It’s Worth It in the Long Run
A beautiful backsplash is a real investment in your kitchen, so it pays to understand the full picture—from the initial price tag to the long-term upkeep. When you choose ceramic backsplash tiles, you're not just buying a product; you're picking a material that’s going to deliver lasting value for years, maybe even decades.
The final cost isn't just about the price per square foot of the tile. It’s actually a mix of several different things coming together, and knowing what they are helps you set a realistic budget and avoid any surprises.
Breaking Down the Budget
When you're mapping out your backsplash project, you have to think about the total investment. That means looking beyond the tiles themselves and factoring in all the other materials and labor needed to get the job done.
Here’s what typically goes into the total cost:
- The Tiles: This is where the price can swing wildly. Simple, mass-produced subway tiles are super affordable, but if you fall in love with handmade, artisanal, or custom-patterned tiles, expect the cost to go up.
- Installation Materials: Don't forget to budget for the essentials: thin-set mortar (the glue), grout to fill the gaps, and a good sealant to protect the grout from stains and moisture.
- Tools: If you're going the DIY route, you'll need a few things like a notched trowel, a grout float, a tile saw or cutter, a level, and some spacers.
- Professional Labor: Hiring a pro will be a significant chunk of your budget. Installers often charge by the square foot or offer a flat fee for the whole project.
A detailed budget is your best friend in any remodel. To see how these costs fit into the grand scheme of things, check out this complete kitchen renovation cost breakdown to put it all into perspective.
Protecting Your Investment with Simple Maintenance
Honestly, one of the best things about a ceramic tile backsplash is how ridiculously easy it is to take care of. A little routine cleaning is all you need to keep it looking just as good as the day it was installed. No harsh chemicals or back-breaking scrubbing required.
For daily messes, a quick wipe-down with a damp cloth and a mild, pH-neutral cleaner will take care of most cooking splatters. This simple habit keeps grease and food from building up.
Think of your grout as the quiet partner to your tiles. Keeping it clean is just as crucial. Every so often, give it a good cleaning with a soft brush and a dedicated grout cleaner to keep it looking bright and prevent mildew.
Sealing the grout lines every year or two is a small step that makes a huge difference. This quick job creates an invisible shield that repels water and stops stains in their tracks, making your daily wipe-downs even easier.
The Unbeatable Long-Term Value of Ceramic
Beyond its good looks and low-maintenance nature, the real value of a ceramic backsplash is its incredible durability. This is a material built to handle the chaos of a real kitchen, ensuring your investment holds up for the long haul.
Just look at its natural strengths:
- Heat Resistance: Ceramic is fired at incredibly high temperatures, so it’s naturally flame-retardant. It won’t get scorched, melt, or release nasty fumes when things get hot behind the cooktop.
- Moisture Resistance: The glaze on most ceramic backsplash tiles creates a non-porous surface that water can't penetrate. This makes it perfect for the splash zone behind the sink, protecting the wall underneath from water damage.
- Fade Resistance: The colors in ceramic tiles are baked right in, which means they won’t fade or turn yellow over time, even if your kitchen gets tons of direct sunlight.
The market for ceramic tiles keeps growing, with strong forecasts that will shape both pricing and availability in the future. This consistent demand highlights just how trusted and timeless the material is in home design. If you're curious, you can find more insights into ceramic tile market dynamics on marketsandmarkets.com. Choosing ceramic isn’t just a purchase—it’s a smart, durable upgrade that adds real, tangible value to your home.
Got Questions? We’ve Got Answers.
Even after you've narrowed down your choices, a few lingering questions almost always come up. It's totally normal. Let's tackle some of the most common ones we hear from homeowners so you can move forward with total confidence.
Can I Just Tile Over My Old Backsplash?
While it might seem like a clever shortcut, tiling over an existing backsplash is one of those things that’s technically possible but rarely a good idea. Think of it like putting a new roof on top of an old one—it adds weight and bulk you don't need.
This extra layer can create awkward depth issues around your outlets, light switches, and the bottom of your cabinets. For a truly professional and long-lasting result, the best move is always to take down the old tile. Starting with a fresh, flat wall gives your new ceramic backsplash tiles the best possible surface to adhere to, ensuring they’ll stay put for years to come.
A fresh start is the only way to guarantee a flawless foundation. Taking the time to remove the old tile prevents much bigger headaches and ensures a seamless finish for your beautiful new backsplash.
How Do I Keep My Grout from Looking Grimy?
Nothing dates a gorgeous backsplash faster than dirty, stained grout. The secret to keeping it looking brand new is twofold: smart cleaning and proactive sealing.
For day-to-day upkeep, you don't need harsh chemicals. A simple paste made from baking soda and water, applied with a small scrub brush, does an amazing job. If you run into a tougher stain, an oxygen-based bleach cleaner is a great option that’s much gentler than chlorine bleach.
But the real game-changer is sealant. Make sure you seal your grout right after it’s installed and then plan to re-apply it every year or so. This creates an invisible shield that stops stains and moisture from ever sinking in.
What’s a Backsplash Style That Won’t Look Dated in 5 Years?
If you want a look that stands the test of time, you simply can't beat a classic white subway tile. Its design is clean, simple, and incredibly versatile, pairing beautifully with everything from a rustic farmhouse kitchen to an ultra-modern one. It provides a perfect, quiet backdrop that lets your stunning countertops and cabinetry take center stage.
A few other choices with serious staying power include:
- Classic Square Tiles: A simple 4×4 or 6×6 inch square in a neutral tone creates a timeless grid pattern that feels both familiar and fresh.
- Natural Stone Lookalikes: Ceramic tiles designed to mimic materials like marble or travertine offer an organic, elegant feel that never goes out of style.
Is Ceramic Really Safe to Put Behind My Stove?
Yes, one hundred percent. Ceramic tiles are born in fire, baked in kilns at incredibly high temperatures—often over 2,000°F. This process makes them exceptionally heat-resistant and completely non-combustible.
This inherent durability makes ceramic a perfectly safe choice for the wall behind your cooktop, whether it's gas or electric. The glazed surface won't scorch, melt, or release any nasty fumes when things heat up during cooking. It's one of the main reasons ceramic has been the go-to material for kitchens for generations.
A stunning backsplash is the perfect finishing touch for beautiful custom cabinetry. At Sinclair Cabinetry inc, we create bespoke cabinets that set the perfect stage for your kitchen's unique style. Explore our gallery and see how we can bring your vision to life.