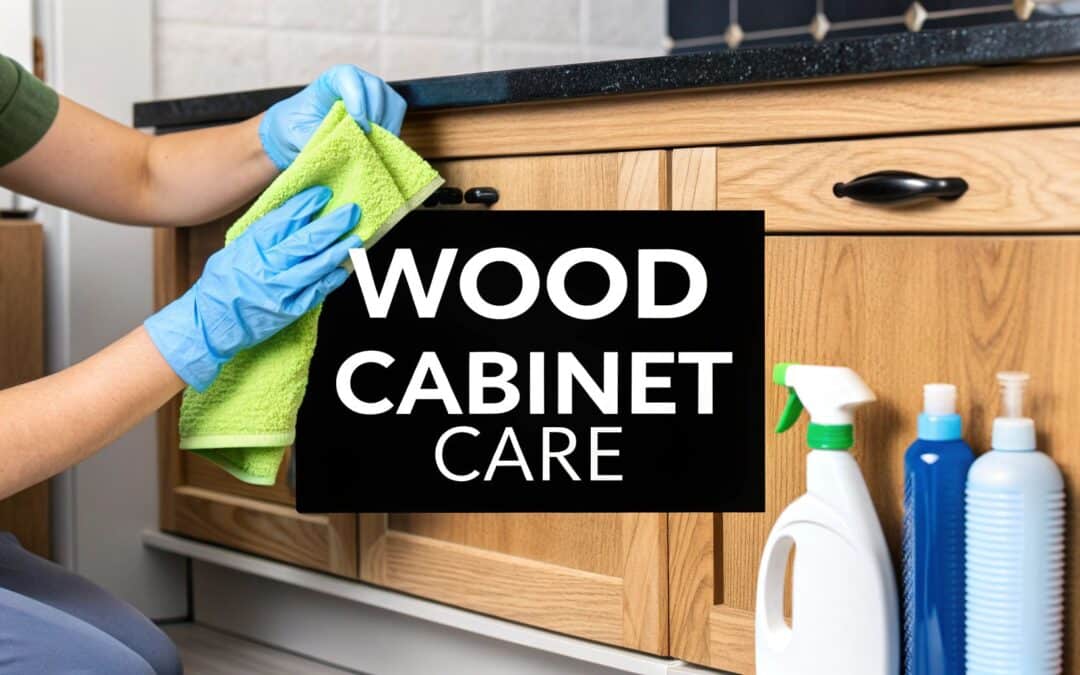
Understanding Your Wood Cabinet's Unique Personality
It’s easy to think any all-purpose cleaner will do the trick, but treating all wood cabinets the same can lead to dull finishes or, even worse, permanent damage. Think of it like skincare: you wouldn't use the same products for oily and dry skin. The best way to clean wood kitchen cabinets really depends on the type of wood and, more importantly, its finish. A modern cabinet with a tough polyurethane finish can handle a lot more than a delicate, oil-rubbed antique cherry cabinet.
Your daily habits also play a huge role. If you’re a fan of pan-frying, the cabinets near your stove are going to have a much tougher, greasier film than those in a kitchen used for lighter cooking. Even your home's humidity can cause wood to expand and contract, making some cleaning methods better than others. Rushing in with the wrong cleaner is a common mistake that can strip the protective top coat, leaving the wood exposed and vulnerable.
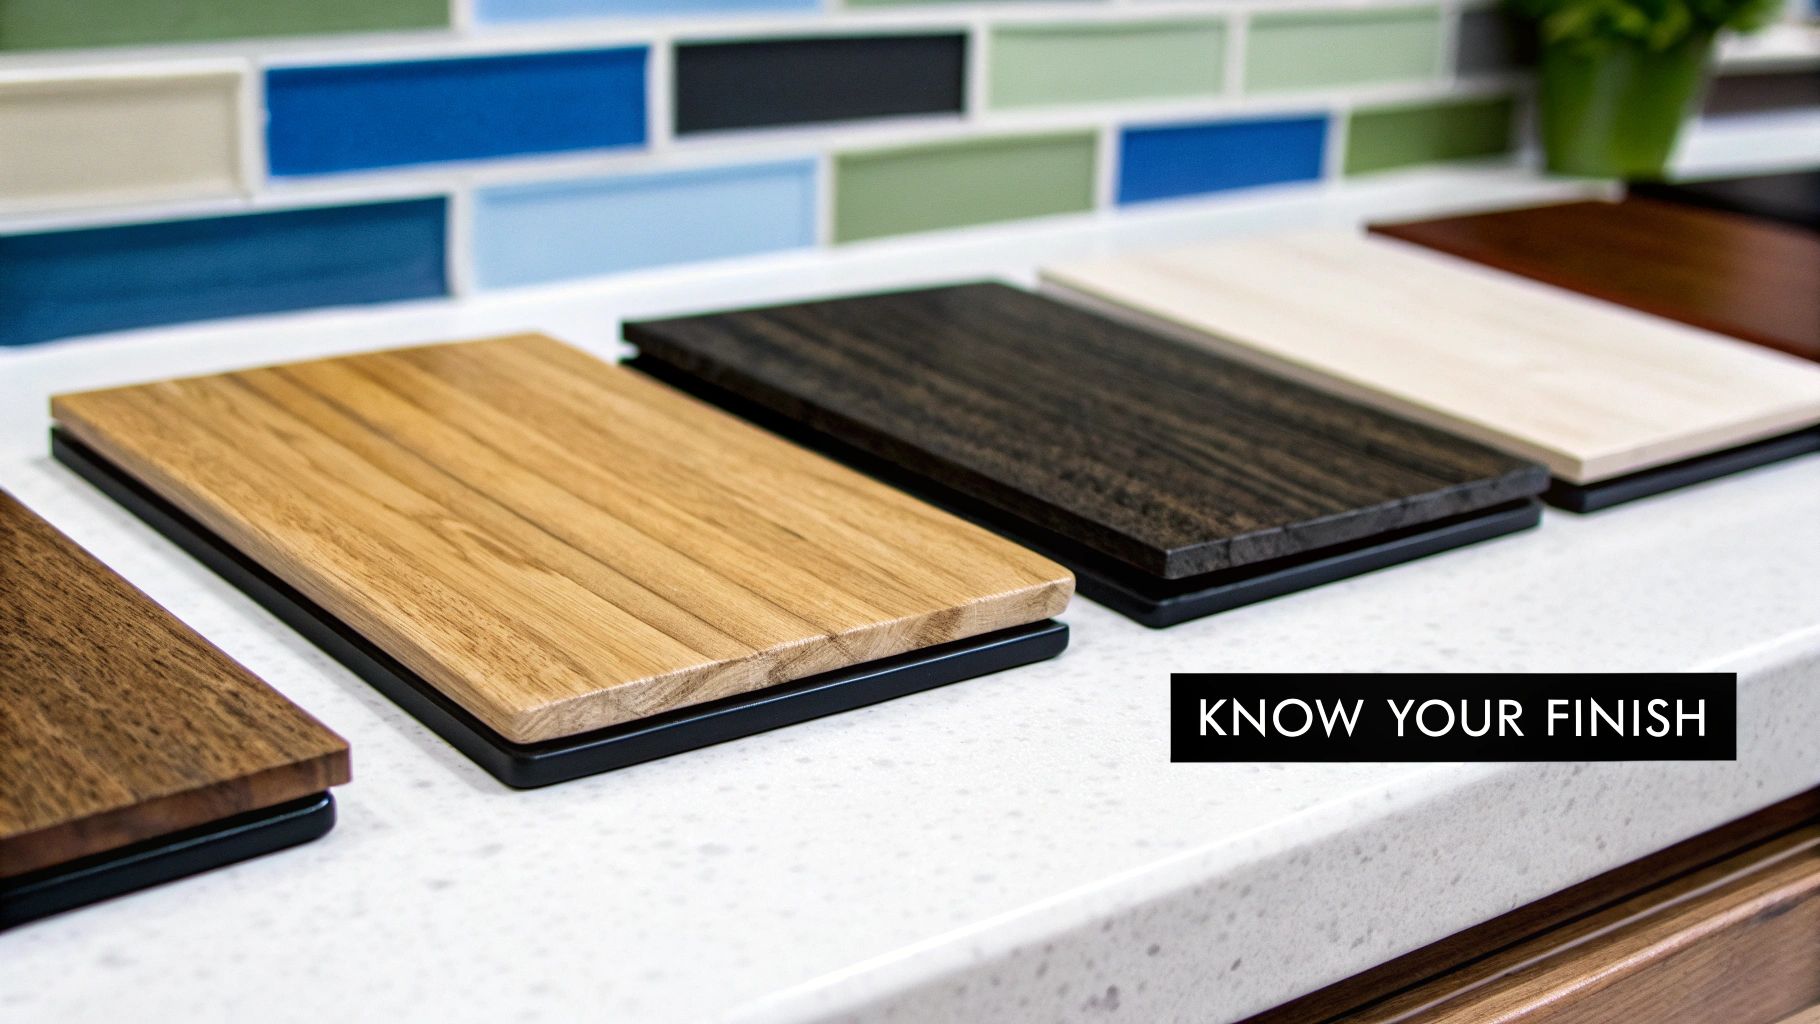
Identifying Your Cabinet's Finish
Before you start scrubbing, you need to know what you’re up against. You don’t need to be a woodworking expert to figure this out. Just find a hidden spot, like the inside of a cabinet door, and apply a drop of denatured alcohol with a cotton swab. If the finish gets sticky or starts to dissolve, you're likely dealing with shellac. If nothing happens, it’s probably a more modern and resilient varnish, lacquer, or polyurethane. This simple test is key to choosing the right cleaning method and avoiding a costly mistake.
The Universal Starting Point
No matter the wood or finish, there's a safe and effective starting point that pros swear by. One of the most recommended methods for cleaning wood kitchen cabinets is a simple solution of warm water mixed with a few drops of mild dish soap. Grab a soft microfiber cloth, dip it in the soapy water, and wring it out until it’s just damp. Gently wipe down all the surfaces, giving a little extra attention to the areas around handles and along the edges where grime loves to build up. This gentle, non-abrasive approach is always your best first move. For more pro tips, you can check out this guide on how to clean kitchen cabinets effectively on ThisOldHouse.com.
To help you get a better handle on your specific needs, the table below breaks down common wood types and what they typically require.
Wood Cabinet Types and Cleaning Requirements
A comprehensive comparison of different wood types, their finishes, and specific cleaning considerations.
| Wood Type | Common Finish | Water Sensitivity | Recommended Cleaning Frequency |
|---|---|---|---|
| Oak | Varnish, Polyurethane | Moderate | Bi-weekly wipe, monthly deep clean |
| Cherry | Oil, Lacquer, Shellac | High | Weekly dusting, gentle monthly clean |
| Maple | Polyurethane, Lacquer | Low | Weekly wipe-down, as-needed deep clean |
| Pine | Wax, Varnish | High | Frequent dusting, careful spot cleaning |
This table shows that while a durable, low-sensitivity wood like maple is quite forgiving, more delicate woods like cherry and pine need a much lighter touch and less exposure to water to stay in top shape.
The Professional Cleaning Method That Actually Protects
When you think about professional cleaning, it's easy to picture someone showing up with a caddy full of powerful, chemical-heavy sprays. But the real secret to the best way to clean wood kitchen cabinets isn’t about brute force; it’s about finesse and technique. Professionals know the magic is in controlling moisture and getting the soap-to-water ratio just right—enough to cut through kitchen grease without ever harming the cabinet's delicate finish. It's a balance that most of us miss, often leading to slow, cumulative damage without even realizing it.
What’s even more surprising is that your choice of cleaning tool is often more critical than the cleaning solution itself. It’s tempting to grab an abrasive sponge or a rough dishcloth, but those can create tiny micro-scratches on the finish, which dulls the sheen over time. This is why the pros exclusively use high-quality microfiber cloths. These cloths are designed to grab and hold onto dirt and grease particles without scratching the surface, meaning you can get the job done with less pressure and gentler wiping motions.
The Two-Cloth System for a Flawless Finish
Here’s a common mistake I see all the time: using the same wet cloth to wash and then "rinse" the cabinet. In reality, this just moves the grime and soapy water around, leaving a sticky residue. The professional approach uses a simple but effective two-cloth system to get a truly clean and protected surface.
- The Cleaning Cloth: Get one microfiber cloth and dampen it with your mild cleaning solution. A few drops of dish soap in a bowl of warm water is all you need. Wring it out until it’s almost dry to the touch—remember, excess water is the enemy of wood finishes. Use this cloth to gently wipe down your cabinet surfaces, always working from the top down.
- The Rinsing Cloth: Immediately after wiping a section, grab a second, separate microfiber cloth dampened with only clean water. Again, wring it out completely. This crucial step removes any leftover soap residue that could otherwise attract dust and dull the finish.
This screenshot from This Old House really captures the gentle wiping technique that is so important for preserving your cabinet’s finish.
The image perfectly illustrates using a soft cloth with minimal moisture. This is fundamental to avoiding the warping and peeling that many people mistakenly blame on the quality of their cabinets.
The Final, Non-Negotiable Step: Drying
If you take away only one thing, let it be this: always dry your cabinets. This is easily the most important part of the entire process, yet it’s the one that gets skipped the most. After rinsing, take a third, completely dry microfiber cloth and buff the cabinets dry. This simple action ensures no moisture is left behind to seep into seams or edges, which is what causes swelling and discoloration over the years.
This final buff not only protects the wood but also leaves a beautiful, streak-free shine. This disciplined method only adds a few extra minutes to your routine but can add years to the life and beauty of your cabinetry. For a more detailed look into wood care, you might find our guide on how to clean wood cabinets helpful for long-term preservation.
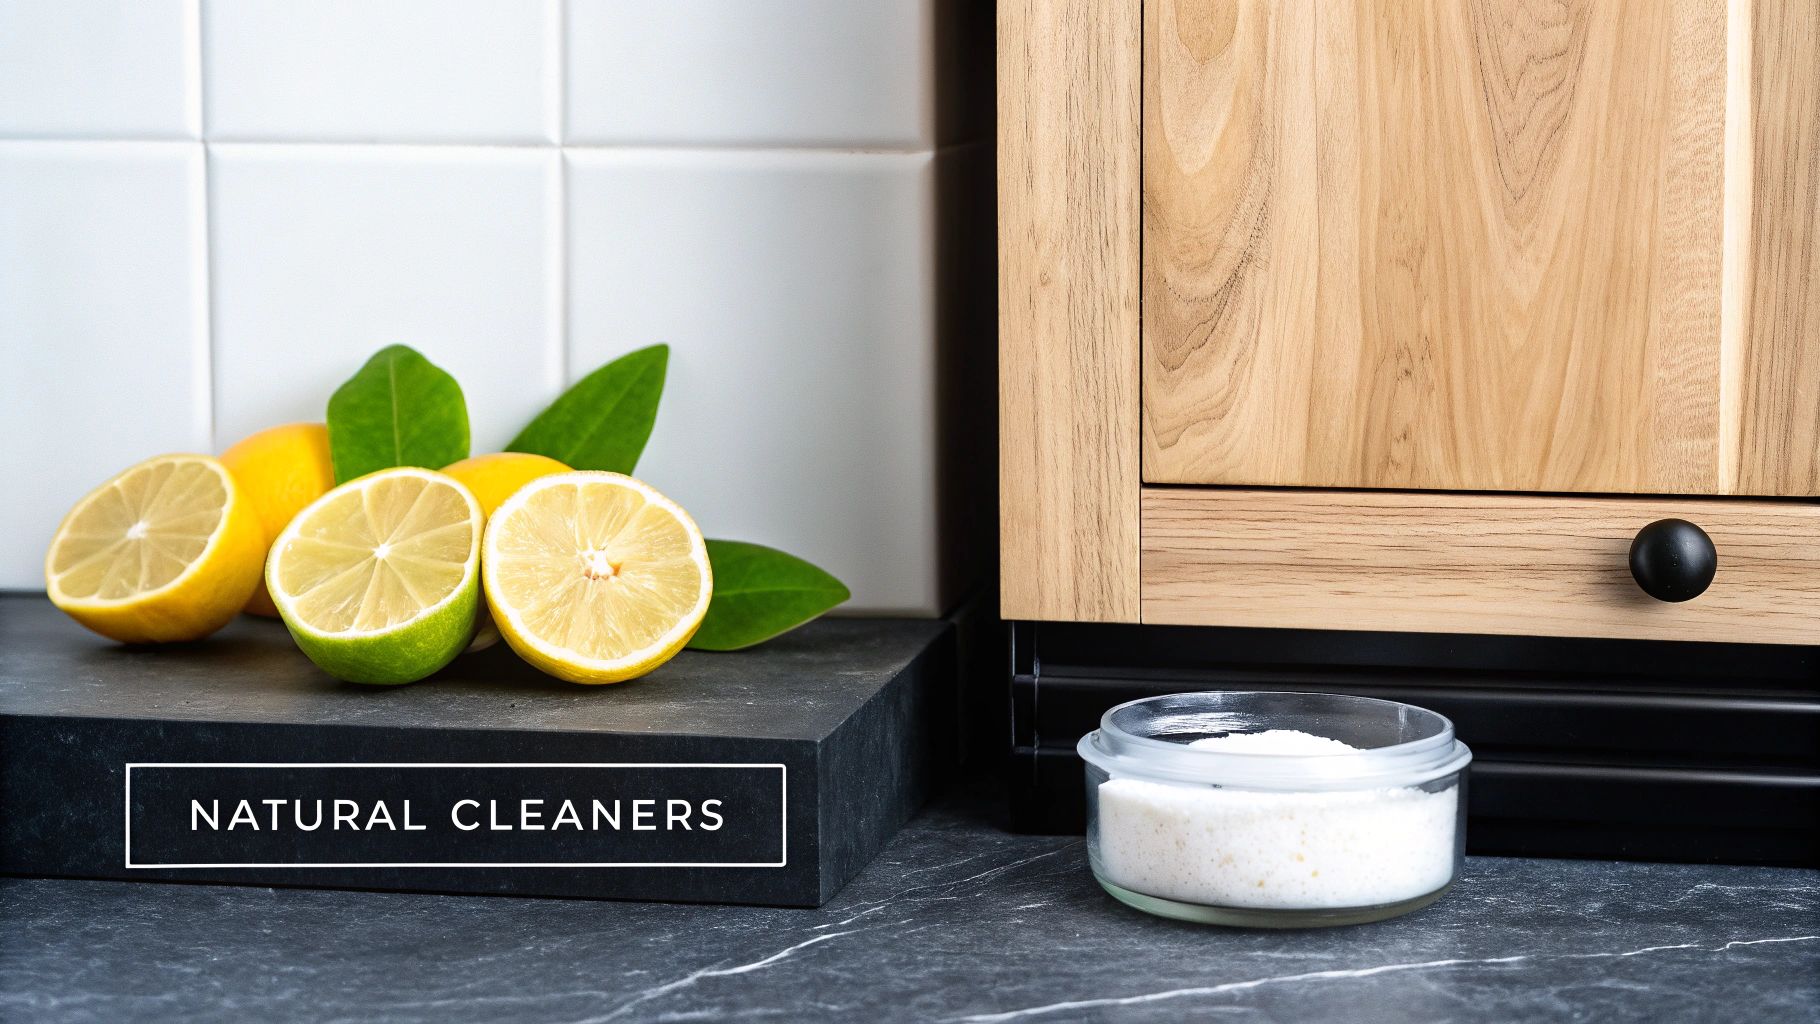
Natural Solutions That Outshine Commercial Products
While professional methods are great for a deep clean, the best approach for daily upkeep on your wood kitchen cabinets often means looking in your pantry, not under the sink. It turns out grandma was right about using household staples, and now we can perfect those recipes for the best results without worrying about damaging the finish. These simple, homemade solutions are easy on the wallet and give you total control over the ingredients you bring into your home.
The secret is knowing why these ingredients are so effective. Take white vinegar, for instance. Its mild acidity is fantastic for cutting through that sticky, greasy film that builds up from cooking, especially on the cabinets right next to your stove. You can whip up a simple but powerful everyday degreaser to tackle this common kitchen headache.
The Everyday Degreaser Recipe
To make a cleaner that’s both safe and effective, you need to balance the cleaning power of vinegar with the gentleness of water. Getting this ratio right is key to protecting your cabinet's finish, which is a frequent worry when using DIY solutions.
- 1 part white vinegar
- 1 part warm water
- 2-3 drops of a citrus-based essential oil (like lemon or orange) for extra degreasing and a fresh scent
Just mix these in a spray bottle. Always spray the solution onto a microfiber cloth, not directly onto the cabinet, and then wipe down any greasy spots. The vinegar cuts through the grime, and the essential oil helps lift any stubborn residue while leaving behind a clean, pleasant smell. This method is part of a larger shift toward eco-friendly home care, with ingredients like vinegar being celebrated for their cleaning power without harsh chemicals. For a deeper dive into these methods, check out this excellent guide on cleaning wood cabinets from SinclairCabinets.com.
Conditioning and Restoring Shine
After a good cleaning, you might find the wood looks a bit thirsty or dull. This is where a simple, natural conditioning treatment can make a huge difference. A word of caution: do not use this on painted or lacquered finishes. However, for natural, oil-finished cabinets, it’s a brilliant way to bring back their luster.
To make a simple wood conditioner, mix two parts olive oil with one part lemon juice. Dab a small amount onto a clean, soft cloth and gently buff it into the wood, always moving with the grain. The oil feeds the wood, while the lemon juice helps clean and brighten it. Let it soak in for about 10-15 minutes, then use another clean cloth to buff off any excess. Your cabinets will look nourished and revitalized, showing that sometimes the most basic solutions work the best.
Conquering Stubborn Problems Without Creating New Ones
Every kitchen has them—those stubborn spots that just won’t quit. You’ve got the faint water rings on the cabinet under the sink, the mystery splatters from last night's spaghetti sauce, and that ever-present greasy film that seems to have permanently bonded with the wood. Your first instinct might be to grab a scouring pad and scrub with all your might, but that’s a quick way to damage the finish you’re trying to save. The best way to clean wood kitchen cabinets when facing these challenges is to use smart, targeted techniques, escalating your approach only when absolutely necessary.
Before you reach for a harsh chemical cleaner, try a simple paste made from baking soda and water. For many tough, caked-on food stains, you can gently work this paste into the spot with a soft cloth using a circular motion. This can lift the grime without scratching the surface. Let it sit for a minute or two, then wipe it away with a damp cloth and follow up with a dry one. For those really persistent greasy areas that are so common in kitchens, you can find some great advice on how to effectively tackle greasy kitchen surfaces that builds on this gentle approach.
Knowing When to Escalate and When to Stop
The secret to winning this battle is a patient, progressive strategy. Always start with the mildest cleaning method first. If a basic soap and water solution doesn't do the trick, then you can move on to a slightly stronger but still natural option, like a diluted vinegar spray or the baking soda paste we just talked about.
It's also critical to assess the stain before you even start. A light-colored water ring on the surface might be removable, but a dark stain that has soaked into the wood often means the damage has gone straight through the finish. Trying to scrub that kind of stain out will only strip the protective layer and make the problem much worse. This is where knowing your limits separates a successful cleaning from a costly mistake. Sometimes persistence is key, but recognizing when it's time to call a professional for restoration is just as important.
To handle the variety of issues your cabinets might face, it helps to have a quick guide. Here’s a table outlining common problems and how to approach them.
| Problem Type | Severity Level | Recommended Solution | Prevention Tips |
|---|---|---|---|
| Greasy Film Buildup | Mild to Moderate | Diluted white vinegar solution (1:1 with warm water) and a microfiber cloth. | Wipe down cabinets weekly with a damp cloth. Use the stove vent fan when cooking. |
| Water Spots/Rings | Mild | Apply a small amount of non-gel toothpaste or baking soda paste; gently rub with the wood grain. | Wipe up spills immediately. Use coasters for wet glasses left on counters near wood. |
| Food Splatters | Mild to Moderate | Warm water with a few drops of dish soap. For dried-on food, use a baking soda paste. | Clean up splatters as they happen. Consider a temporary backsplash guard during messy cooking. |
| Dark Penetrating Stains | Severe | The finish is likely compromised. This usually requires professional refinishing or restoration. | Avoid leaving wet items on or against wood surfaces for extended periods. |
This table shows that most common cabinet messes can be handled with simple, gentle solutions. The key is acting quickly and using the right tool for the job to avoid turning a small spot into a major repair.
The infographic below gives you an idea of how cleaning times can differ based on the method you choose for a deeper clean.
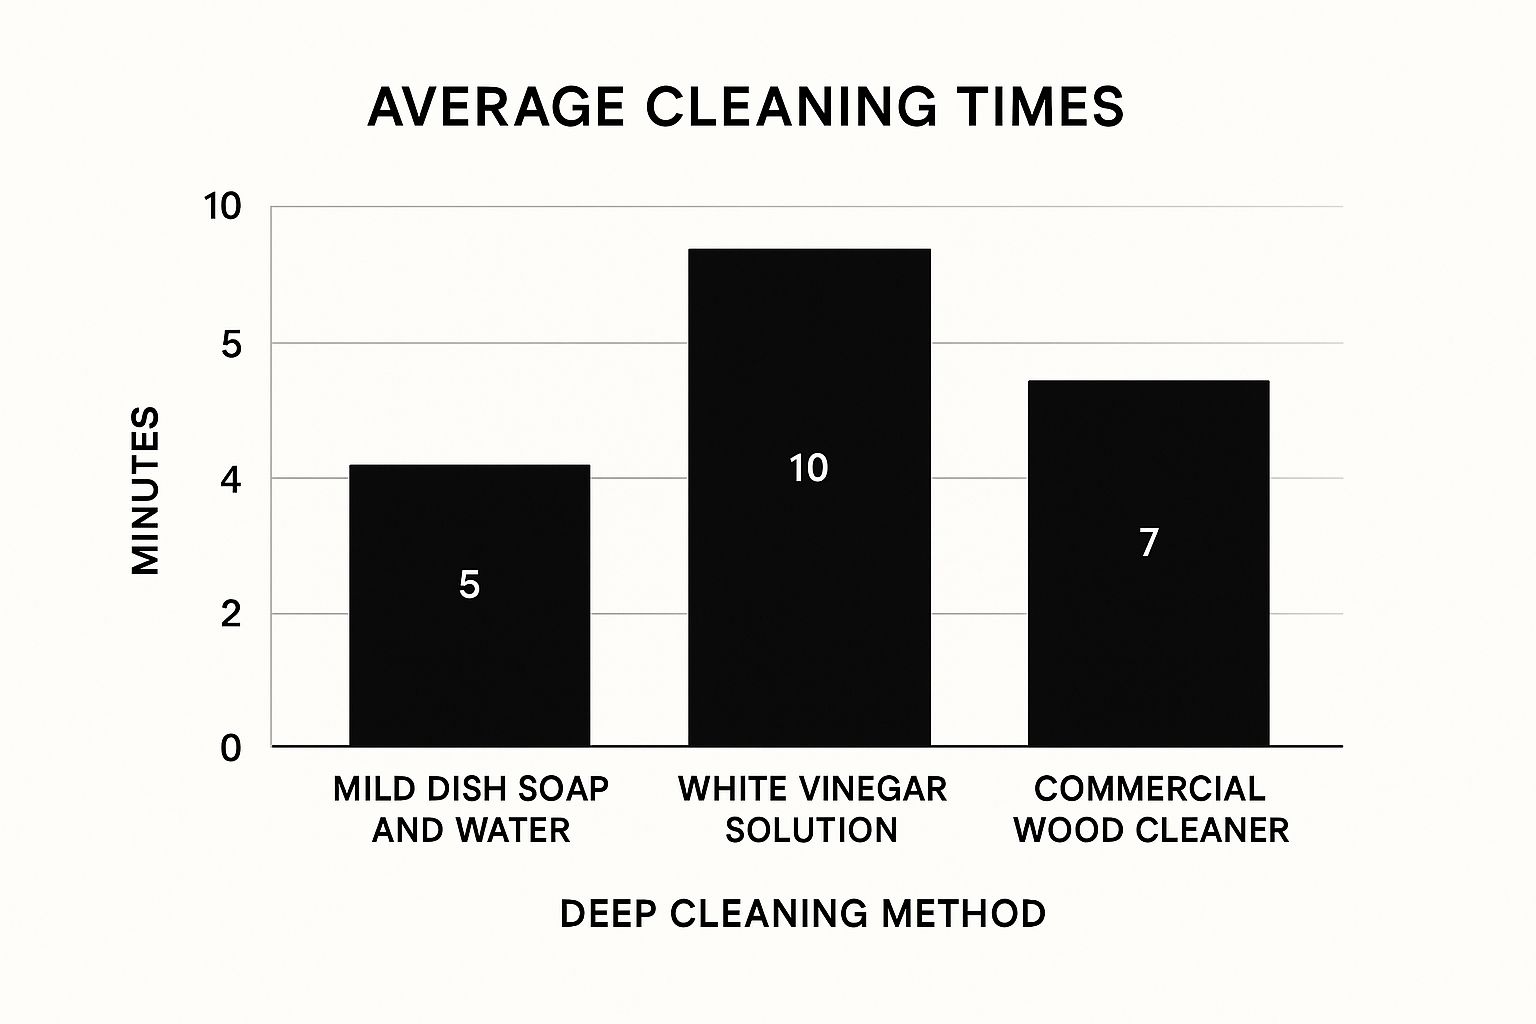
As the chart shows, while a vinegar solution might take a bit longer than a quick soap and water wash, its power against tough grease often makes that extra time well worth it.
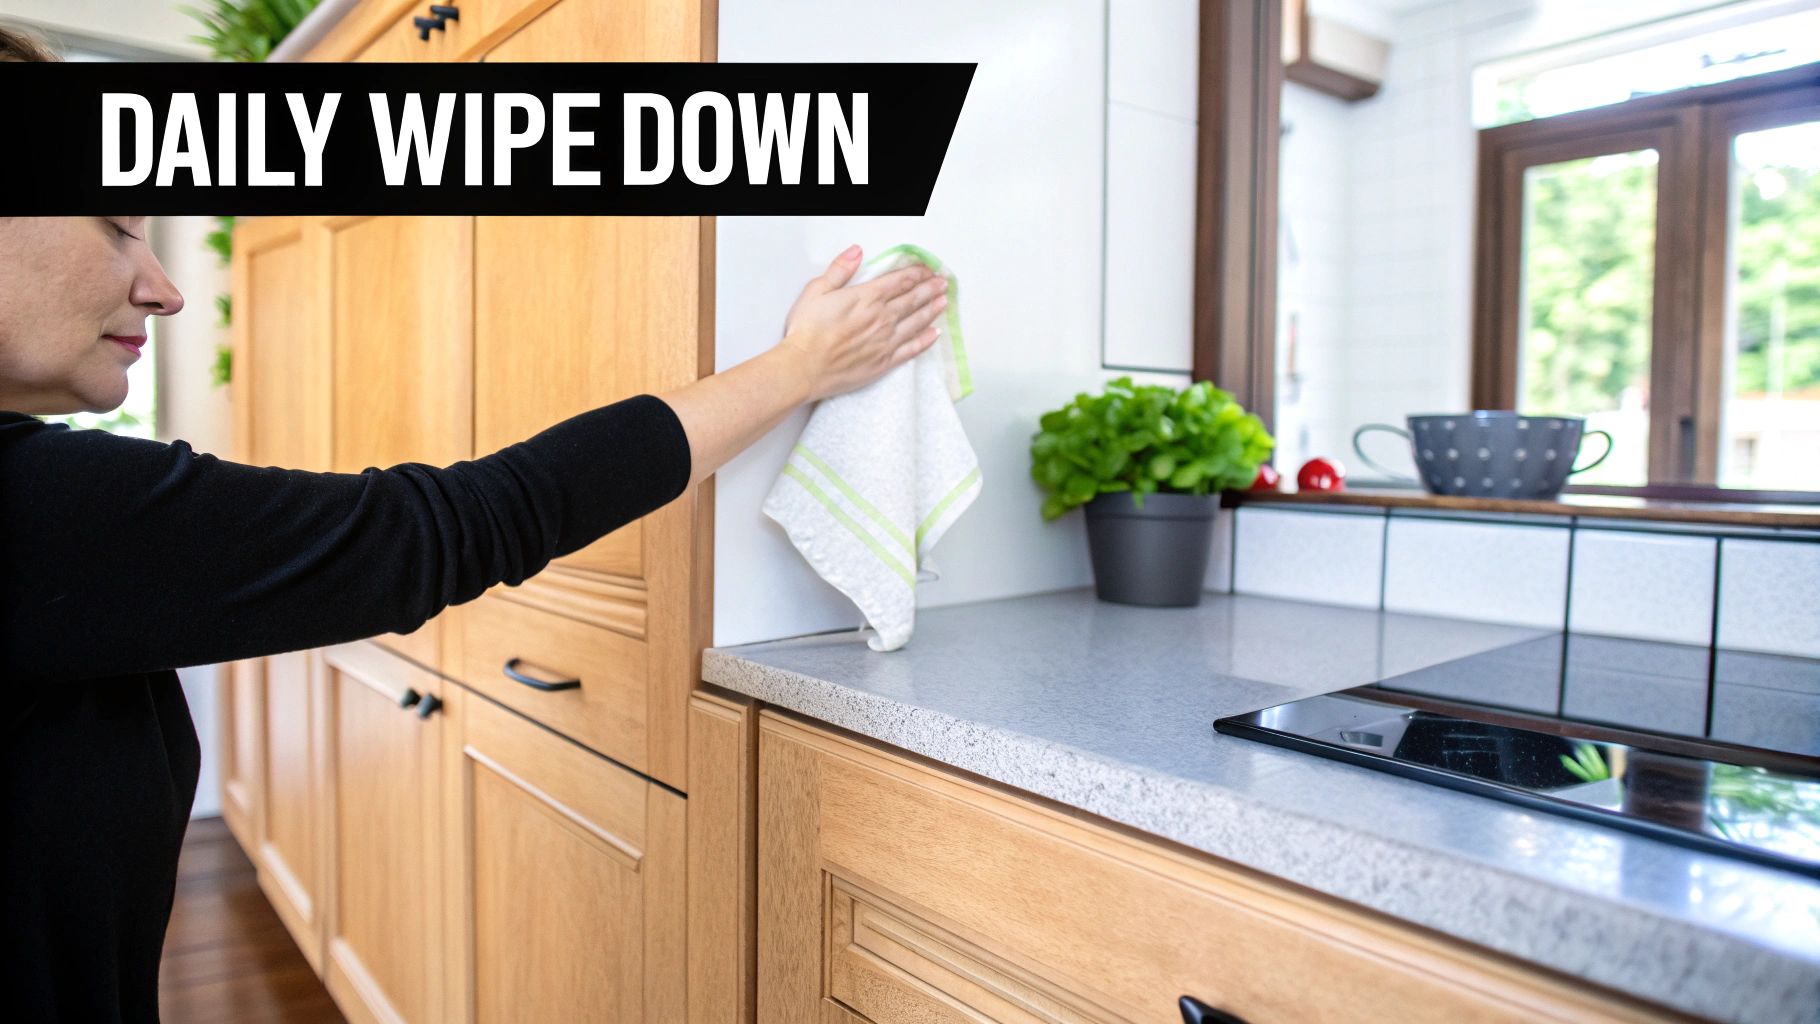
Creating a Maintenance Routine That Fits Real Life
The real key to beautiful, long-lasting cabinets isn't one huge cleaning blitz—it's consistency. Let's be honest, though; no one has the time or energy for the intense daily cleaning routines you might see in a magazine. The difference between cabinets that look brand new for decades and those that show wear after just a few years comes down to a simple, practical maintenance plan. The best way to clean wood kitchen cabinets for the long haul is to adopt small, frequent habits that fit into your actual life.
A massive cleaning session every six months can feel overwhelming. It also gives everyday grime, grease, and food splatters plenty of time to set, making them much tougher to remove. By integrating tiny cleaning habits into your kitchen routine, you can prevent 90% of common cabinet issues before they even begin. For instance, keeping a dedicated microfiber cloth under the sink just for quick cabinet wipe-downs makes it second nature to clean up splatters as they happen.
Building a Practical Schedule
An effective maintenance plan has to work for you. Think about your cooking style. If you fry food often, your cabinets will need more regular attention than those in a kitchen where the microwave is the primary appliance. A realistic schedule might look something like this:
- Daily (2 Minutes): Wipe up spills, splatters, and drips immediately. This is the single most important habit you can develop. Keep a dry cloth nearby to buff away any moisture, especially on cabinets around the sink area.
- Weekly (5-10 Minutes): Give high-touch areas a quick wipe-down. This includes handles, pulls, and the cabinet frames right around them. A slightly damp microfiber cloth is perfect for lifting fingerprints and fresh grime before it has a chance to build up.
- Seasonally (1 Hour): This is your chance for a more thorough clean. Empty the cabinets, wipe down the interior shelves, and tackle any stubborn spots on the doors and frames. It's also a great time to inspect the finish for any early signs of wear and tear. Seeing the latest kitchen cabinet color trends might even inspire you to keep your space looking its best.
This tiered approach turns a huge chore into small, manageable tasks. If you want to ensure your cabinets stay in top condition without adding more to your plate, consider professional routine cleaning services. It can be a great way to set up an effective, ongoing care plan. This proactive strategy is always more effective than waiting until a deep clean is desperately needed.
Industry Secrets for Long-Term Cabinet Beauty
Have you ever wondered what separates cabinets that look incredible after twenty years from those that show their age in just five? It’s not always about the initial quality. It's often about understanding the invisible forces at play in your kitchen. Cabinet makers and designers know that factors beyond cleaning—like your home's environment and proactive protection—are the real keys to longevity. The best way to clean wood kitchen cabinets also involves protecting them from what happens between wipe-downs.
For instance, that gorgeous sunny window streaming light into your kitchen could be slowly working against your cabinets. UV light exposure is a well-known culprit for fading and breaking down wood finishes over time. A simple fix is to add a UV-blocking film to your windows. It’s a completely invisible upgrade that pays for itself by preserving your cabinet’s original color and integrity.
Proactive Protection and Advanced Care
Beyond sunlight, another silent threat is fluctuating humidity. Wood is a natural material, so it expands in humid summers and contracts in dry winters. This constant movement can stress the joints and finish, eventually leading to cracks. Running a dehumidifier during those muggy months and a humidifier in the winter helps create a more stable environment, reducing this stress on the wood.
For a more advanced conditioning treatment, especially if you have oil-finished wood, you can periodically apply a high-quality furniture polish or a specialized cabinet conditioner. This isn't an everyday job, but more of a seasonal ritual that nourishes the wood, brings back its natural luster, and adds a protective layer. Think of it like a deep-conditioning treatment for your hair—not necessary for every wash, but essential for long-term health. Learning more about different cabinet construction types can also help you understand their specific needs and weak points.
Finally, give your hardware some attention. Loose handles or sticky drawer slides put extra strain on the wood every time you open a door or drawer. A quick seasonal check to tighten screws and lubricate hinges ensures everything operates smoothly and prevents unnecessary wear on the cabinet frames and doors. These small, expert-level habits are what truly keep a kitchen looking beautiful for decades.
Your Complete Cabinet Care Action Plan
After diving into wood types, cleaning methods, and natural solutions, it's time to put it all together into a plan that actually works for your kitchen. The best way to clean wood kitchen cabinets isn't some rigid formula; it's a personalized routine. This plan will help you turn everything you've learned into simple habits that keep your cabinets looking great for the long haul.
This isn't about adding another huge chore to your to-do list. It’s about being consistent with small, smart actions that stop major grime and damage before they start. Let's build a realistic action plan that fits your schedule, budget, and the specific needs of your cabinets.
Your Seasonal Checklist for Success
To avoid feeling overwhelmed, it helps to break down cabinet care into a simple, seasonal rhythm. This approach prevents gunk from building up and turns one massive job into a few easy tasks spread throughout the year.
- The Weekly Wipe-Down: Set aside just 5-10 minutes each week to wipe down the spots you touch most—handles, pulls, and the cabinet frames around them. For this, a damp microfiber cloth is usually perfect for erasing fresh fingerprints and smudges before they have a chance to set.
- The Monthly Refresh: Once a month, give your cabinets a slightly deeper clean. Use your go-to solution, whether that’s a simple mix of mild dish soap and water or a diluted vinegar spray. This is your opportunity to tackle any new food splatters or greasy films, especially on the cabinets near your stove.
- The Quarterly Inspection & Polish: Every three months, it’s time to play detective. Look closely for any early warning signs, like a peeling finish near the sink or a loose hinge. If you have oil-finished cabinets, this is the ideal moment to apply a nourishing wood conditioner to bring back their beautiful, natural shine.
Budget-Friendly vs. Premium Care
You don't need a huge budget to maintain beautiful cabinets. For everyday upkeep, a homemade solution of water and vinegar is surprisingly effective and costs next to nothing. When you encounter tougher grime, a high-quality, pH-balanced commercial wood cleaner can deliver great results without harming your cabinet's finish. No matter your budget, a good set of microfiber cloths is a worthwhile investment—they’re essential for cleaning without causing scratches.
Ultimately, the best action plan starts with quality construction. For homeowners who want to protect the heart of their home, choosing cabinets built for longevity is key. At Sinclair Cabinetry, we create custom wood cabinets designed for timeless style and durability. Discover how our craftsmanship can create the foundation for a beautiful kitchen for decades to come.