
A whole house renovation checklist is your master plan, the one thing that breaks a massive, overwhelming project into phases you can actually tackle. It all starts with the big picture stuff—defining your goals and budget—before moving into design, hiring pros, and then getting your hands dirty with demolition, construction, and all the finishing touches before the final walkthrough. Following this kind of structure is non-negotiable for keeping the project on track and, more importantly, on budget.
Why You Need a Plan Before Picking Up a Hammer
Jumping into a whole house renovation without a detailed plan is like trying to drive across the country without a map. You might end up somewhere, but it probably won't be where you wanted to go, and the trip will be a chaotic mess. The planning phase is where you set yourself up for success, making sure every single dollar and decision has a purpose.
First things first, you have to figure out your "why." What's the real reason you're taking on this huge project? Maybe your family is growing and you need more space, or you're tired of living in a time capsule from the 80s, or you're looking to boost your home's resale value. Nailing down this core reason is everything. It becomes your North Star, guiding every choice from moving walls to picking out cabinet pulls. When you hit an inevitable snag or budget crunch, that "why" is what keeps you focused on the finish line.
Defining Your Project Scope
Once you know your motivation, you can start mapping out the project's scope. This just means making a detailed list that separates your absolute must-haves from your nice-to-haves. Honestly, this is one of the most important things you'll do for your budget.
- Must-Haves: These are the dealbreakers. Things like fixing that leaky roof, adding a much-needed bedroom, or addressing the obvious signs you need a remodel in a kitchen that's falling apart.
- Nice-to-Haves: This is the fun stuff, the dream features you'd love to have if the money is there at the end of the day. Think heated bathroom floors or that fancy wine fridge.
Going through this exercise forces you to be realistic from the get-go. If you're looking for more ways to structure your planning, this ultimate house renovation checklist has some great additional pointers.
Your project scope is more than a wishlist—it's your defense against "scope creep." That's the sneaky process of adding little things here and there that ends up blowing your timeline and your budget. A solid, well-defined scope is the best tool you have to fight off those costly impulse decisions.
This visual really breaks down how a clear project scope flows directly into a realistic budget, complete with that all-important contingency fund.
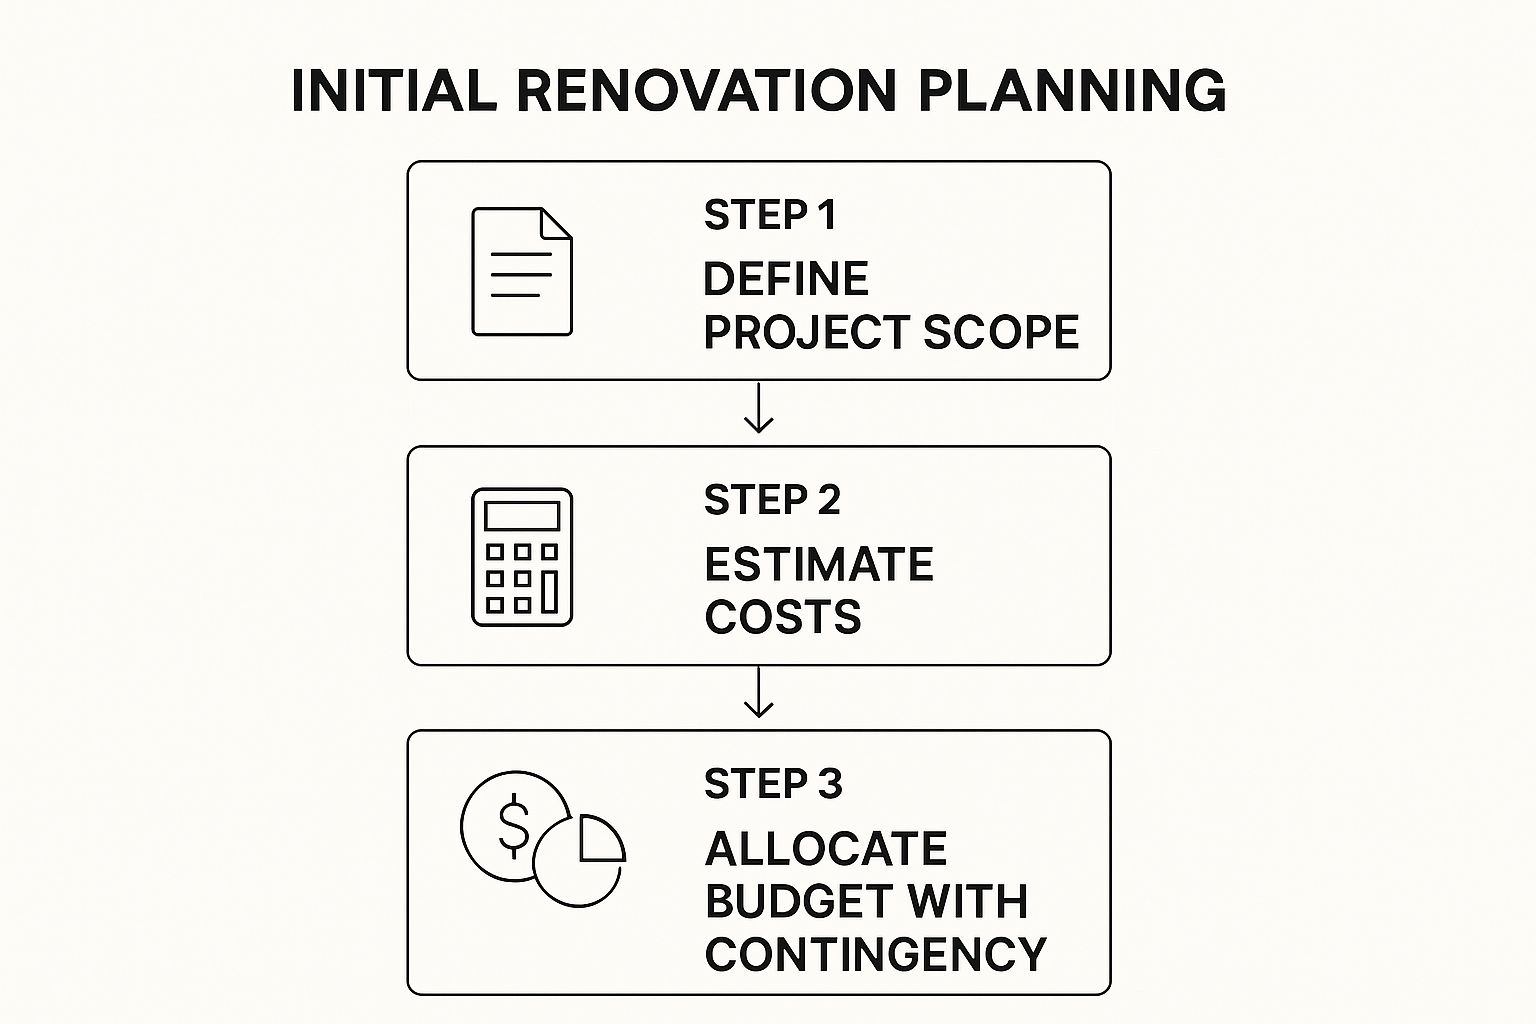
As the infographic shows, a great plan is built on steps that depend on each other. When your scope is crystal clear, it makes estimating costs and setting your final budget so much easier.
The 5 Core Phases of a Whole House Renovation
Understand the entire renovation journey at a glance with this high-level overview of each distinct phase.
| Phase | Key Objective | Primary Tasks |
|---|---|---|
| Phase 1: Planning & Design | Create a detailed blueprint and financial plan for the entire project. | Define goals, set a budget, hire an architect/designer, and create final drawings. |
| Phase 2: Permitting & Prep | Secure all necessary approvals and prepare the site for construction. | Submit plans to the city, finalize contractor bids, and clear out the renovation area. |
| Phase 3: Demolition & Framing | Tear down the old and build the new structural framework. | Interior demolition, foundation work, rough framing, and installing windows/doors. |
| Phase 4: MEP & Systems | Install all major mechanical, electrical, and plumbing systems. | Rough-in plumbing, HVAC ductwork, and electrical wiring. |
| Phase 5: Finishes & Fixtures | Bring the design to life with all the final aesthetic details. | Drywall, painting, flooring, cabinet installation, tiling, and fixture installation. |
Seeing the project broken down like this helps you understand the logical order of operations and mentally prepare for what’s ahead. Each phase builds on the last, leading you step-by-step toward the finish line.
Nailing Down Your Budget and Assembling Your Team

Okay, you’ve got the vision. Now it’s time to ground that dream in reality by tackling the two pillars of any successful renovation: your budget and your team. This is the moment your dream home meets the hard numbers. Getting these two things right from the get-go is probably the single best thing you can do to keep your project on track and on budget.
Homeowners are investing more in their spaces than ever before. The global home renovation market is expected to jump from $2049.25 billion in 2025 to a staggering $2659.60 billion by 2032. That’s a lot of new kitchens and bathrooms! It also highlights just how critical it is to plan your finances carefully to make sure every dollar counts. You can check out more on this trend over at Fortune Business Insights.
Building a Bulletproof Renovation Budget
A real-deal budget is more than just a list of things you want to buy; it’s your financial roadmap for the entire project. The best way to start is by breaking it all down into the big categories.
- Materials: This is everything from the 2x4s and drywall that form the bones of the project to the fancy tile and light fixtures that give it personality.
- Labor: Be prepared for this to be your biggest expense. It covers the plumbers, electricians, carpenters, painters—all the skilled pros who bring the vision to life.
- Permits and Fees: Don’t let the boring stuff sneak up on you. Your local city or county will need their cut, so factor in these administrative costs.
- Tools and Equipment: Are you renting a floor sander or buying a new set of saws? Make sure to account for it.
Here’s the most important line item, and it’s one you hope you never touch: the contingency fund. Set aside 15-20% of your total budget for the unexpected. This isn’t optional. It’s a project-saver.
Picture this: your crew starts demolition for a kitchen expansion and finds a nasty surprise—a slow leak has rotted out the studs inside the wall. Without a contingency fund, that discovery could mean giving up your dream kitchen island or, worse, stopping the project altogether. With a fund, it's just a problem to be solved, not a complete disaster.
Assembling Your A-Team
A renovation is only as good as the people building it. Finding the right contractor isn't a step you can rush. It takes some serious diligence, but the payoff is a smoother project with fewer headaches.
Think of your general contractor (GC) as the quarterback of your project. They coordinate everyone, from the foundation guys to the final painters, and are your go-to problem solver.
Finding and Vetting Your Contractor
- Gather Recommendations: Start with people you trust—friends, family, maybe an architect you know. Online reviews can be a good starting point, but a personal referral is gold.
- Interview at Least Three Candidates: This is a job interview, plain and simple. Ask about their experience with projects like yours, how they prefer to communicate, and what their current workload looks like. You don't want to be their last priority.
- Verify Credentials: Always, always ask for their license number and proof of both liability insurance and worker's compensation. Then, actually check it with your state’s licensing board.
- Check References Thoroughly: Don't just get a list of names—call them. Ask the tough questions: How was the experience? Did the project stay on budget? How did the contractor handle it when something went wrong?
For a really detailed breakdown of what to ask, our guide offers a handy contractor hiring checklist to make sure you’ve covered all your bases.
Dissecting Quotes and Contracts
Once you’ve narrowed it down, ask your top candidates for a detailed, itemized bid based on your plans. If you get a vague, one-page estimate, consider it a huge red flag. A proper bid breaks down costs for materials, labor, and permits so you know exactly what you’re paying for.
And don’t just automatically go for the cheapest option. A bid that’s way lower than the others could be a sign of cheap materials, inexperienced labor, or something important being left out of the scope.
Before you sign a single thing, have a lawyer look over the contract. Make sure it clearly outlines:
- A detailed scope of work.
- An itemized cost breakdown.
- A payment schedule tied to specific milestones.
- A projected start and finish date.
- The process for handling change orders.
- Proof of lien waivers.
A solid contract protects you and the contractor. It sets clear expectations from day one and gives you legal footing if things go south. Taking the time now to get your budget and team locked in will pay off big time down the road.
Tearing It Down: Demolition and Major Structural Changes

Alright, you’ve got your budget locked in and your dream team assembled. The quiet planning phase is officially over, and now the real fun begins—the loud, dusty, and incredibly satisfying part where your vision starts to become a reality.
This is the stage of controlled chaos. Welcome to demolition and major structural work, where we strip your old house down to make way for its new life. It’s often one of the quickest phases, but it can definitely feel like the most disruptive. Just remember, this isn't about aimlessly swinging a sledgehammer; it's a carefully planned operation.
Before anyone even thinks about touching a wall, your contractor absolutely must have all the necessary permits in hand. Trying to start demolition without them is a recipe for disaster, leading to expensive fines and stop-work orders that will bring your entire project to a screeching halt.
Gearing Up for the Big Tear-Down
A little prep work goes a long way in keeping the demolition process from taking over your entire life. This is about more than just moving furniture out of the way; it’s about protecting your home and keeping some sense of order while the dust flies.
First things first: protect everything that isn’t part of the renovation. Seal off doorways with heavy plastic sheeting to contain the dust—and trust me, that dust will try to get everywhere. You’ll also want to cover air vents in nearby rooms and lay down protection for any floors you’re keeping.
And if you’re living in the house through all this? You’ll need to get a little creative.
- Create a temporary kitchen. A microwave, a mini-fridge, a coffee maker, and a big stack of paper plates will be your lifeline. Find a corner in the basement or a spare room and set up your makeshift command center.
- Secure your valuables. Pack up anything fragile—artwork, important papers, you name it. Either move it to a room far from the action or, even better, put it in an off-site storage unit for safekeeping.
- Set clear boundaries. Have a chat with your contractor. Establish clear pathways for the crew, figure out where they can store tools, and designate a bathroom for them to use.
Down to the Studs and What Lies Beneath
Once the site is prepped, the real show begins. The goal is to get the space "down to the studs," creating a clean slate for all the new work. This means ripping out old drywall, insulation, flooring, cabinets, and fixtures. It’s also the moment of truth when you might uncover some surprises hiding in the walls—think old plumbing problems or quirky structural issues.
This is precisely why you have that contingency fund. Unforeseen problems are pretty standard in old homes, but having that financial cushion turns a potential crisis into just another box to check.
Communication with your contractor is absolutely non-negotiable during this phase. Daily check-ins, even a quick 10-minute chat, are crucial to make sure the work is lining up with the plans. It’s your chance to ask questions and double-check that every change matches the architectural drawings.
After the tear-down, the focus shifts to the heavy lifting: the structural modifications. This is the new skeleton of your home, and it has to be built with precision, following the engineering specs to the letter.
The Order of Operations for Structural Work
The sequence here is critical. Each step builds on the last, and doing things out of order can cause major headaches and expensive rework.
- Foundation and Framing: All major structural work starts from the ground up. This could mean repairing foundation issues, pouring new footings for an addition, or framing out the new walls, floors, and rooflines.
- Load-Bearing Wall Changes: If your dream open-concept layout means taking out a load-bearing wall, this is when the big guns come out. Massive beams, often LVL (Laminated Veneer Lumber), are installed to carry the structural load.
- Mechanical, Electrical, and Plumbing (MEP) Rough-In: With the new frame in place, it’s time for the "rough-in" stage. This is where plumbers run new water supply and drain lines, electricians pull all the new wiring for outlets and lights, and the HVAC crew installs the ductwork. Think of it as installing your home’s circulatory system.
Being able to look at the blueprints is a huge advantage here, as you can verify that everything is being placed correctly. If you've never looked at a set of plans, learning how to read construction blueprints can empower you to spot a potential problem before it gets buried behind drywall. Catching that an outlet for your future kitchen island is a foot off-center now can save you a world of frustration down the road. This is your last easy chance to make changes to these core systems.
Closing Up the Walls and Sealing the Exterior
The demolition dust has settled and the noisy part is mostly over. Your home’s new skeleton is in place, and this is where the magic really starts to happen. We're moving from tearing down to building up—creating the protective shell that will eventually become your finished home.
This phase is all about what pros call the building envelope. Think of it as wrapping your home in a high-performance jacket. We'll go from open studs to a weather-tight structure, covering everything from the roof and windows all the way to the first sheets of drywall. It’s an exciting milestone when those framed spaces finally begin to feel like real rooms again.
Creating a Weather-Tight Exterior
Your home’s first line of defense against the elements is its exterior cladding and roofing. There's no room for error here; getting this right is non-negotiable for protecting the structure from moisture, wind, and whatever else Mother Nature throws at it. The sequence of operations is also incredibly important to make sure every layer overlaps correctly, creating a seamless, waterproof barrier.
The process almost always follows this order:
- Roofing First: Once the framing is done, the roof is typically the next big step. The sheathing gets covered with a tough underlayment, followed by your final roofing material—shingles, metal, tile, you name it.
- Windows and Exterior Doors: With the roof on, it’s time to install windows and exterior doors. Proper flashing and sealing around every single opening is make-or-break. Water intrusion is one of the most common and costly problems down the road, and this is where you prevent it.
- Siding and Finishes: Finally, the house wrap goes on, followed by siding, brick, or stucco. This completes the primary weather barrier and gets the structure "dried-in," which is a huge relief. It means interior work can finally start without being at the mercy of the weather.
Before a single sheet of drywall goes up, you absolutely must complete any electrical updates. This is your last, best chance for your electrician to run new circuits and make sure everything is up to code. For a major renovation, this often means bringing in professional wiring and rewiring services to handle the heavier electrical loads of a modern home.
Insulating and Air Sealing for Efficiency
With the outside buttoned up, the focus shifts to what’s between the studs. Insulation and air sealing are easily two of the best investments you can make for your home's long-term comfort and energy bills. In fact, the Department of Energy estimates that proper insulation can slash your heating and cooling costs by up to 20%.
This is more than just stuffing some pink fluff into the walls. The insulation you choose needs to be the right fit for your climate and budget.
- Fiberglass Batts: This is the go-to, affordable option that works great for standard wall cavities.
- Spray Foam: It costs more, but spray foam gives you superior air sealing and a higher R-value per inch. It’s perfect for sealing up tricky spots and creating an incredibly tight building envelope.
- Mineral Wool: Not only does mineral wool provide excellent thermal insulation, but it’s also fire-resistant and a fantastic sound-dampener.
Here’s a pro tip: The real secret to an efficient home isn’t just the insulation itself—it’s the air sealing you do beforehand. Meticulously sealing every little gap around windows, electrical boxes, and plumbing pipes with caulk or foam makes a world of difference. It’s a tedious step, but it pays you back in comfort and lower energy bills for years.
Hanging and Finishing Drywall
Now for the moment you’ve been waiting for. Hanging drywall is when your framed-out spaces are transformed into defined rooms with smooth, solid walls. The process starts with hanging the large sheets of gypsum board, but the real skill comes in the finishing.
Taping and mudding the seams is a true art form. A good drywall finisher will apply three or more thin coats of joint compound, sanding meticulously between each one to create a flawless, seamless surface. Once it’s perfectly smooth and has had time to cure, a coat of primer goes on. This seals the porous surface of the new drywall and mud, ensuring that your final paint colors look even and rich.
This primed "white box" is the clean slate your painter, flooring installer, and cabinet maker have been waiting for. The messy work is done, and the beautiful finishes are just around the corner.
Installing Finishes, Fixtures, and Final Details

This is the part everyone waits for. The dust is finally settling, the heavy lifting is over, and your home is basically a blank canvas—a primed "white box" just waiting for its personality. All those design choices you agonized over months ago are about to spring to life, turning what was a construction zone into a space that feels like yours.
Getting the order of operations right at this stage is absolutely crucial. A simple misstep, like putting down gorgeous new hardwood floors before the painters do their final touch-ups, can create a world of headaches and costly rework. This phase is less about brute force and more about precision, patience, and a logical workflow.
Laying the Foundation with Flooring and Trim
Once the walls are primed and ready, it's time to install your hard-surface flooring and all the detailed trim work. This is when the architectural bones of each room really start to show.
The golden rule here is to paint the walls and ceilings before the final flooring goes down. This lets the painters work quickly and efficiently without having to worry about every single drop and splatter on your brand-new floors. Once the paint is fully cured, the flooring installers can come in and work their magic.
Here's the sequence we always follow:
- Install Hard Flooring: The hardwood, LVT, or tile goes down first across all the main areas.
- Hang Interior Doors: With the final floor height established, you can hang the interior doors and install the surrounding casings.
- Add Baseboards and Molding: Baseboards are one of the last trim pieces to be installed. They neatly cover the expansion gap between the wall and the floor, giving you a clean, finished line.
This is a critical takeaway for any whole house renovation checklist: Paint first, then floors, then trim. Sticking to this order protects your new materials and gives you crisp, professional-looking lines where walls, floors, and door frames meet.
Bringing the Kitchen and Bathrooms to Life
Kitchens and bathrooms are the undisputed stars of the finishing phase—and usually the most complex. A massive chunk of most renovation budgets is poured into these high-value spaces. It's no surprise that looking ahead to 2025, industry projections show that 38% of all renovations will focus on kitchens and another 26% on bathrooms. You can dig into more of these renovation trends to see what’s driving the market.
Getting these rooms right is a carefully choreographed dance between several different trades.
Cabinet and Countertop Installation Checklist
- Set the Base Cabinets: First, the lower cabinets get installed, meticulously leveled, and secured to the walls. This establishes the footprint for your kitchen or vanity.
- Template for Countertops: As soon as the base cabinets are in, the countertop fabricator comes out to create a precise template. For materials like granite or quartz, this step has to be perfect.
- Install Upper Cabinets: While you're waiting for the countertops to be cut—which can take a week or more—it's the perfect time to get the upper cabinets hung.
- Install Countertops: The finished countertops are delivered and professionally installed, instantly elevating the look of the room.
- Tile the Backsplash: With the counters in place, the tile setter now has a perfect line to work from for the backsplash.
Following this order is non-negotiable. Trying to install a backsplash before the countertop, for instance, is a recipe for disaster.
The Final Systems Hookup and Fixture Installation
With floors, cabinets, and countertops in, it's time to bring your home's systems fully online. This is where your plumbers and electricians return to transform the functional rough-ins into the beautiful, usable fixtures you'll interact with every day.
Plumbing Final Fixture Set
Plumbers call this the "trim-out" phase. They come back to install all the visible components that connect to the pipes hidden in your walls.
- Sinks and Faucets: Kitchen and bathroom sinks are dropped into the countertops and faucets are connected.
- Toilets: Toilets are set in place, sealed, and hooked up to the water supply.
- Shower and Tub Fixtures: This includes installing the showerheads, tub spouts, and control handles you picked out.
- Appliances: The dishwasher gets hooked up, as does the water line for the refrigerator's ice maker and dispenser.
Electrical Final Fixture Set
In the same way, the electrician makes a final pass to complete all the connections. This is the moment your lighting plan truly comes to life, adding layers of ambiance and function throughout the house.
- Light Fixtures: Chandeliers, pendants, sconces, and ceiling fans are all hung and connected.
- Switches and Outlets: All the switches, dimmers, and outlets are installed and finished with their faceplates.
- Appliance Connections: Hardwired appliances like your oven, cooktop, or microwave are officially connected.
Once these final fixtures are in, your house stops feeling like a project and starts feeling like a home. Every flick of a switch and turn of a faucet is a small, satisfying victory.
Executing the Final Walk-Through and Punch List
You’ve made it. The dust has settled, the last tradesperson has packed up their tools, and your house is starting to feel like a home again. But don't pop the champagne just yet. This final phase, often called the last 5%, is where your attention to detail matters most. A thorough final walk-through is your last line of defense against lingering imperfections before you sign off on the project.
Your general contractor will schedule this walk-through with you. It's a formal, room-by-room inspection to spot anything that’s incomplete or not quite up to par. I always tell my clients to come prepared: bring a notepad, a roll of blue painter's tape, and your most critical eye. This is not the time to be shy; point out every single issue you find, no matter how small it seems.
Creating an Effective Punch List
As you move through each room, you’ll be building what we call a punch list. Think of it as a documented to-do list of every minor fix needed before you release that final payment. That blue painter's tape is your best friend here—use it to mark the exact location of each issue so there’s absolutely no confusion later.
Your punch list might include things like:
- A small paint scuff on the new baseboard in the hallway.
- A kitchen cabinet door that isn’t perfectly aligned with the one next to it.
- A light switch plate that was installed slightly crooked.
- A tiny chip on the corner of a tile in the new bathroom.
Get incredibly specific in your notes. Don't just write "paint touch-up." Instead, write, "Paint scuff on the west wall of the master bedroom, next to the window." This level of clarity helps the contractor tackle every item efficiently without coming back to you with questions.
A detailed punch list is your final piece of leverage. It’s a professional, non-confrontational way to communicate exactly what needs finishing to meet the terms of your contract. Don't even think about considering the project complete until every single item on this list is checked off to your satisfaction.
Once you and your contractor agree on the punch list, their team will work through the fixes. This usually takes anywhere from a few days to a week, depending on how long the list is and what kind of coordination is needed.
Final Cleaning and Systems Check
While the contractor is handling the punch list, it's time for the final, deep clean. This isn't your average weekly tidy-up; this is a top-to-bottom, construction-grade cleaning to get rid of that fine layer of dust that has a knack for settling everywhere. It's also the perfect opportunity to test out every new system and appliance.
- Appliance Run-Through: Run a full cycle on the dishwasher, washing machine, and dryer.
- HVAC Test: Turn on the heating and air conditioning to make sure they’re running smoothly.
- Plumbing Check: Run every faucet, flush every toilet, and keep an eye out for slow drains or any hidden leaks.
This is also when the final exterior tasks, like landscaping or installing an irrigation system, get wrapped up. This kind of work is always saved for last to avoid damage from all the heavy foot traffic and equipment used during the main renovation.
Finally, before you write that last check, you need to collect all the essential closeout documents. This includes all product warranties, user manuals for new appliances, and—most importantly—final lien waivers from the general contractor and all major subcontractors. A lien waiver is a legal document confirming they've been paid in full and give up any right to place a lien on your property. This is your ultimate protection, ensuring your whole house renovation checklist is truly, officially, complete.
Your Top Questions About Whole House Renovations
Taking on a massive remodel is a huge deal, and it's only natural to have a long list of questions. While a solid whole house renovation checklist is your best friend, a few concerns pop up so often that they really deserve their own spotlight.
Getting straight answers to these common questions from the get-go helps you set realistic expectations and navigate the entire process with a lot more confidence.
How Long Will This Actually Take?
This is usually the first thing homeowners want to know. While there’s no magic number, a good rule of thumb for a full gut renovation is somewhere in the 6 to 12-month range. Think of this as a starting point.
That timeline can shift dramatically based on a few key things:
- The sheer complexity of your project.
- How long it takes to get permits approved in your city (this can be a real wild card).
- Your contractor's schedule and the availability of materials.
A simple cosmetic refresh might be wrapped up much faster. On the other hand, if you're planning a large addition, you can bet that will push the timeline out even further.
Can I Live in My House During the Renovation?
This is a big one, with major financial and lifestyle ripple effects. Technically, you can live in your home during some renovations, but it's often far from practical—or pleasant—especially once the heavy demolition and construction phases kick off.
You really need to think about the day-to-day realities. A construction zone is full of hazards like dust, debris, exposed wiring, and fumes. That’s a tough environment for anyone, and it’s especially risky if you have kids or pets running around.
Then there’s the functionality issue. Will you have access to essentials like water, electricity, or a working kitchen? Trying to live without a kitchen for three months is a challenge most people aren't prepared for. Plus, a vacant house lets your crew work faster and more efficiently, which can sometimes lead to cost savings that help offset the expense of renting.
For the vast majority of homeowners, moving out is the smartest move. If your renovation involves major systems like plumbing and electrical, or if essential spaces like the kitchen and primary bathroom will be out of commission, it's time to find a temporary home.
How Do I Handle Unexpected Costs?
Here’s a hard truth: no renovation, no matter how perfectly planned, is immune to surprises. That's precisely why a contingency fund of 15-20% of your total budget isn't just a friendly suggestion—it's an absolute must. This is your financial safety net for all the things you can't see coming.
What kind of surprises are we talking about?
- Discovering hidden water damage or mold hiding behind the drywall.
- Realizing old electrical wiring needs to be brought up to current building codes.
- Uncovering structural issues that were impossible to spot until demolition started.
When one of these issues pops up, your contractor should present you with a formal change order. This document clearly lays out the new work required, what it's going to cost, and how it might affect the project's timeline. Always make sure you review and approve any change orders in writing before the new work begins. It’s the best way to keep your budget on track.
Ready to bring your vision for a new kitchen, bathroom, or custom closet to life? The experts at Sinclair Cabinetry inc have over 35 years of experience crafting beautiful, high-quality custom cabinets that transform any space. Explore our gallery and see what’s possible.