
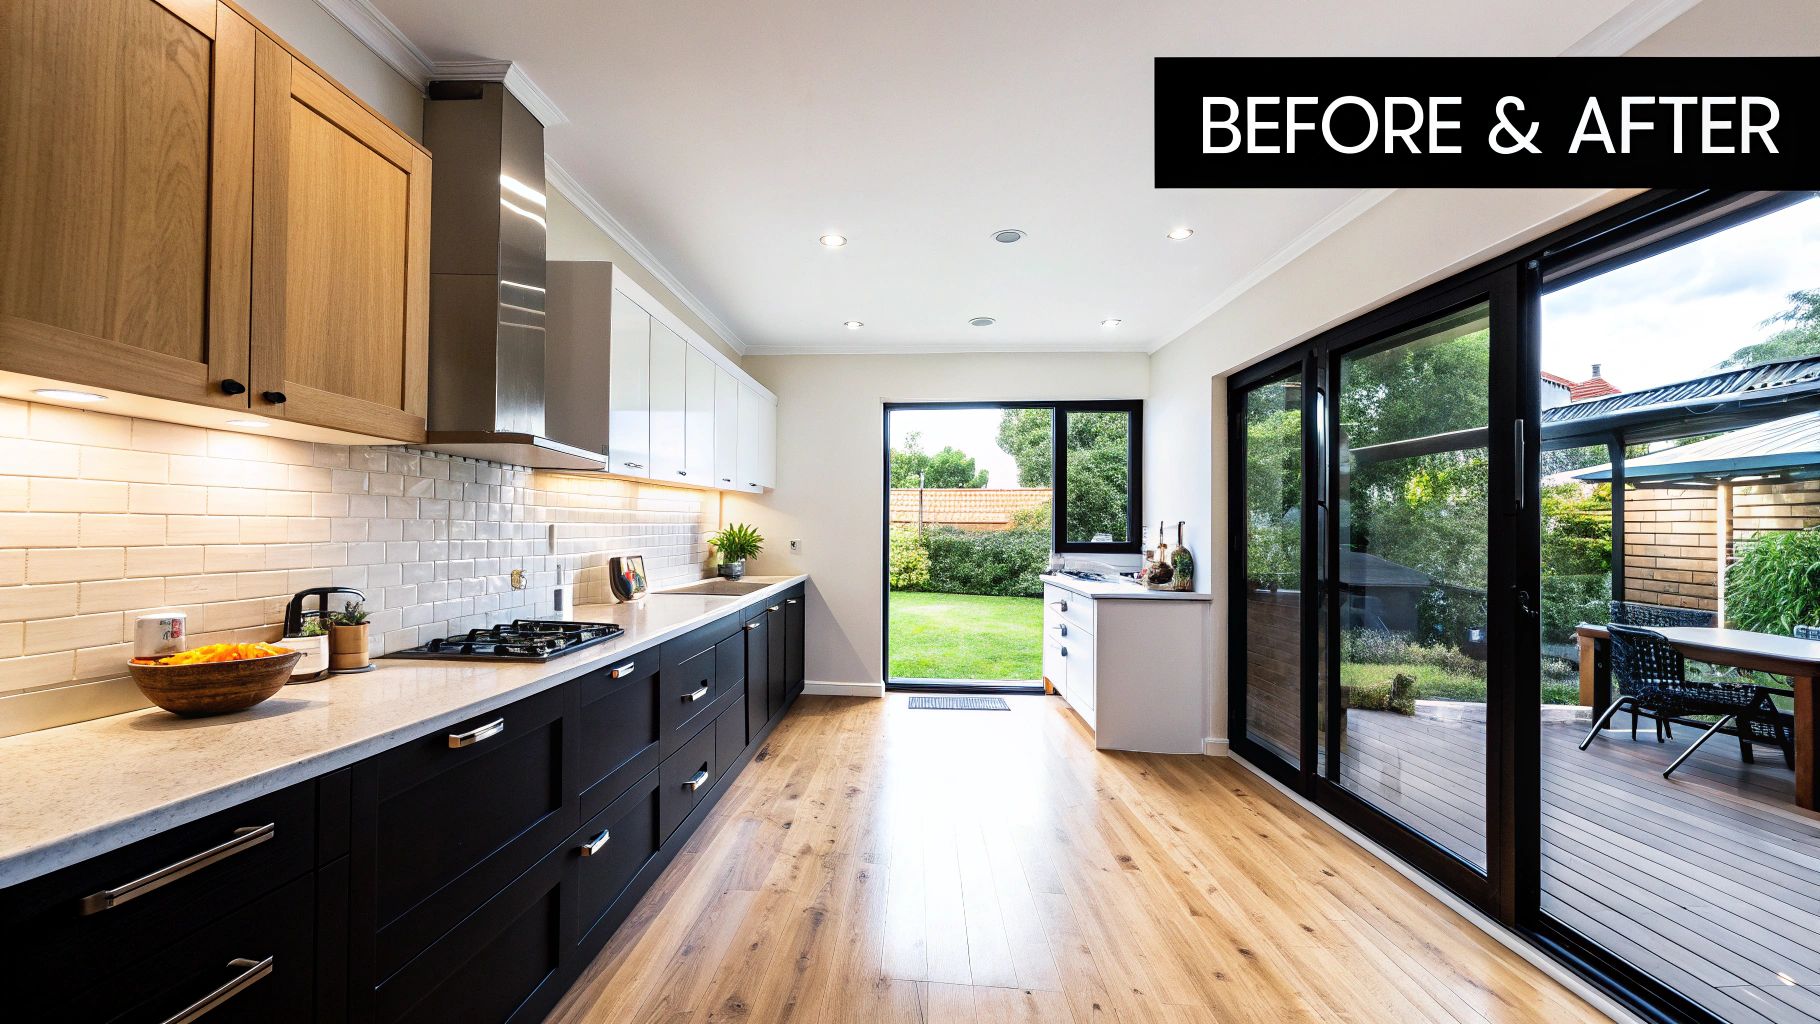
The journey to remodel a galley kitchen, as seen in stunning before and after photos, is all about strategic design. It’s amazing how focusing on smart layouts, light-enhancing materials, and clever storage can turn a cramped corridor into a beautiful, functional space that works for you. The key is maximizing every single square inch.
The Real Potential of a Galley Kitchen Remodel
Galley kitchens are often underestimated, but they're powerhouses of efficiency. The simple, two-wall design is rooted in practicality, minimizing the steps between your sink, stove, and fridge to create an intuitive workflow. This layout isn't a limitation; it's a canvas for incredible creativity. With the right approach, a tight, dated passage can become a bright, welcoming hub that feels surprisingly spacious.
This layout is seeing a resurgence, especially in smaller homes and urban apartments where every foot of space counts. The 2025 Houzz Kitchen Trends Study found that galley layouts now account for 11% of all kitchen layout changes—a clear sign of their lasting appeal in modern design.
Understanding Your Project Scope
Before you even think about picking up a sledgehammer, it’s critical to get a firm handle on the full scope of your project. A successful remodel galley kitchen before after transformation is built on a foundation of clear, upfront planning. This means looking beyond just the pretty finishes and thinking through the practical elements that will define your new kitchen.
Taking some time to review comprehensive tips for remodeling your home before you begin can help you set realistic expectations and sidestep common headaches.
Here are the key areas you'll want to define early on:
- Budget: Nail down a realistic number that covers everything—cabinetry, countertops, labor, and a contingency fund for those inevitable surprises.
- Timeline: Map out a clear schedule for each phase. Think design, material selection, demolition, installation, and all the finishing touches.
- Must-Have Features: Make a list of your non-negotiables. Is more counter space your top priority? Better lighting? Or maybe specific storage like a pull-out pantry?
- Return on Investment (ROI): Remember, a well-planned kitchen remodel doesn't just improve your daily life; it can also add significant value to your home.
A thoughtful remodel isn’t just about replacing old fixtures. It’s about re-imagining how you live in the space and designing a kitchen that supports your lifestyle for years to come.
Setting these parameters from the get-go gives you a solid roadmap. It turns what could be an overwhelming process into a manageable and exciting journey. For a little more inspiration on what's possible, check out our guide on kitchen remodeling ideas for galley kitchens.
To give you a clearer picture, here's a quick look at what a typical galley kitchen project involves.
Galley Kitchen Remodel Project at a Glance
| Metric | Average Range | Key Considerations |
|---|---|---|
| Project Cost | $15,000 – $40,000+ | Varies based on material quality, labor costs, and structural changes. |
| Project Timeline | 4 – 12 weeks | Depends on contractor availability, material lead times, and project scope. |
| Return on Investment | 60% – 80% | Higher ROI often comes from mid-range remodels with timeless appeal. |
| Cabinetry Costs | 30% – 40% of total budget | This is the largest expense; custom or semi-custom will cost more. |
| Labor Costs | 20% – 35% of total budget | Includes demolition, installation, plumbing, and electrical work. |
This table provides a solid baseline, but remember that every project is unique. Your final numbers will depend on your specific choices and location.
Designing a Layout That Works for You
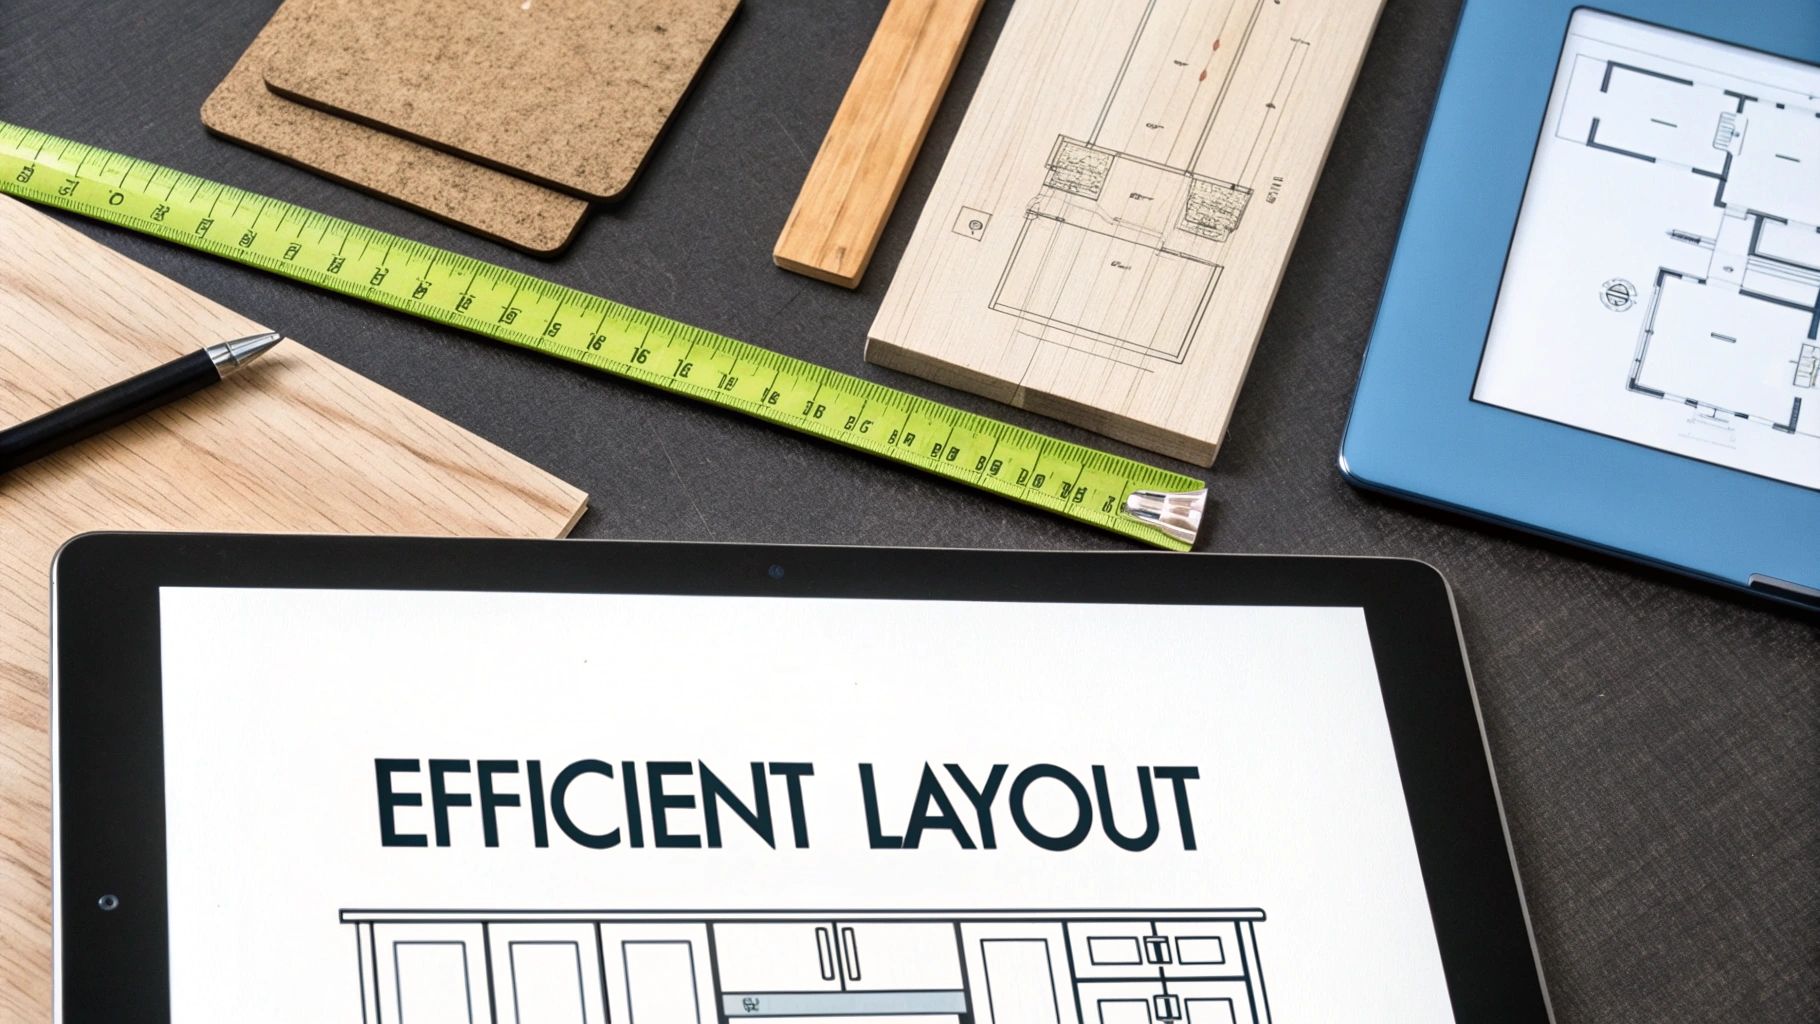
The secret behind every stunning remodel galley kitchen before after story isn't just beautiful finishes—it's a brilliant layout. While the classic two-wall corridor is the standard, modern design has opened up some exciting possibilities that can dramatically improve workflow and create a surprising sense of space.
Your floor plan is the functional backbone of your entire kitchen. Getting it right is the single most important step you'll take.
Think of your layout as the choreography for your daily cooking routine. The goal is to make every movement feel natural and efficient, from grabbing ingredients out of the fridge to plating your final dish. This all starts with the classic kitchen work triangle—the path between your stove, sink, and refrigerator.
In a galley kitchen, this triangle becomes more of a streamlined work line. The ideal setup often places the sink and stove on one wall, with the refrigerator directly opposite, creating a simple, step-saving flow that just makes sense.
Optimizing Your Workflow
A truly functional layout lives in the details. For example, placing your dishwasher next to the sink is a no-brainer, but have you considered which side? You need to be able to open the dishwasher door completely without blocking the main walkway or trapping someone at the fridge. It's a small detail that prevents major daily frustrations.
Similarly, you need dedicated "landing zones" next to your key appliances. You’ll want at least 15-18 inches of counter space next to the refrigerator for setting down groceries and another clear spot beside the stove for hot pans.
These thoughtful placements are what turn a simple corridor into a high-performance culinary workspace.
Beyond the Traditional Corridor
While the classic two-wall galley is efficient, you’re not locked into it. Depending on your home’s structure, a few creative variations can completely change the feel and function of your kitchen.
- The Broken Galley: If you can remove a small section of a non-load-bearing wall, this layout is a fantastic option. It creates a pass-through or a small breakfast bar, connecting the kitchen to an adjacent room and making it feel much more open and social.
- The Single-Wall Galley: For extremely narrow spaces, consolidating all appliances and cabinetry onto one wall can be a game-changer. This opens up the opposite side, creating a wider walkway that makes the entire room feel less confined.
- The Galley with an End Wall: Some layouts feature a window or a full wall of pantry cabinets at one end. This "dead end" is a great opportunity for a statement feature, like a bold backsplash or a beautiful piece of art that draws the eye and adds personality.
The desire to update these spaces is growing. Heading into 2025, an estimated 35% of homeowners feel their kitchen is in desperate need of a refresh, which is driving more modern and functional designs. For a deeper dive into project costs, Angi's guide to galley kitchen costs is a great resource.
Maximizing a galley kitchen isn't about adding more square footage; it's about making every existing inch work smarter. Smart storage integrated directly into your layout is the key to unlocking its full potential.
Integrating Smart Storage from the Start
A cluttered galley kitchen feels cramped and chaotic. The best way to combat this is by planning for storage at the layout stage, not treating it as an afterthought. This is where high-quality cabinetry, like the solutions from Sinclair Cabinetry, really makes all the difference.
Think about integrating these storage workhorses from day one:
- Full-Height Pantry Cabinets: A tall, narrow pull-out pantry can hold an astonishing amount of food. Placing one next to the refrigerator creates a cohesive and ultra-convenient food storage zone.
- Deep Drawers for Pots and Pans: Swap out lower cabinets for deep, heavy-duty drawers. This lets you see everything at a glance and access heavy cookware without digging around in a dark, awkward cabinet.
- Vertical Dividers: Have a cabinet near your stove fitted with vertical dividers. It’s a simple solution for organizing baking sheets, cutting boards, and platters, preventing those messy, clattering stacks.
- Appliance Garages: A dedicated cabinet with a lift-up or retractable door can hide your toaster, blender, and coffee maker, keeping your limited counter space clear, tidy, and ready for action.
By weaving these elements into your initial floor plan, you design a kitchen that not only looks beautiful but also functions flawlessly. This kind of foresight is what separates an average renovation from a truly exceptional one, ensuring your "after" is as practical as it is picturesque.
From Dated to Dazzling: A Real Remodel Story

Sometimes, the best way to see what's possible is to walk through a real-life project. Let's dive into one homeowner's remodel galley kitchen before after journey, where they took a dark, crumbling kitchen and turned it into a bright, welcoming space packed with personality.
The "before" picture was a scene many of us know all too well. The kitchen was more of a forgotten hallway, complete with dated cabinets, crumbling grout, and terrible lighting that made the whole space feel gloomy. It was a room you had to endure, not one you could actually enjoy.
What started as a plan for a minor refresh quickly spiraled into a full-blown renovation—a decision that completely changed how the homeowners use and feel about their home.
The Vision: A Moody and Functional Hub
The goal wasn't just to update the space but to create a kitchen that felt cozy, inviting, and uniquely personal. No sterile white boxes here. This meant leaning into color and texture to bring some much-needed warmth to the long, narrow layout.
They landed on a modified shaker-style cabinet, a design that hits that sweet spot between timeless and modern. The color they chose? A stunning, warm olive green. This rich, earthy tone became the anchor for the entire design, giving the room a sense of depth and preventing it from feeling stark. Paired with elegant brass hardware, the combination added a touch of vintage character that just felt right.
This project is a perfect example of how a bold color choice can absolutely work wonders in a small kitchen. Instead of making the galley feel even smaller, the deep green cabinets created an intimate, cozy vibe, turning the kitchen into a little jewel box.
Key Decisions That Made the Difference
A few crucial choices were the real game-changers in this transformation. Each one was carefully thought out to strike the perfect balance between great aesthetics and the practical needs of a kitchen that gets used every single day.
Here are the elements that brought the vision to life:
- Appliances with Personality: Instead of going with standard stainless steel, the homeowners opted for a commercial-style range in a deep ink blue. This not only added another layer of color but also became a gorgeous focal point. To keep things clean, the refrigerator and dishwasher were panel-ready, letting them blend right in with the green cabinetry.
- Durable and Elegant Countertops: For the countertops and backsplash, they went with Caesarstone quartz with subtle veining. This was a smart, practical move. The non-porous surface is incredibly durable and has stood up to chips, cracks, and stains—a must for anyone who loves to cook.
- Strategic and Stylish Lighting: A mix of lighting was key to making the space feel bright and open. A central flush mount provides great ambient light, while an arched wall sconce adds a beautiful decorative touch. This layered approach got rid of all the dark corners that made the old kitchen feel so claustrophobic.
The combination of all these materials is what makes the kitchen feel so curated and cohesive. The warm brass, the deep green cabinets, and the soft, creamy quartz counters all play off each other perfectly.
The Results: Function Meets Feeling
The "after" isn't just a pretty picture; it's a space that truly works. The homeowners report that even after a year of heavy use, everything has held up beautifully. The custom cabinet fronts are durable and a breeze to clean, and the quartz countertops still look brand new.
This project drives home a critical lesson for any remodel galley kitchen before after project: a successful renovation is one that reflects who you are and supports how you live. Every single item, from the cutting boards on display to the faucet, was chosen with intention. It's that personal touch that turns a house into a true home.
Ultimately, the new kitchen has reignited the homeowners' love for cooking. The space is no longer a cramped corridor but a delightful, functional hub where they actually enjoy spending time. For even more inspiration, check out the other projects in our gallery of kitchen remodel before and after transformations.
Choosing Materials to Maximize Your Space
In any remodel galley kitchen before after project, the materials you pick do so much more than just look good—they're your secret weapon for making the space feel bigger. The right finishes can turn a narrow corridor into a kitchen that feels wider, brighter, and way more inviting. It’s all about making smart, strategic choices that blend great style with the practical needs of a galley layout.
This is where your design vision really starts to take shape. The mix of textures, colors, and finishes is what creates a kitchen that feels both cohesive and functional. Let’s break down the big four—cabinets, countertops, flooring, and backsplashes—and talk about how to choose them like a pro.
Cabinets That Create an Illusion of Space
Cabinets are the biggest visual element in your kitchen, so they have the most power to transform a galley. Your goal here is to steer clear of anything that looks heavy or bulky, which can make the walls feel like they’re closing in on you.
- Light Colors are Your Friend: Think whites, soft grays, and pale blues. These colors are fantastic at bouncing light around the room, which instantly makes the space feel more open and airy.
- Sleek Styles Work Best: Stick with simple, clean-lined cabinet doors. Flat-panel or a minimalist shaker style are perfect. Anything too ornate or detailed just adds visual clutter, making a small space feel even busier.
- Mix in Glass or Open Shelving: Breaking up a long, solid wall of upper cabinets is a must. Swapping a few doors for glass fronts or adding a section of open shelving creates visual depth and helps you dodge that dreaded "tunnel effect."
A high-gloss finish can also be a game-changer. That reflective surface acts almost like a mirror, amplifying both natural and artificial light to really open things up. To learn more about which materials hold up best over the long haul, check out our expert guide on luxurious kitchen cabinet materials.
Countertops Durability Meets Design
Counter space is precious real estate in a galley kitchen, so your choice needs to be both gorgeous and tough as nails. The right countertop pulls the whole room together.
For a seamless, spacious vibe, try matching your countertop color closely to your cabinets. A low-contrast palette creates a clean, unbroken visual line that tricks the eye into seeing a bigger, more unified space.
Pro Tip: When you're picking out a slab, look for materials with subtle, delicate veining or a more uniform pattern. Bold, dramatic patterns can easily overwhelm a narrow kitchen, making it feel chaotic and confined.
Here’s a quick rundown of popular options:
| Material | Pros for Galley Kitchens | Cons to Consider |
|---|---|---|
| Quartz | Incredibly durable, non-porous, and comes in light, consistent colors that boost brightness. | Can be more expensive than some natural stones. |
| Light Granite | Offers natural beauty and is highly durable. Lighter-colored granites can work well. | Can have busy patterns; needs to be sealed to prevent stains. |
| Solid Surface | Can be seamlessly integrated with the sink for a clean look; minor scratches are easy to repair. | Not as heat resistant as stone options. |
Flooring That Can Handle the Traffic
The floor in a galley kitchen is basically a high-traffic hallway, which means durability is non-negotiable. But beyond that, your flooring can also play a huge role in making the room feel larger.
One of the oldest tricks in the book is to run flooring planks parallel to the longest walls. This simple move draws your eye down the length of the kitchen, making it feel longer and more expansive. Using larger tiles can also help; fewer grout lines mean a less busy, more open look.
If you can, continue the same flooring from an adjacent room right into the kitchen without a threshold. That seamless transition erases the visual boundary, making both spaces feel larger and more connected.
Backsplashes That Add Personality
Finally, the backsplash. This is your chance to inject some personality without eating up any precious space. Because it's a vertical surface, it has a huge visual impact without taking up a single square inch.
- Glossy Tiles: A backsplash made of glossy ceramic or glass tiles will reflect light beautifully, adding brightness and a sense of depth.
- Vertical Patterns: Laying subway tiles in a vertical stack or a sharp herringbone pattern can draw the eye upward. It's a fantastic trick for creating the illusion of height, especially with standard ceilings.
- Mirrored or Metallic: If you're feeling bold, a mirrored or metallic backsplash can work wonders by reflecting the entire room and amplifying light.
By thoughtfully picking each material, you can create a galley kitchen that’s not just highly functional, but also feels wonderfully bright, open, and stylish.
Managing Your Remodel Budget and Timeline
Let's talk about the two things that can make or break a kitchen remodel: money and time. Getting the financial and logistical side of your project right is just as crucial as picking the perfect cabinet finish. A stunning remodel galley kitchen before after is always backed by a solid plan, and that plan is your best defense against stress and spiraling costs.
Think of it this way: good planning ensures a smooth ride from demolition day all the way to the final reveal.
Now for the numbers. A mid-range galley kitchen remodel typically runs somewhere between $15,000 and $40,000+. Of course, that figure can swing wildly depending on where you live, the materials you fall in love with, and how much work you’re actually doing. The first step to building a budget you can stick to is understanding where all that money goes.
Deconstructing Your Remodel Budget
Imagine your budget is a pie. The biggest slice, a hefty 30-40%, is almost always reserved for cabinetry. It makes sense—cabinets are the biggest investment and the visual anchor of your entire kitchen. Next up is labor (think demolition, installation, plumbing, and electrical), which usually eats up another 20-35% of the budget.
The rest of the pie gets divided among the other key players:
- Appliances (10-15%): Your fridge, range, dishwasher, and microwave all fit in here.
- Countertops (5-10%): This cost varies a ton based on material, from budget-friendly laminate to high-end quartz.
- Flooring (5-7%): In a high-traffic galley kitchen, durability is everything.
- Fixtures and Lighting (5%): This covers your sink, faucet, and all the lighting that makes the space shine.
- Contingency Fund (10-15%): This part is non-negotiable. Seriously. Set this cash aside for the things you can't see, like hidden water damage or outdated wiring. You'll thank yourself later.
A well-planned budget isn’t about limiting your vision; it’s about making it happen. When you allocate funds smartly, you can afford the elements that matter most without derailing the whole project.
Understanding where your material dollars are going helps you decide where to splurge and where to save.
As you can see, cabinets and countertops are the heavy hitters. Making smart choices here is critical to keeping your budget in check.
Mapping Out a Realistic Project Timeline
On average, a galley kitchen remodel takes anywhere from four to twelve weeks to complete. That clock starts ticking once all your materials are on-site and your contractor is ready to get to work. The most common delays? Waiting on materials with long lead times, like custom cabinets or special-order tile.
Here’s what you can generally expect, week by week:
- Week 1 – Demolition and Rough-Ins: The old kitchen comes out. This is when any new plumbing or electrical lines are run through the walls before they get closed up.
- Weeks 2-3 – Building the Foundation: Drywall gets patched, the new flooring goes in, and most importantly, your cabinets are installed.
- Week 4 – Countertops and Measurements: Once the base cabinets are firmly in place, a fabricator comes to create a precise template for your countertops. Cutting and finishing can take another week or two.
- Weeks 5-6 – Major Installations: This is a big one. The countertops are installed, followed quickly by the sink, faucet, and all your shiny new appliances.
- Weeks 7-8 – The Finishing Touches: It’s all about the details now. The backsplash goes up, light fixtures are installed, cabinet hardware is attached, and the painters come in for final touch-ups.
Managing a project of this scale can feel overwhelming, but there are tons of resources to help. For some great tips, check out this guide on the secret weapon for home renovations and remodelling projects.
Finally, don't forget about the return on your investment (ROI). Homeowners can typically expect to get back around 59% of the cost of a kitchen renovation when they sell. For galley kitchens, where the update dramatically improves function and modern appeal, that ROI can be even higher. Smart planning doesn't just improve your daily life—it adds real, tangible value to your home.
Got Galley Kitchen Questions? We've Got Answers.
Jumping into a remodel is exciting, but let's be honest—it also brings up a ton of questions, especially with a unique layout like a galley kitchen. You've seen the stunning remodel galley kitchen before after photos, but what about the real-world decisions that made them happen?
We hear the same questions from homeowners all the time. Getting clear, expert answers upfront saves you time, money, and a whole lot of stress. Let's tackle the big ones.
How Can I Make My Galley Kitchen Feel Bigger?
This is the number one goal for almost everyone with a galley kitchen. The trick isn't magic; it's about smart design choices that play with light and break up long, monotonous lines. You want to fool the eye into seeing a wider, more open area.
Your two best friends here are light and reflection. Start with light-colored cabinets and walls—think classic whites, soft grays, or even a pale, calming blue. These shades are champs at bouncing light around the room, which immediately pushes back the walls and makes the space feel less like a corridor.
Once you've got the color palette down, layer in these design moves:
- Glass-Front Cabinets: Swap out a few solid upper cabinet doors for glass fronts. This simple change breaks up what can feel like a solid wall of wood, adding visual depth. It also gives you a nice spot to display your favorite dishes, making the kitchen feel more personal and open.
- Open Shelving: Even a small section of open shelving can work wonders. It has the same space-opening effect as glass doors and is perfect for everyday plates or a few decorative pieces that show off your style without creating clutter.
- Layered Lighting: This is non-negotiable. A good lighting plan combines bright overhead fixtures for general ambiance with under-cabinet LEDs. This combo kills shadows in dark corners and makes your countertops shine, making the whole kitchen feel brighter and bigger.
What Is the Biggest Mistake to Avoid?
I see it all the time: a beautiful new galley kitchen that's a nightmare to actually use. The single biggest pitfall is ignoring the workflow, usually because someone fell in love with a standard-sized appliance that just doesn't fit the space properly.
Imagine a refrigerator door that can't open all the way because it smacks into the opposite counter. Or a dishwasher door that, when open, completely blocks the only walkway. It turns a dream kitchen into a daily frustration. Function always has to come first in a narrow space.
The most successful galley kitchen designs prioritize movement and accessibility above all else. Sacrificing a smooth workflow for a slightly larger appliance is a mistake you will regret every single day.
Always, always opt for counter-depth appliances if you can. Before you buy anything, get out a tape measure and map out the full swing of every appliance door. Make sure you have plenty of clearance. This tiny step during the planning phase will save you from a massive headache later on.
Is Removing a Wall in a Galley Kitchen a Good Idea?
Ah, the million-dollar question for anyone dreaming of an open-concept layout. Taking down a non-load-bearing wall can be absolutely incredible. It can blend your kitchen into the living or dining room, creating a peninsula or island that completely changes the social dynamic of your home.
But—and this is a big but—it's a major structural change that will have a huge impact on your budget and timeline. It's not just about swinging a sledgehammer. You're looking at a structural assessment, rerouting electrical wires, patching flooring, and a ton of drywall work. A project that might have taken six weeks can easily stretch to ten or more.
Before you commit, have a serious talk about the cost versus the benefit. Is the hefty price tag and extended disruption really worth it for your lifestyle? Often, you can get a surprisingly open and airy feel just by using the clever design tricks we talked about earlier, all for a fraction of the cost and hassle.
Ready to start your own transformation? The team at Sinclair Cabinetry inc has over 35 years of experience crafting bespoke, real-wood cabinetry that can maximize any space. Explore our custom solutions and see how we can bring your vision to life.