
Why Your Vanity Installation Matters More Than You Think
Let's be honest: installing a new bathroom vanity feels like one of the final, exciting steps in a renovation. But here's a truth many homeowners learn the hard way: rushing this part can sabotage your entire project. We've seen it happen too many times—a small mistake leads to wobbly cabinets, persistent water damage, and costly do-overs down the line. Getting this right from the start isn't just about looks; it's about protecting your home and ensuring one of its busiest spaces works flawlessly for years.
A poorly installed vanity might not scream "problem" right away. It often starts with little annoyances, like a drawer that doesn't close smoothly or a countertop that shimmies when you lean on it. These are often symptoms of a bigger issue. A cabinet that isn't perfectly level puts constant stress on the plumbing. That stress can cause slow, invisible leaks that lead to mold and rot inside your walls and subfloor. The real cost of a bad installation isn't just a new vanity; it's the thousands you could spend on structural repairs and water damage restoration.
The Hidden Costs and Real Value
It's no secret that a beautiful, functional bathroom is a top priority for homeowners. This is reflected in the market itself—the global bathroom vanities market is expected to grow from USD 13.8 billion in 2025 to roughly USD 27.6 billion by 2035. This isn't just about keeping up with trends; it's about investing in your home's value and your daily comfort. A well-installed vanity looks great and directly contributes to your home's resale price. For a deeper dive into market trends, you can explore the complete bathroom vanities market analysis.
Making sure your vanity is installed correctly is about more than just avoiding problems. It's about elevating your home's worth and making your daily routines better. If you're looking for design inspiration, checking out different ideas to update your bathroom can help you visualize the final result.
DIY or Pro: Knowing When to Call for Help
So, can you install a bathroom vanity yourself? It really depends on your skills and the specifics of your project. If you're doing a simple swap—replacing an old vanity with a new one of the exact same size where the plumbing lines up perfectly—you might be in good shape for a DIY weekend. However, if you run into any of these situations, it’s probably time to call a professional:
- Signs of existing water damage: If you find soft spots on the floor or discolored drywall behind the old vanity, stop. These are red flags for much bigger problems that a plumber or contractor should investigate.
- Complex plumbing: Moving drain or supply lines isn't a simple task. It requires real plumbing know-how to meet building codes and prevent future leaks. Don't risk it.
- Uneven surfaces: Is your floor noticeably sloped or the wall bowed? Getting a cabinet perfectly level and securely fastened in these conditions takes experience and specialized tools.
- Custom heights: The height of your countertop is key to comfort. Getting it wrong can be a daily frustration. For a detailed look at this, our guide on the average height of a bathroom vanity offers some great insights.
Building Your Installation Toolkit Like a Pro
Jumping into a vanity installation without the right equipment is like trying to bake a cake without a mixing bowl—you might get there eventually, but it’s going to be frustrating and messy. Let’s look beyond a simple list and talk about the specific tools and materials that really make the job of installing a bathroom vanity run smoother, safer, and with a more professional finish.
Having a complete, organized toolkit ready to go from the very beginning saves you from those momentum-killing trips back to the hardware store. It also means you’re ready for the little surprises that old plumbing or uneven walls love to throw your way. This isn't about having the most expensive equipment; it’s about having the right equipment for the unique challenges of working in a tight bathroom space.
The Tools That Make a Real Difference
Forget the generic tool lists for a second. Anyone can tell you to bring a drill. A seasoned pro, however, will tell you that a basin wrench is the most important tool you'll own when you're twisted into a pretzel under the sink, trying to tighten a faucet nut you can't even see. In the same way, a standard torpedo level is fine, but a 4-foot level is what truly confirms your countertop is perfectly flat across its entire length, preventing water from pooling. Little details like these are what separate a good-enough job from a great one.
To help you get started, we've put together a checklist of the essential tools and materials that experienced installers rely on. This isn't just a list of items; it explains why each one is important and offers some practical tips for using them effectively.
| Item | Purpose | Pro Tip | Estimated Cost |
|---|---|---|---|
| Basin Wrench | Tightening/loosening faucet nuts in tight spaces under the sink. | The long handle and swiveling jaw are lifesavers. You can’t do this job with regular pliers. | $15 – $30 |
| Stud Finder | Locating wall studs to securely anchor the vanity cabinet. | Use a reliable electronic model. Mark both edges of the stud for precise screw placement. | $20 – $50 |
| 4-Foot Level | Ensuring the vanity cabinet and countertop are perfectly level. | Use it across the top and front-to-back. A longer level gives a more accurate reading than a short one. | $25 – $40 |
| Adjustable Wrenches (2) | Tightening plumbing supply lines and drain fittings. | You need two—one to hold the fitting, the other to turn the nut. This prevents leaks and damage. | $20 – $40 (for a set) |
| Channel-Lock Pliers | Gripping and turning larger plumbing nuts, like on the P-trap. | Their adjustable jaws can handle a wide range of sizes that a standard wrench can't. | $15 – $25 |
| Silicone Caulk | Sealing the backsplash to the wall and the sink to the countertop. | Choose a 100% silicone product labeled for kitchens and baths to prevent mold and mildew. | $8 – $15 per tube |
| Dripless Caulk Gun | Applying caulk with control and precision for a clean bead. | The "dripless" feature automatically releases pressure, preventing messy oozing. Well worth the extra few dollars. | $15 – $25 |
| Composite Shims | Leveling the vanity cabinet on an uneven floor. | Unlike wood, composite shims are waterproof and won’t rot or compress over time. They snap cleanly. | $5 – $10 (per pack) |
| Cordless Drill | Driving screws to secure the vanity and for other assembly tasks. | A drill with an adjustable clutch helps you avoid over-tightening and stripping screws. | $50 – $150 |
| Utility Knife | Cutting shims, opening boxes, and scoring caulk lines. | Keep a sharp blade for clean, safe cuts. | $10 – $20 |
This checklist covers the core items that address the most common challenges in vanity installation. Having these on hand will not only make the job easier but will also contribute to a high-quality, long-lasting result that you can be proud of.
Here are a few more essentials that experienced installers swear by:
- A Good Quality Stud Finder: Don’t just knock on the wall and hope for the best. A reliable magnetic or electronic stud finder ensures your vanity is anchored to the solid wall frame, not just fragile drywall. This is absolutely critical for a stable installation that will last for years.
- Silicone Caulk and a Dripless Caulk Gun: Sealing the vanity top to the wall and the sink to the countertop is essential for preventing water damage. A dripless caulk gun gives you much better control, helping you avoid the oozing mess that can make a project look amateurish.
- Adjustable Wrenches and Channel-Lock Pliers: You'll want at least two of each. Why two? You use one to hold a fitting steady while the other tightens the corresponding nut. This two-wrench method is the secret to creating leak-free plumbing connections without putting stress on the fixtures themselves.
- Composite Shims: Forget those thin wood shims that can get soggy, compress, or rot if they get wet. Composite shims are completely waterproof, they don't split when you drive a screw through them, and they are much easier to snap off for a clean, hidden finish when you're leveling the cabinet.
Measuring and Planning Without the Guesswork
This is where a dream project can quickly turn into a nightmare if you’re not careful: the planning phase. Before you even think about disconnecting pipes or picking up a drill, taking a moment to measure and plan properly will save you from that heart-sinking feeling when your brand-new vanity just doesn't fit. You're not just getting rough dimensions; you're creating a detailed map for a successful installation.
This process is more important than you might think. As homeowners invest more in their personal spaces, the global bathroom vanities market has grown substantially, estimated at over USD 43 billion in 2024 and projected to hit USD 46 billion by 2025. This growth is driven by a boom in home renovations, making smart planning a key element of a successful project. You can discover more insights about the bathroom vanity market on Grandview Research. Beyond just the vanity, understanding the bigger picture of your project by exploring key considerations before remodeling can help you sidestep unexpected problems.
Mapping Out Your Space
First things first, grab a notepad and make a simple sketch of your bathroom. Don't worry about being an artist; this is all about function.
- Wall and Floor Reality Check: Measure the total width of the space where the vanity will sit. Now, do it again at countertop height and then once more at floor level. Older homes, in particular, are rarely perfectly square, and even a half-inch difference can create a major installation headache. Make a note of any baseboards or trim that will prevent the cabinet from sitting flush against the wall.
- Plumbing Centerlines: This is a step you can't afford to skip. Measure from the floor up to the center of your water supply lines (both hot and cold). Next, measure from the floor to the center of the drainpipe opening in the wall. Finally, measure the distance from the nearest side wall to the center of that drain. These are your critical plumbing centerlines. When you're shopping, pull up the spec sheet for any vanity you're considering and make sure its open back or pre-drilled cutouts align with your plumbing.
- Door and Drawer Clearance: Swing your bathroom door wide open. Will it bump into the side of your new, potentially deeper, vanity? Do the same for your shower door. Next, imagine the new vanity is in place and map out how far its drawers and cabinet doors will extend when fully open. You need to be sure they won’t block the main walkway or prevent other doors from opening. It’s a small detail that’s easy to overlook until it's already too late.
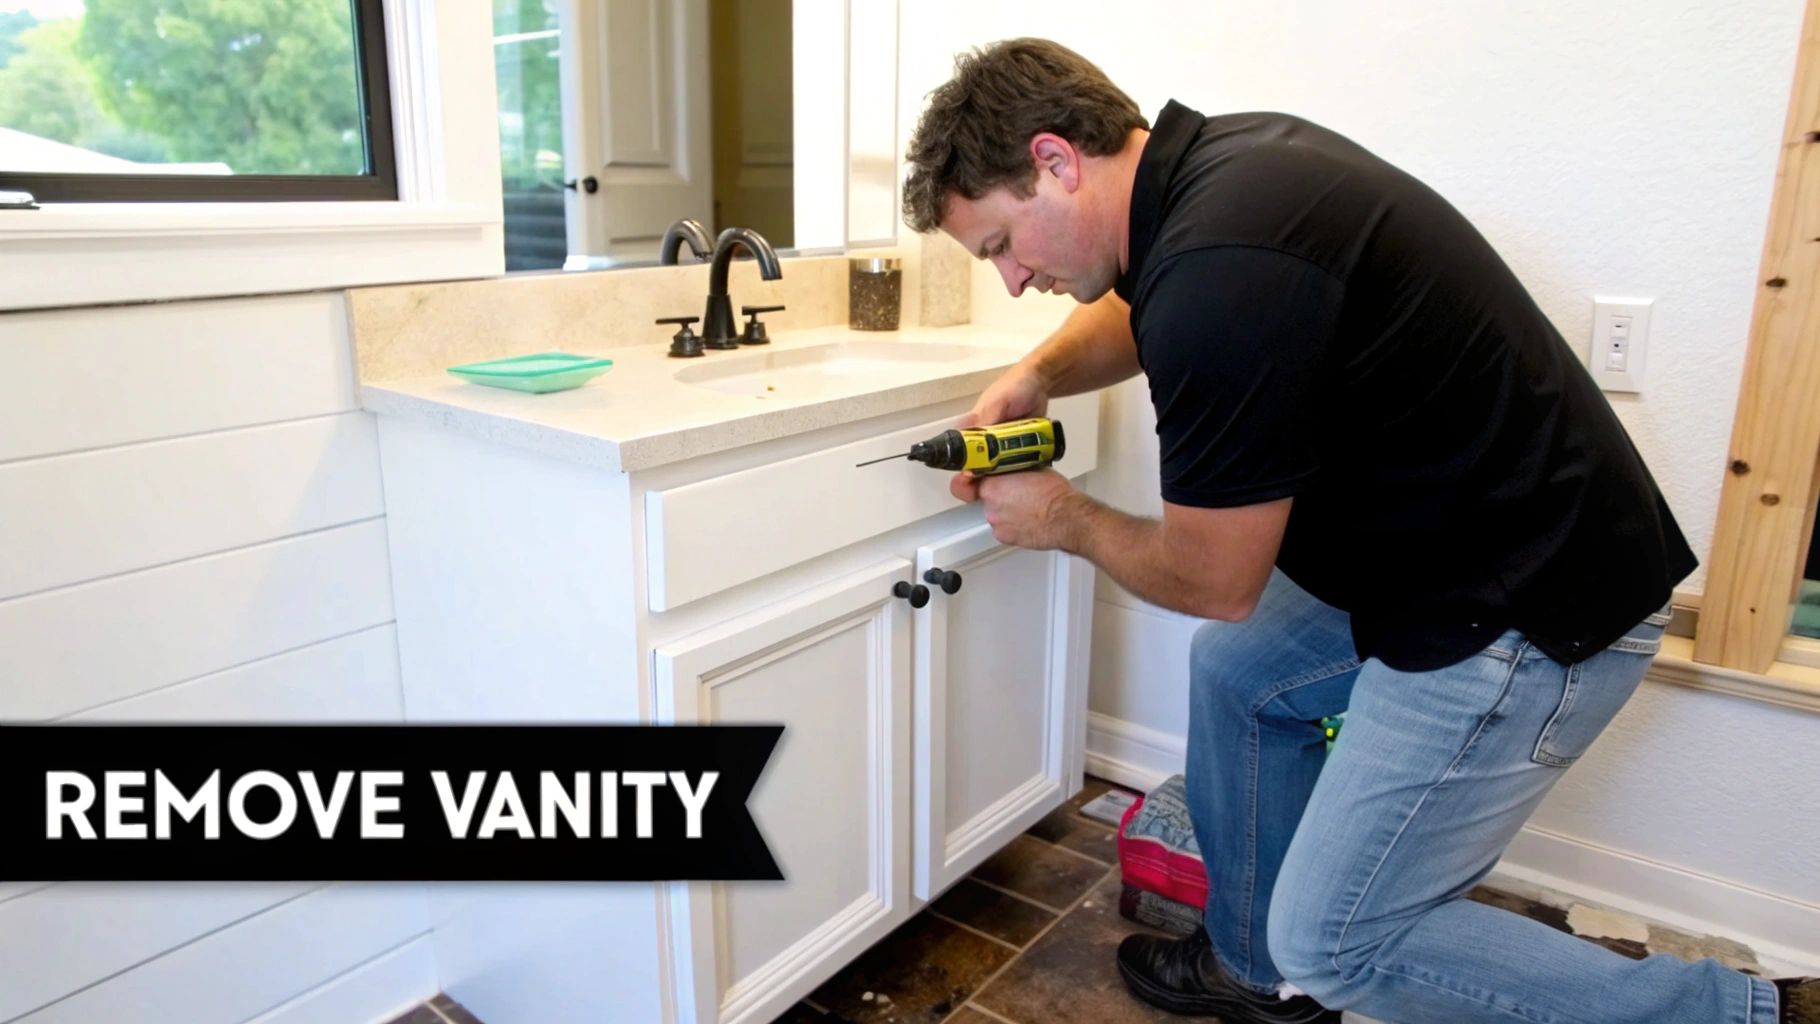
Removing Your Old Vanity Without Creating Chaos
Before you can get to the exciting part of installing your new bathroom vanity, the old one has to come out. This step can easily feel like a demolition job, but a little bit of strategy will save you from a huge mess. The last thing you want is a surprise flood or a chunk of missing drywall. The goal here is a clean and simple removal that paves the way for a smooth installation, not a bigger repair project.
Shutting Down and Disconnecting Plumbing
First things first: turn off the water. Look under the sink for the two shutoff valves, often called angle stops—one for hot water and one for cold. Give them a good clockwise turn until they stop. Next, open the faucet handles to bleed out any lingering water and release the pressure in the lines. Grab a small bucket and a few old towels; even with the valves closed, the supply lines and the P-trap will still have some water left in them.
With the water supply safely off, you can disconnect the water supply lines from the valves. An adjustable wrench should do the trick here. Now, let’s deal with the P-trap, which is that U-shaped pipe directly under the sink drain. This is where most of the spills happen, so place your bucket right underneath it. Loosen the two large nuts that hold it in place. You can usually do this by hand, but if they’re stuck, a pair of channel-lock pliers will help you get them moving.
The Art of a Clean Detachment
Now that the plumbing is free, it's time to separate the vanity from the wall. You'll almost always find a line of caulk or silicone sealing the countertop to the wall. Grab a utility knife and carefully score along this seam. Taking your time here is key—a clean cut will prevent you from accidentally tearing the paper face off the drywall, which is an annoying and totally avoidable repair. I recommend making a few shallow passes instead of trying to cut through it all in one go.
After the caulk is cut, peek inside the cabinet to find the screws holding the unit to the wall. Typically, you'll find 2 to 4 screws drilled through a wooden support rail at the back. Use your drill to back these out, and the vanity should now be free from the wall. Give it a gentle rock to break any leftover adhesive bonds. If you're hoping to reuse the old vanity, it’s a good idea to have a friend help you lift it out to avoid damaging it or scratching your floors. With the old unit gone, you now have a blank canvas for your new vanity installation.
Installing Your New Vanity With Confidence
With the old unit gone and the area prepped, we get to the exciting part: bringing in your new bathroom vanity. This is where your careful planning really shines, turning that empty spot into the beautiful centerpiece of your bathroom. The key here isn't muscle; it's about being precise, patient, and using a few pro tricks to get everything perfectly aligned and locked in. Even if you're tackling this solo, a flawless installation is totally within reach.
Positioning and Leveling the Cabinet
First things first, gently guide the new vanity cabinet into the bathroom and place it roughly where it will live. Your initial mission is to get it perfectly level. This is crucial because it ensures the doors will hang straight, the countertop will sit flat, and the plumbing will connect smoothly without putting stress on the pipes. Uneven floors are a common hurdle in many homes, but they are easily managed with composite shims.
- Lay your 4-foot level across the top of the cabinet. Check it from front to back and then from side to side.
- Find the low spots and carefully tap shims under the corners until the bubble on your level is dead center.
- Don’t be shy with the shims—solid support is what you're after. A classic mistake is to only shim the front, which can leave the cabinet wobbly. Make sure all four corners are stable and don't rock.
Once it's perfectly level, grab your stud finder again to double-check the stud locations you marked earlier. You absolutely want to anchor the vanity directly to the wall's framing. A cabinet attached only to drywall will wiggle loose over time, which is a headache you don't need.
To help you map out the process, here's a quick look at the sequence and what to expect.
| Installation Step | Time Required | Key Points | Common Issues |
|---|---|---|---|
| Positioning & Leveling | 20-30 minutes | Use a 4-foot level for accuracy. Check both front-to-back and side-to-side. Support all corners with shims. | Rocking or instability due to uneven shimming. Forgetting to check level in both directions. |
| Securing to Wall | 15-20 minutes | Locate at least two studs. Use cabinet screws long enough to penetrate studs by 1.5 inches. | Over-tightening screws and pulling the cabinet out of level. Missing the stud entirely. |
| Attaching Countertop | 10-15 minutes | Apply a continuous bead of silicone adhesive to the top edge of the cabinet base. | Using too much adhesive, causing squeeze-out. Not cleaning surfaces before application. |
| Final Checks | 5-10 minutes | Re-check that the vanity is level after securing. Ensure the countertop is centered and stable. | The vanity shifted slightly during securing. The countertop is misaligned. |
This timeline provides a clear path forward, highlighting the importance of getting the foundation right before moving on. A well-leveled and secured base is the key to a professional-looking and long-lasting installation.
Securing the Vanity and Attaching the Top
With the cabinet perfectly level and in its final resting place, it’s time to secure it. Using your drill, drive cabinet screws through the thick support rail at the back of the vanity and directly into the wall studs. You should aim for at least two screws into two separate studs to create a rock-solid hold. Be careful not to crank the screws too tight; this can crack the wood or pull the cabinet out of level. You're going for snug, not strained.
Next up is the countertop. Run a clean bead of silicone adhesive along the top edge of the cabinet base. Then, carefully lower the countertop into place. This adhesive forms a strong bond that also seals the gap and stops the top from shifting around.
This infographic breaks down the essential steps of positioning, leveling, and securing the vanity base.

As the visual shows, getting the base level with shims before locking it to the wall is the single most important part of the job. With a stable and correctly aligned vanity, you can tackle the plumbing and finishing touches with confidence. Of course, a great installation starts with the right product. If you're still exploring options, you might find our guide on how to choose a bathroom vanity helpful for making sure your selection is a perfect match for your bathroom.
Finishing Touches That Make All the Difference
You’ve done the heavy lifting—the vanity is secure, the top is on, and the plumbing is connected. Now it’s time for the finesse work. These last few steps are what separate a project that looks homemade from one that looks like a professional job. It’s the last 10% of the effort that creates 90% of the visual impact, giving you those clean lines and watertight seals that protect your hard work for years.
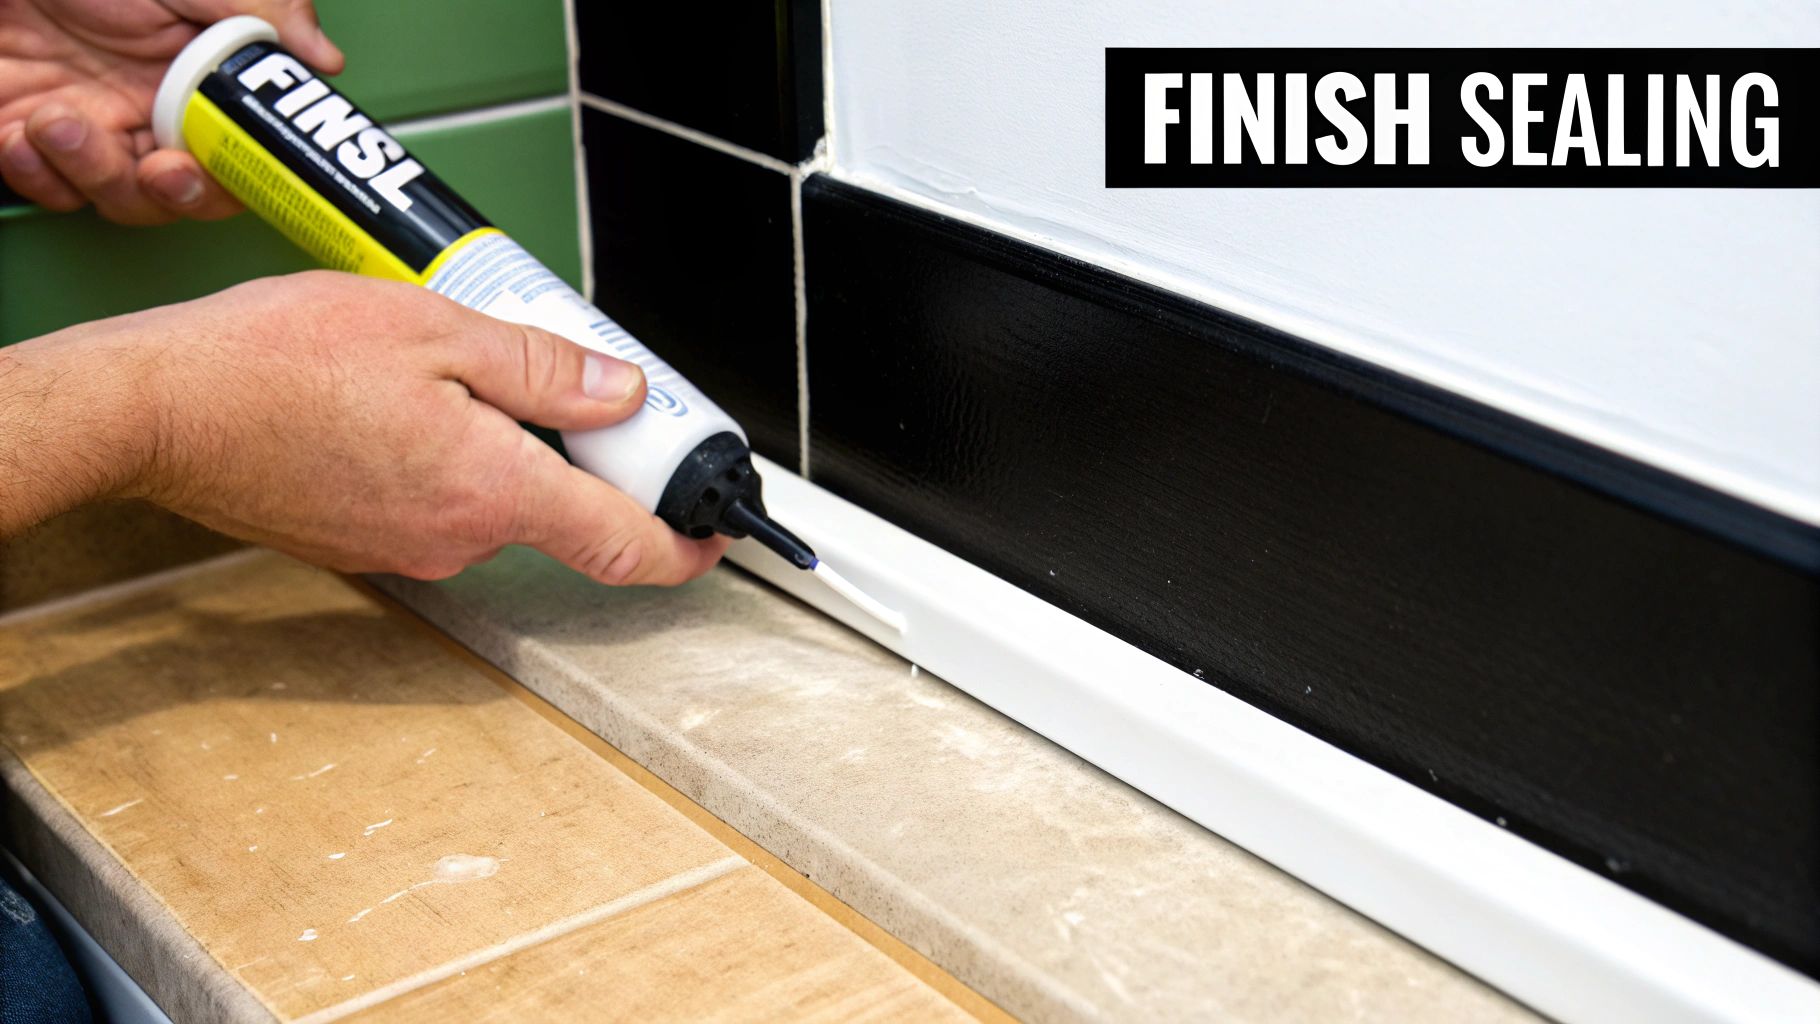
Mastering the Caulk Line
A clean caulk line is the unsung hero of any bathroom project. It’s not just for aesthetics; it’s a critical barrier that stops water from sneaking behind your vanity and causing mold, mildew, and rot. For this job, you’ll want a 100% silicone caulk made specifically for kitchens and baths. It stays flexible and has mildew-resistant properties, which is exactly what you need in a humid space like a bathroom.
Here’s how to get it right:
- Prep the surface: Wipe down the gap between the vanity top and the wall with denatured alcohol. This removes any lingering dust or oils, giving the caulk a clean surface to bond to.
- Use painter’s tape: This is my favorite trick for a perfect line. Place tape along the wall and the countertop, leaving a consistent 1/8-inch gap. This is your guide.
- Cut the tip correctly: Snip the tip of the caulk tube at a 45-degree angle. You want the opening just large enough to fill the gap—starting smaller is always better.
- Smooth and peel: After applying a steady bead of caulk, run a wet finger or a caulk finishing tool over it to create a smooth, concave line. Then, immediately and carefully pull off the tape to reveal a razor-sharp edge.
Hardware and Door Adjustments
Next up are the parts you'll touch every day: the handles, knobs, and drawers. A cabinet hardware jig is a lifesaver here. It’s an inexpensive tool that ensures every handle and knob is perfectly straight and aligned. It’s a small purchase that prevents the frustration of crooked hardware, which can instantly make a beautiful vanity look cheap.
Once the hardware is on, open and close every door and drawer. Most modern cabinet hinges are adjustable in three directions: up/down, in/out, and left/right. With just a Phillips screwdriver, you can make tiny turns to the adjustment screws to even out any gaps and make sure the doors close silently. This fine-tuning is what truly completes the installing a bathroom vanity job, giving you that smooth, flawless operation you expect.
As homeowners continue to invest in quality renovations, details like these matter more than ever. In fact, the bathroom vanities market is projected to grow to USD 78.7 billion by 2032, driven by new construction and a focus on high-quality bathroom updates. You can read more about the bathroom vanities market outlook to see just how much this industry is expanding.
Troubleshooting and Keeping Everything Perfect
Even after a flawless installation, your new vanity will settle into its new environment. Over time, you might notice small things, like a cabinet door that doesn't close as perfectly as it did on the first day. This is completely normal and isn't a sign of a bad install; it's just the reality of a home that naturally shifts and settles. Knowing how to make these minor tweaks is the key to keeping your vanity looking and functioning perfectly.
Fine-Tuning Doors and Drawers
The most frequent adjustment you'll likely make is to the door alignment. The great news is that most modern cabinet hinges are built for easy fixes. You’ll usually see three adjustment screws on each hinge, each with a specific job:
- The front screw shifts the door left or right across the cabinet face.
- The back screw moves the door closer to or away from the frame.
- The middle screw adjusts the door's vertical position, moving it up or down.
With just a Phillips head screwdriver and a few careful turns, you can get those door gaps perfectly even again. For drawers, if one starts to feel wobbly or loose, simply tighten the screws that hold the drawer slides to both the cabinet frame and the drawer box itself. Keeping this hardware snug ensures everything glides smoothly for years.
A Simple Maintenance Routine
Keeping your vanity looking brand new doesn't take much work—just a bit of consistency. For cleaning, it's critical to avoid harsh, abrasive chemicals, as they can strip or damage the finish. A soft cloth with a mild solution of dish soap and warm water is perfect for everyday wipe-downs. If you encounter a tougher spot, a mixture of vinegar and water can often do the trick.
Here’s a simple schedule to follow:
- Weekly: Give the surfaces a quick wipe-down and check around the faucet and drain for any drips or standing water.
- Annually: Take a closer look at the silicone caulk around the countertop and backsplash. If you see any cracking or peeling, it's time to reapply. Also, give the plumbing connections under the sink a quick check for any hint of moisture.
This proactive approach, combined with a proper initial setup, makes all the difference in the world. For more tips on setting up your bathroom for lasting comfort, check out our guide on selecting the perfect bathroom vanity height.
Ready to start your bathroom refresh with a vanity that’s built to last? Explore the custom, high-quality options at Sinclair Cabinets and let us help you create the bathroom you’ve always wanted.