
Why Refacing Beats Replacement: The Smart Choice
Are your kitchen cabinets starting to show their age? You're likely considering two main options: a complete replacement or cabinet refacing. While a full remodel can be tempting, refacing offers a compelling alternative. This process involves replacing the cabinet doors and drawer fronts and applying a new veneer to the existing cabinet boxes.
This approach gives your kitchen a fresh look while preserving the existing cabinet structure. You achieve the desired aesthetic upgrade without the significant disruption and cost of a full demolition.
Think of it like giving a beloved book a new cover. The story (your cabinet boxes) remains unchanged, but the fresh cover (new doors and veneer) revitalizes the overall presentation. Plus, refacing allows you to keep your kitchen functional during most of the project. This is a stark contrast to a full replacement, which can transform your kitchen into a construction zone for weeks.
Refacing offers considerable cost savings, often between 30-50% less than a full replacement. This financial benefit comes from keeping the existing cabinet boxes, reducing labor and material costs. These savings can then be used for other kitchen upgrades like new countertops or appliances. This is a significant advantage for budget-conscious homeowners.
Refacing is also quicker, typically completed in 3-5 days compared to the weeks required for a full remodel. This means you can enjoy your updated kitchen much sooner. Refacing has become a popular choice for homeowners looking for updates without the expense and disruption. In fact, 78% of homeowners choose refacing over replacing due to its cost-effectiveness, speed, and eco-friendly nature. Find more detailed statistics here.
Evaluating Your Cabinets for Refacing
Is refacing suitable for every kitchen? The answer depends on the condition of your current cabinet boxes. If the boxes are structurally sound and free from water damage or warping, they are ideal candidates for refacing.
However, if the boxes are damaged, unstable, or poorly built, a full replacement might be the better choice. This ensures the durability and functionality of your new kitchen.
Durability and Aesthetics: Addressing Common Concerns
A common misconception is that refacing is less durable than replacement. However, with quality materials and proper installation, refaced cabinets are just as durable as new ones.
Modern veneers are remarkably resilient, resisting scratches, chips, and daily wear. Your refaced cabinets will maintain their beautiful appearance for years to come.
Refacing also offers a broad range of style options. With a vast selection of door styles, colors, and finishes, you can achieve almost any look.
From sleek and modern to classic and traditional, refacing lets you personalize your kitchen to match your style perfectly. This versatility makes refacing a viable option for any kitchen upgrade.
Tools & Materials: Everything You'll Actually Need
Successfully refacing your cabinets depends on having the right tools and materials. This isn't just about having something to work with; it's about choosing the right options to achieve professional-looking results. This guide will help you make informed choices for your project.
Essential Tools For Refacing
The right tools will simplify your project and reduce frustration. Here's what you'll need:
-
Measuring Tools: Precise measurements are essential. Gather a tape measure, speed square, and a level.
-
Removal Tools: A putty knife, screwdriver, and possibly a pry bar are needed for removing old hardware and veneer. A nail puller will also come in handy.
-
Surface Preparation Tools: Use sandpaper (various grits), sanding blocks, and a tack cloth for smoothing surfaces and ensuring proper adhesion. An orbital sander attached to a shop vac can significantly speed up sanding and minimize dust.
-
Application Tools: For even paint application, you'll need high-quality angled paintbrushes and firm foam rollers. A paint sprayer, while optional, is recommended for larger projects. Cabinet door stands can help you paint doors evenly.
-
Safety Gear: Protect yourself with safety glasses, ear protection, and a respirator or mask, especially when sanding and painting.
-
Clamps: These are vital for holding veneer and new end panels in place while the adhesive dries.
-
Drill/Impact Driver: Use this for installing new hardware and pre-drilling pilot holes.
-
Specialty Jigs: Tools like Kreg's Cabinet Door Jig and Drawer Front Jig can significantly improve the precision of your installation.
Choosing The Right Materials
Your material choices will impact both the look and the longevity of your refaced cabinets.
-
Veneer: This is arguably the most critical material decision. Consider Real Wood Veneer (RWV), Thermofoil (RTF), and Laminate. RWV offers the most authentic look but requires more care. RTF is cost-effective and easy to install. Laminate provides great durability but can be trickier to work with. For more on cabinet doors and drawers, see How to master choosing cabinet doors and drawers.
-
Adhesives: Use a high-quality adhesive designed for cabinet refacing. Your local hardware store can offer recommendations based on your chosen veneer. Liquid Nails is a popular choice for securing new end panels.
-
Paint: Choose a durable cabinet-specific paint like Sherwin Williams Emerald Urethane Trim Enamel or Benjamin Moore Advance. These paints can handle daily kitchen use. A bonding primer, like Zinsser BIN shellac primer, is recommended for laminate surfaces.
-
Hardware: New hardware dramatically updates the final look. Select hardware that complements your overall kitchen style.
-
Finishing Touches: Don't forget edge banding, wood filler, and possibly a clear top coat (Polycrylic) for a polished look.
To help you compare materials, we've put together a helpful table:
Cabinet Refacing Materials Comparison
This table compares different refacing materials based on cost, durability, installation difficulty, and aesthetic options.
| Material Type | Cost Range | Durability | Installation Difficulty | Appearance Options |
|---|---|---|---|---|
| RWV | High | Moderate | Moderate | Wide Variety |
| RTF | Low | Low-Moderate | Easy | Moderate Variety |
| Laminate | Moderate | High | Moderate-Difficult | Wide Variety |
Key takeaway: RWV offers the best look, laminate the best durability, and RTF the easiest installation. Choose the material that best balances your needs and budget.
Investing in quality materials will ensure a beautiful and long-lasting outcome for your cabinet refacing project. Don't hesitate to seek advice at your local hardware store; their expertise can be invaluable. By choosing the right materials and tools, you'll be well on your way to a stunning kitchen transformation.
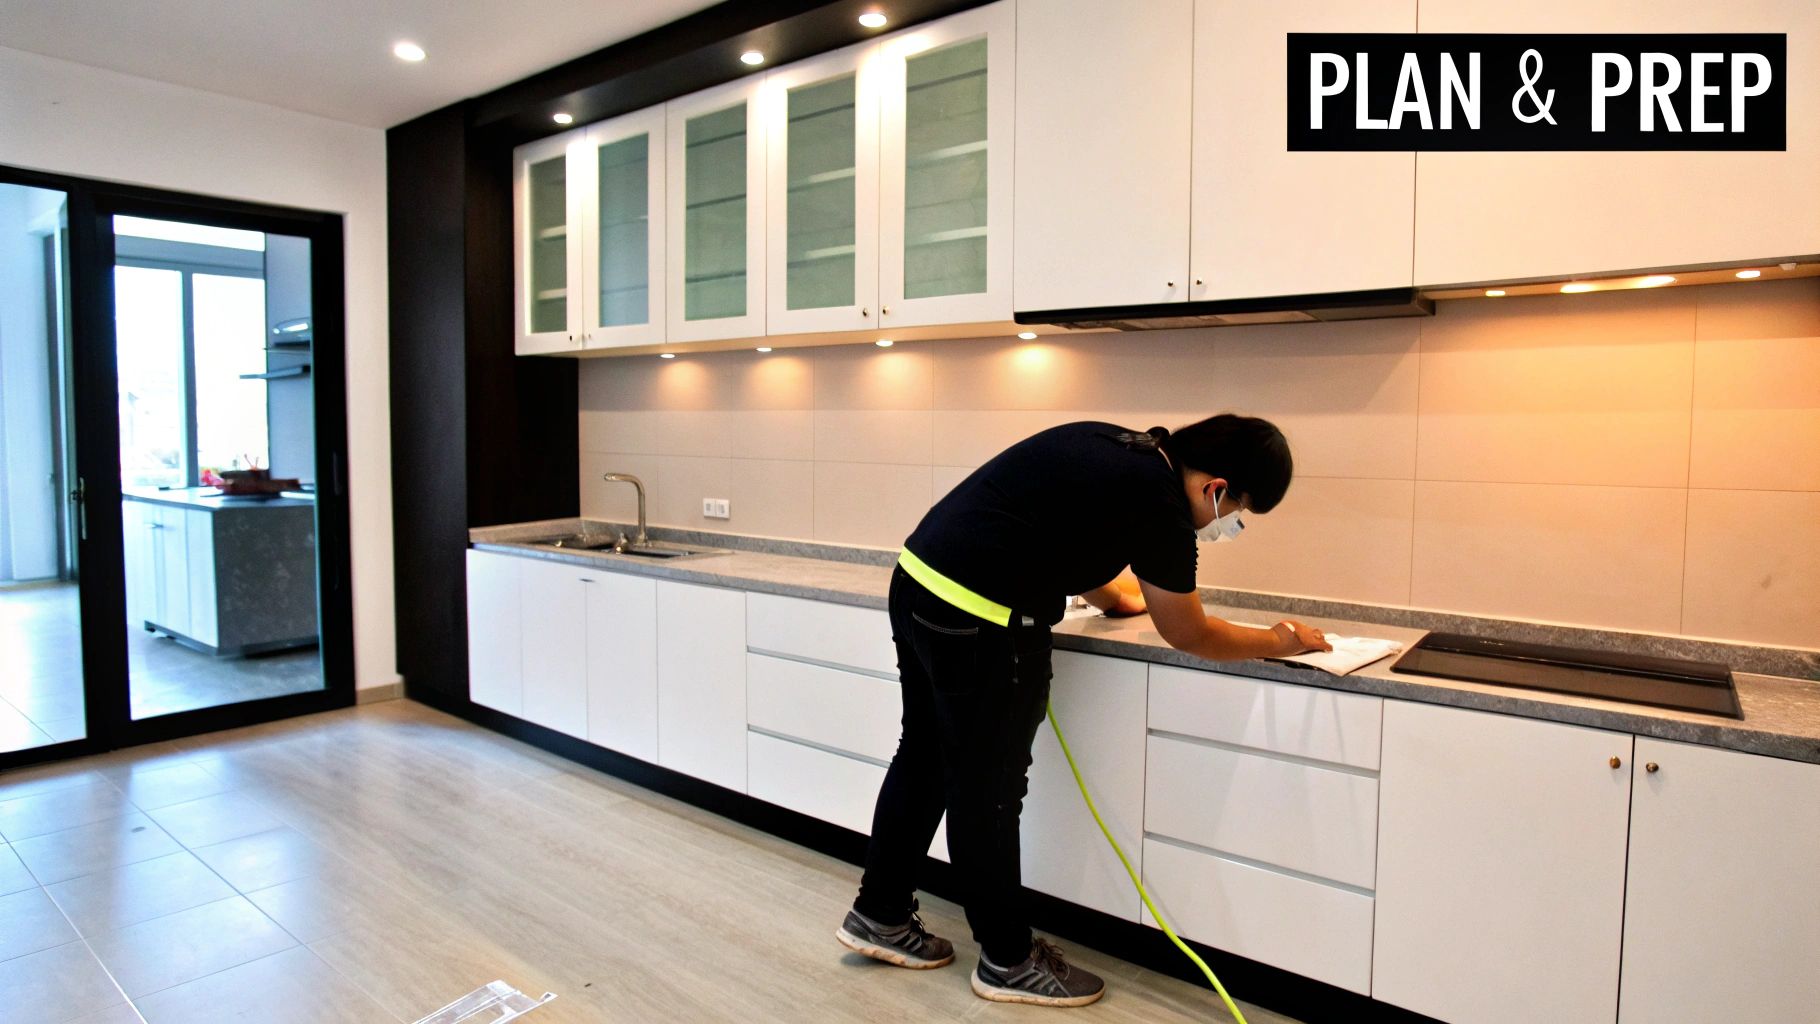
Preparation: Setting Yourself Up For Success
Proper preparation is essential for any successful cabinet refacing project. This crucial first step sets the stage for a smooth, efficient process, ultimately leading to a professional-looking result. Think of it as laying the groundwork before building a house – a strong foundation is key to a lasting structure.
Assessing Cabinet Integrity
Before getting caught up in the excitement of choosing new veneers and hardware, take the time to thoroughly evaluate your existing cabinets. This means checking for structural soundness, including inspecting for water damage, warping, and overall frame stability. Hidden water damage, for instance, can compromise the integrity of the cabinet box, even if the surface appears undamaged.
This assessment is also the perfect opportunity to identify any necessary repairs. Loose hinges, damaged drawer slides, or minor cracks should be addressed before proceeding. Fixing these issues upfront will ensure your refaced cabinets are not only beautiful but also fully functional for years to come.
Creating a Detailed Roadmap
Next, create a detailed diagram, or "map," of your cabinets. This visual guide is invaluable in preventing costly mistakes and ensuring accurate measurements for your new doors and drawer fronts. Numbering each cabinet and drawer on your diagram will also make the installation process much smoother.
Accurate measurements are paramount for a professional finish. The construction industry as a whole places a strong emphasis on precision, evident in the ongoing discussions around metrication. While refacing isn’t directly impacted by these trends, the focus on precise measurements is equally important. This attention to detail will prevent ordering incorrect sizes, saving you both time and money.
Establishing Your Workspace
A dedicated and organized workspace is also essential. This not only improves efficiency but also minimizes disruption to your kitchen during the refacing process. Protecting your countertops and flooring with drop cloths is a simple step that can prevent accidental spills or damage.
Having all your tools readily available will also prevent unnecessary trips back and forth to the garage or storage area. This dedicated workspace promotes a more efficient, streamlined workflow.
Cleaning and Prepping Surfaces
Finally, thoroughly clean all cabinet surfaces that will be receiving new veneer or paint. Grease, grime, and dust can interfere with adhesion, potentially causing bubbling or peeling. A simple solution of warm water and mild detergent is usually sufficient.
For stubborn grease buildup, however, a degreaser might be necessary. Ensure all surfaces are completely dry before moving on to the next step. This final cleaning step is crucial for proper bonding of the new materials. Now, with the preparation complete, you're ready to begin the exciting transformation of your kitchen cabinets.
The Refacing Process: From Outdated to Outstanding

Transforming your kitchen into a showpiece is an exciting project. This guide provides a step-by-step approach to cabinet refacing, offering professional techniques for a DIY success story. You'll be surprised at the professional-grade results you can achieve.
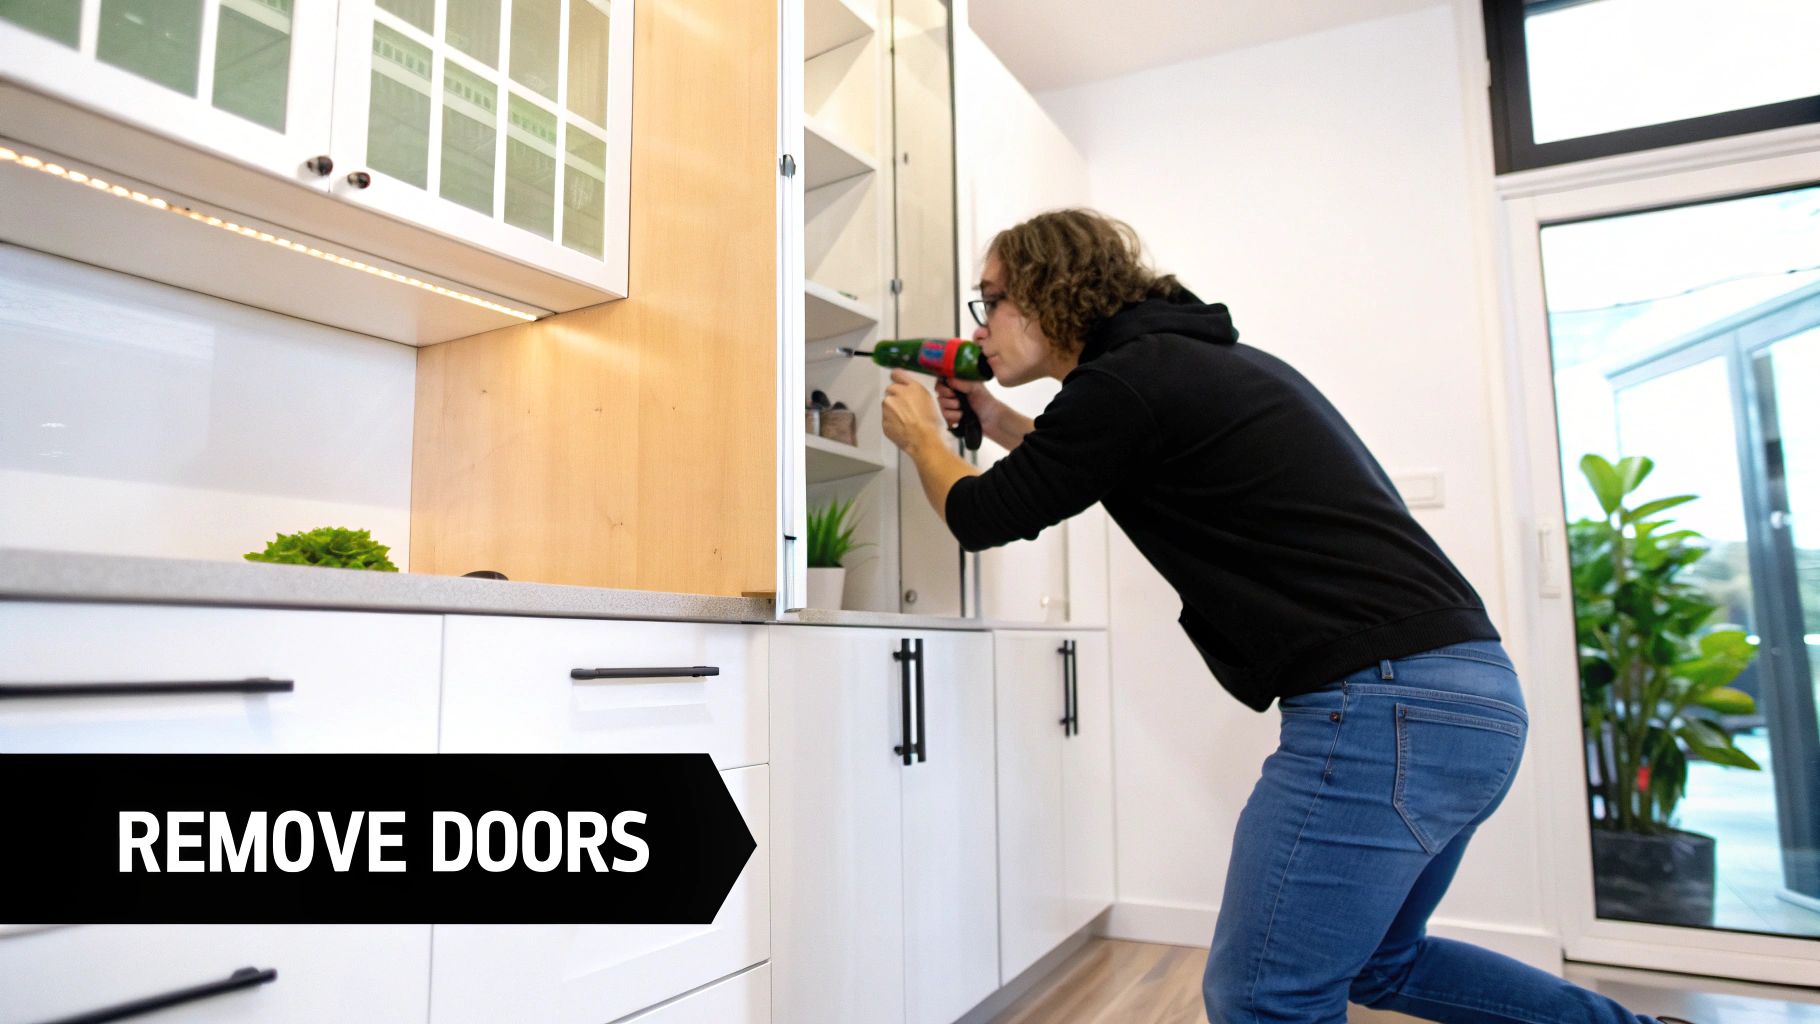
Removing Existing Doors and Hardware
Begin by carefully removing your existing cabinet doors and drawer fronts. Label each piece meticulously as you remove it. This crucial step simplifies reinstallation or matching with new custom doors, ensuring a seamless and organized project. Also, remove and safely store all existing hardware if you plan on reusing it. Small, labeled ziplock bags are perfect for organizing hardware by type and location.
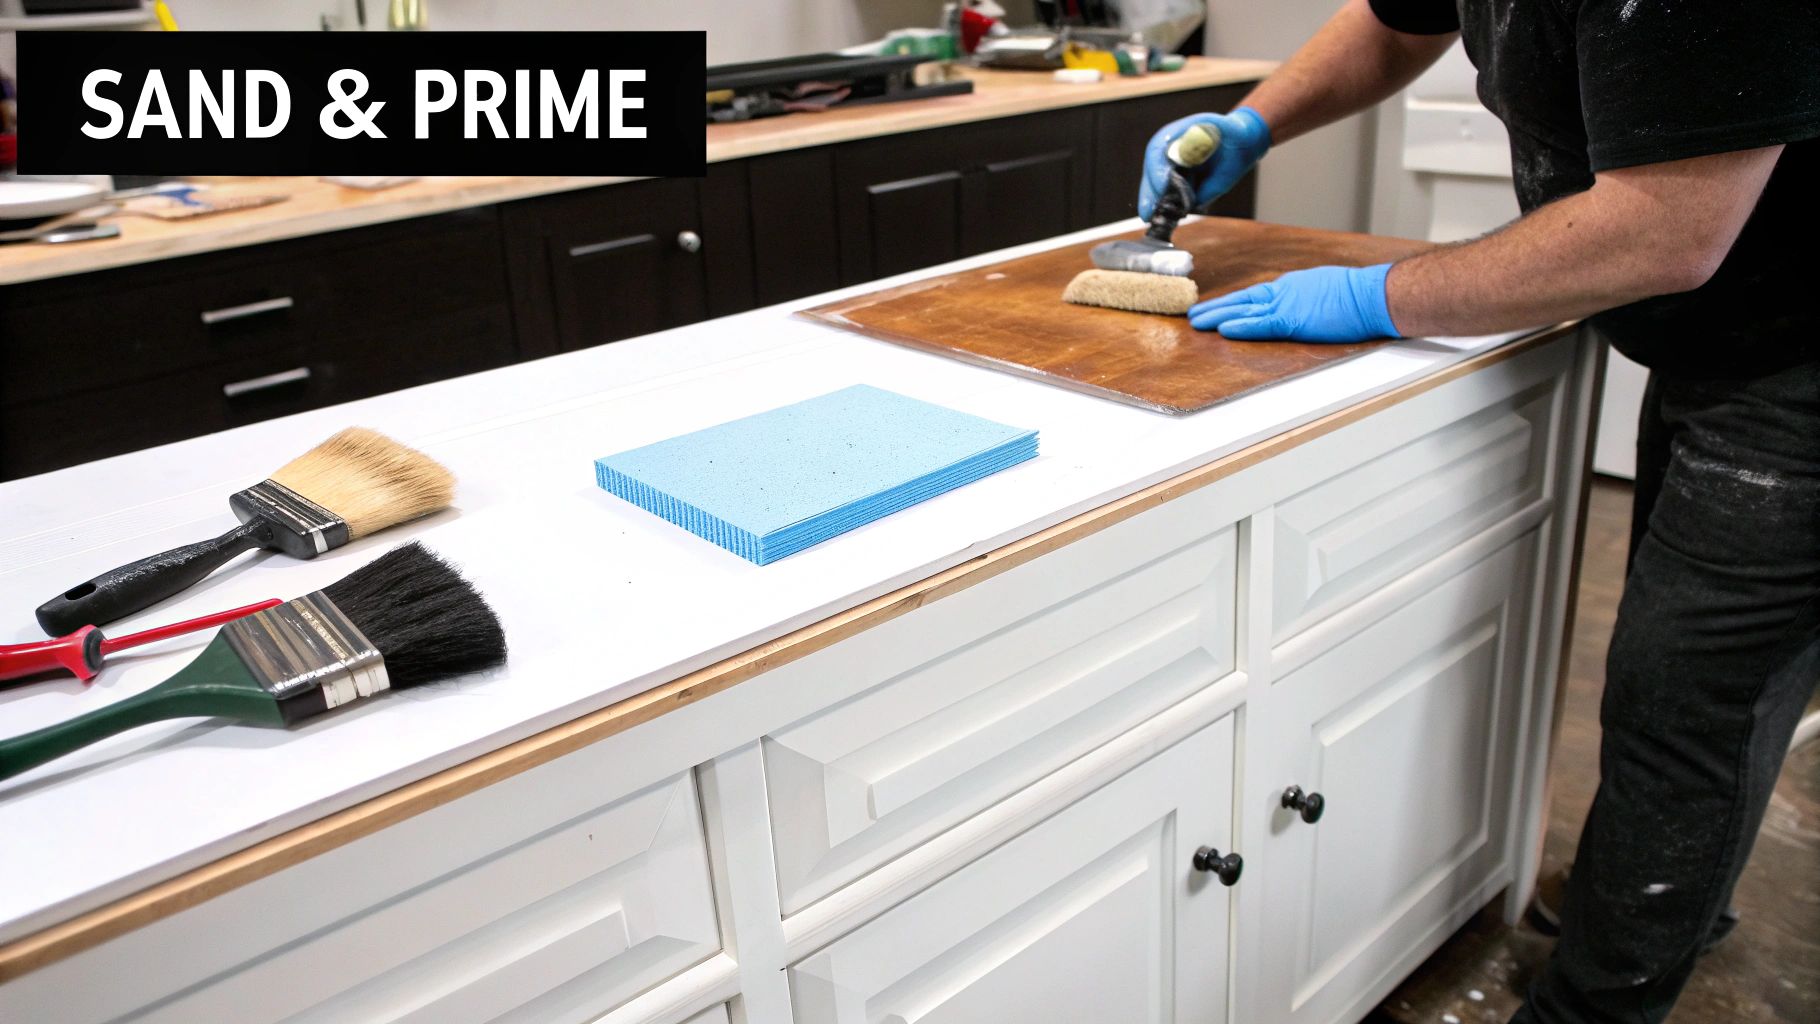
Surface Preparation: The Foundation of Success
Proper surface preparation is essential for a flawless finish. Thoroughly clean the cabinet boxes with a mild detergent solution to remove grease and grime. A degreaser can be helpful for stubborn residue.
After cleaning, lightly sand all surfaces with fine-grit sandpaper (approximately 220 grit). This creates the ideal texture for the veneer to adhere properly, much like preparing walls before painting. A smooth, clean base guarantees a professional result. You might be interested in: How to master your cabinet refacing project from start to finish.
Applying the Veneer: A Transformative Touch
Now, you're ready to apply the new veneer. Accurate measurements are crucial for this step. Use a sharp utility knife and a straight edge to cut the veneer sheets precisely for each cabinet box.
Apply a high-quality adhesive to the back of the veneer and carefully position it on the cabinet box. A smoothing tool or roller helps eliminate air bubbles, creating a smooth, even surface. Patience and attention to detail are key here, but the stunning transformation will be well worth the effort.
Installing New Doors and Hardware: The Finishing Flourishes
Once the veneer is dry, you can install your new cabinet doors and drawer fronts. Use a drill or impact driver to install the new hinges and hardware. A cabinet door jig is a helpful tool, ensuring accurate alignment, particularly for full overlay doors. It simplifies the process and improves precision. After installing the doors, adjust as needed for proper alignment and smooth functionality.
Timeline Breakdown: Managing Your Project
Refacing a kitchen typically takes a few days, depending on the size of your kitchen. The following table, "Cabinet Refacing Timeline Breakdown," provides a detailed timeline for each phase of the process:
| Task | Estimated Time | Skill Level | Tips for Success |
|---|---|---|---|
| Removing Doors/Hardware | 1-2 hours | Beginner | Label everything carefully |
| Surface Preparation | 2-3 hours | Beginner | Ensure thorough cleaning and sanding |
| Applying Veneer | 4-6 hours | Intermediate | Take your time, avoid air bubbles |
| Installing Doors/Hardware | 3-4 hours | Intermediate | Use a jig for precise alignment |
This table offers a general guideline. Remember, quality takes time, so avoid rushing. Focus on accuracy and attention to detail in each stage to achieve a beautiful, long-lasting result. By following these steps, you'll transform your outdated cabinets into the kitchen of your dreams.
Finishing Touches: Where Details Make the Difference
After the major cabinet refacing work is complete, the finishing touches are what truly elevate your project from a DIY endeavor to a professional-looking upgrade. These seemingly minor details can significantly impact the overall aesthetic and perceived quality of your refaced kitchen.
Perfect Edge Banding Application
Edge banding is crucial for a polished, refined look. It covers the exposed edges of the veneer, creating a seamless and professional finish. Think of it as the frame around a beautiful painting, completing the overall presentation. Apply edge banding carefully with a specialized iron or adhesive, ensuring a strong, secure bond. Trim any excess banding with a sharp utility knife for a clean, flush edge. For complex curves and corners, consider using a flexible edge banding material.
Hardware Selection and Installation
Hardware, such as knobs and pulls, can dramatically enhance the style of your refaced cabinets. Consider your kitchen's overall aesthetic when selecting hardware. Modern, minimalist designs complement contemporary kitchens, while ornate handles can elevate a traditional space. Learn more about selecting cabinet hardware. Proper installation is vital for both function and appearance. Make sure screws are tightened securely and handles are aligned consistently across all doors and drawers.
Soft-Close Mechanisms: A Touch of Luxury
Adding soft-close mechanisms to your doors and drawers adds a touch of luxury and significantly improves the user experience. These mechanisms prevent slamming and minimize wear and tear over time. While a small investment, soft-close hardware makes a noticeable difference in the daily use and perceived quality of your kitchen.
Protective Finishes and Door Alignment
Applying a protective finish is essential, particularly in a kitchen. A clear topcoat, like polycrylic, protects your veneer from moisture, grease, and everyday wear. It also enhances the natural beauty of your chosen materials. Finally, ensure your cabinet doors are correctly aligned. Even small misalignments can be visually distracting and hinder functionality. Adjust hinges as needed for consistent spacing and smooth opening and closing.
The Impact of Details on Perceived Quality
The cabinet refinishing market, a close relative to refacing, is experiencing significant growth. By 2031, this market is projected to reach $233.85 billion, growing at a CAGR of 10.00% from 2024 to 2031. This growth reflects consumer demand for budget-friendly home improvement solutions. Learn more about the cabinet refinishing market. This shows the increasing interest in upgrading existing cabinets rather than full replacements. Investing in details like precise edge banding and consistent hardware alignment significantly improves the perceived quality of your refaced cabinets. These finishing touches are the signs of professional work and will make your kitchen shine. They demonstrate the attention to detail that separates a good refacing project from an exceptional one. By focusing on these finishing touches, you not only improve the appearance of your kitchen but also create a space that is more enjoyable and functional to use daily.
Value Analysis: The Real ROI of Refacing
Refacing your kitchen cabinets is more than a simple cosmetic change; it's a smart investment that can significantly increase your home's value. But how does this investment stack up against other kitchen renovation options? This analysis explores the return on investment (ROI) of refacing, empowering you to make informed decisions that enhance both your home's beauty and its market worth.
Refacing vs. Replacement: A Value Comparison
Refacing offers a substantially higher ROI compared to a full kitchen remodel. A major remodel, while attractive, often carries a hefty price tag and a surprisingly lower return. Refacing, conversely, delivers a noticeable upgrade at a fraction of the cost. This translates to more value for your money, boosting your home's value without breaking the bank.
For instance, consider two identical houses: one with refaced cabinets and the other with a completely remodeled kitchen. The refaced kitchen might cost $5,000, while the remodeled kitchen could reach $25,000 or more. Upon resale, the refaced kitchen could add $4,000 to the home's value (an 80% ROI), while the fully remodeled kitchen might only add $15,000 (a 60% ROI). This clearly demonstrates the potential for a higher return with refacing. The speed and minimal disruption of a refacing project are also appealing to potential homebuyers.
Material Choices and Their Impact on ROI
Some refacing material choices yield higher returns than others. Real Wood Veneer (RWV), for instance, is often seen as a premium upgrade and generally adds more value than Thermofoil (RTF) or laminate. However, even budget-friendly materials can dramatically improve your kitchen's look and value with precise installation.
The cabinet refacing services market is experiencing rapid growth, fueled by the increasing demand for renovations and cost-effective updates. In 2023, the market was valued at $36,542.34 million and is projected to reach $59,222.23 million by 2031. Find more detailed statistics here. This upward trend highlights the growing popularity of refacing as a valuable home improvement.
Style Trends and Long-Term Value
Opting for classic, timeless styles for your cabinet doors and hardware ensures your kitchen's appeal endures for years to come. While trendy styles may be tempting, they can quickly become outdated, potentially impacting your ROI over time. Neutral colors and adaptable door styles provide greater longevity and wider buyer appeal.
Calculating Your Break-Even Point
If you plan to sell your home soon, calculating your break-even point is crucial. This involves estimating the refacing cost and the potential increase in your home's value. Understanding your potential profit margin enables you to make smart decisions about your investment level.
Estimating Materials and Avoiding Costly Mistakes
Accurate material estimation is key to avoiding overspending or delays due to material shortages. Careful planning and precise measurements help you buy the correct amount of materials, minimizing waste and keeping your project on budget. Think of it like baking: using the correct measurements guarantees a successful result, while inaccurate measurements can lead to a kitchen catastrophe.
Cost Breakdowns by Material and Project Scope
Understanding the cost breakdown by material type and project scope allows you to make informed choices about where to invest and where to save. For example, investing in high-quality hardware may be worthwhile, while choosing a slightly less expensive veneer could offer savings without compromising the overall look. By carefully weighing these factors, you can maximize your ROI and create a kitchen that beautifully reflects both your personal style and your budget.
Long-Term Care: Protecting Your Investment
Refacing your kitchen cabinets is a significant investment. Proper maintenance ensures they remain beautiful and functional for years to come. This goes beyond simply wiping up spills. It involves understanding how different materials react to their environment and adopting a care routine that maximizes the lifespan of your newly refaced cabinets.
Cleaning: Preserving, Not Damaging
Choosing the right cleaning products is the first step in long-term care. Many common household cleaners contain harsh chemicals that can dull or even damage the finish on your cabinets. This is especially true for real wood veneer (RWV), which is more susceptible to damage from harsh chemicals than laminate or thermofoil.
Instead, opt for gentle cleaning solutions. A simple mix of warm water and mild dish soap is often sufficient for everyday cleaning.
For tougher grime, consider a specialized cabinet cleaner. Always test it in an inconspicuous area first. This ensures compatibility with your specific finish and prevents unwanted damage. Remember, preserving your cabinets' finish is about using the right products, not the strongest.
Addressing Minor Damage: Quick Fixes for Lasting Beauty
Even with careful use, minor chips or scratches are inevitable. Addressing these quickly prevents them from becoming larger problems. For small chips in painted finishes, touch-up paint can work wonders.
However, ensure the touch-up paint matches perfectly to avoid noticeable discrepancies. For scratches on veneer, specialized touch-up markers or putty sticks can fill in the damage and blend seamlessly with the surrounding surface. Deeper scratches may require professional attention, but addressing them promptly prevents further damage and keeps your cabinets looking their best.
Seasonal Maintenance: Preventing Bigger Issues
Just like your car needs seasonal maintenance, so do your cabinets. Changes in humidity and temperature can affect different cabinet materials. Wood, for example, can expand and contract with humidity fluctuations, potentially leading to warping or cracking.
During dry winter months, consider using a humidifier to maintain optimal humidity levels in your kitchen. This simple step can prevent damage to wood cabinets and ensure their longevity. Regularly inspecting your cabinets for signs of wear and tear is also essential. This proactive approach allows you to address small issues before they become major problems.
Preventing Common Wear Patterns: Practical Solutions
Certain areas of your cabinets, like those around handles and knobs, are more prone to wear. To prevent this, consider installing clear protective film in these high-traffic areas. This invisible barrier protects the underlying finish and keeps your cabinets looking new.
Additionally, be mindful of how you open and close your cabinet doors and drawers. Slamming doors not only creates unnecessary noise but also puts stress on the hinges and hardware, leading to premature wear. Gentle use extends the lifespan of your cabinets and preserves their functionality.
Caring for Hinges and Drawer Slides: Smooth Operation for Years
Hinges and drawer slides are essential for the smooth operation of your cabinets. Regularly lubricating these components with a silicone-based lubricant keeps them functioning smoothly and prevents squeaks or sticking.
This simple maintenance task also extends the life of these often-overlooked components. Think of it like changing the oil in your car – regular lubrication ensures optimal performance and prevents costly repairs down the line. By implementing these practical care routines, you can protect your investment and enjoy your beautiful, functional refaced cabinets for years to come.
For exquisite custom cabinetry that stands the test of time, explore the options available at Sinclair Cabinetry Inc. They offer expert craftsmanship and high-quality materials to transform your kitchen into a space you'll love for years to come.