
Ever wonder why some kitchens just feel right, while others make you feel like you're running a marathon just to cook dinner? The answer often comes down to a design secret that’s been around for nearly a century: the working triangle. It’s the invisible thread connecting your three most-used work areas—the refrigerator, the sink, and the stove.
The Secret to a Flawlessly Efficient Kitchen
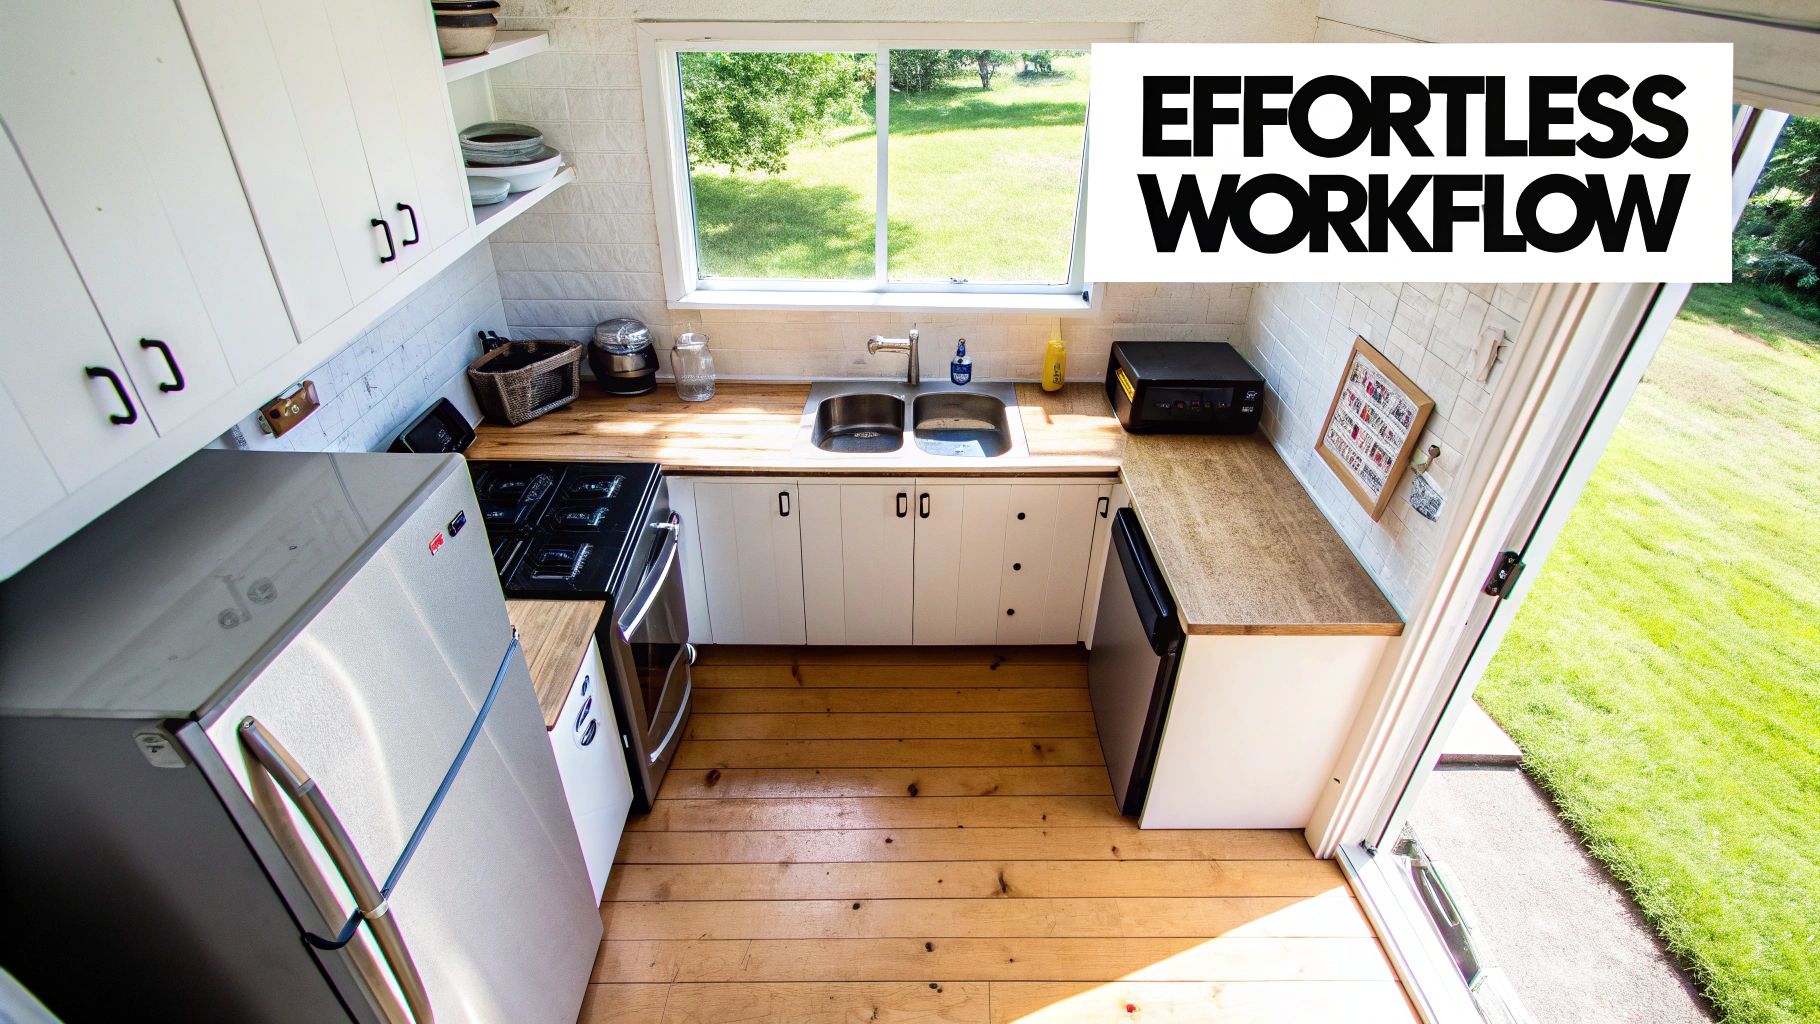
This isn’t just about geometry; it's a strategic layout that creates a chef's "cockpit" where everything you need is just a few steps away. The goal is to slash wasted motion, making everything from meal prep to cleanup feel natural and intuitive. Getting this principle right is the first step toward a kitchen that not only looks incredible but works beautifully for you.
This time-tested approach has its roots in the early 20th century, born from efficiency studies aimed at saving homeowners time and labor. The idea was pioneered by industrial psychologist Lillian Moller Gilbreth and later refined into the kitchen work triangle we rely on today.
From Theory to Practical Application
The core idea is refreshingly simple. By placing the three main work points—storage, cleaning, and cooking—in a triangular layout, you can glide between tasks with total ease and minimal walking. This thoughtful arrangement keeps your kitchen from feeling like an obstacle course during the dinner rush.
A well-designed working triangle brings a few key benefits to your daily routine:
- Reduced Foot Traffic: It cuts down the steps you take between the fridge, sink, and stove, saving you a surprising amount of time and energy.
- Improved Safety: By creating a dedicated work zone, it prevents family and guests from cutting through the cooking area, reducing the risk of collisions and spills.
- Enhanced Workflow: The logical placement of your key stations creates an intuitive flow, making cooking a more pleasant and far less chaotic experience.
The real magic of the working triangle is how it transforms a kitchen from a random collection of appliances into a high-performance workspace. It’s all about making your environment work for you, not against you.
To achieve this level of efficiency, designers often apply broader methodologies like design for lean principles, which focus on maximizing value while eliminating waste. The working triangle is a perfect example of this concept at home.
More Than Just a Triangle
While the name highlights the shape, the principle is really about creating an ergonomic and deeply functional space. It forces a thoughtful approach to layout that considers how a real person moves and works in their kitchen.
This foundational concept is the backbone of so many successful kitchen designs, proving that a smart layout is the key to true efficiency. For a deeper look into creating a highly effective space, check out our guide on improving kitchen efficiency with layout. Next up, we’ll get into the exact dimensions and rules that bring this powerful design principle to life.
Understanding the Rules of the Kitchen Triangle
While the working triangle is a simple idea on paper, its real magic comes from a set of specific, time-tested guidelines. This is where we move from theory into the practical numbers that professional designers use to build a kitchen that’s not just logical, but truly a joy to work in. Following them is the secret to creating a space that feels completely effortless.
The whole point is to hit that perfect sweet spot between having enough room to work and keeping everything efficient. If your sink, stove, and fridge are too close, you'll feel cramped. But if they're too far apart, you'll feel like you're running a marathon just to make dinner.
The Magic Numbers for an Ideal Layout
To get that effective working triangle, designers have relied on a few core measurements for decades. These aren't just random numbers; they're based on creating a comfortable workflow that cuts down on wasted steps.
Here are the three big ones:
- Leg Length: Each side of the triangle—the distance between any two points—should be between 4 and 9 feet.
- Total Perimeter: Add up all three sides, and the total distance should be no more than 26 feet.
- Traffic Flow: The main path through your kitchen shouldn't cut through the triangle. This is your protected work zone.
These rules ensure everything you need is just a few easy steps away, but you still have enough breathing room to move around without feeling boxed in.
Breaking Down the Rules
So, why do these specific dimensions matter so much? Each rule is designed to solve a common frustration, turning what could be a chaotic space into a streamlined culinary cockpit.
The genius of the working triangle isn’t just the shape—it’s the scale. It creates a compact work zone that respects how people actually move, ensuring efficiency doesn't come at the expense of comfort.
Of course, modern kitchen design also recognizes that these rules are a fantastic starting point, not an unbreakable law. While the ideal dimensions call for each leg to be between 4-9 feet with a total perimeter of 13-26 feet, today's designs are more about you. Customization is key, focusing on your unique cooking habits rather than just sticking to a rigid triangle. You can see how kitchen design concepts are evolving in recent research on SAGE Journals.
This flexibility is what keeps the principle so relevant. To make it even clearer, here's a quick-reference table that breaks down these crucial guidelines and the "why" behind each one.
Kitchen Work Triangle Guidelines at a Glance
This table sums up the essential measurements for planning an effective and comfortable kitchen work triangle.
| Guideline | Recommended Measurement | Rationale |
|---|---|---|
| Leg Length | 4 to 9 feet (1.2 to 2.7 meters) | Prevents the workspace from feeling either too cramped or too spread out, ensuring quick and easy pivots between tasks. |
| Total Perimeter | 13 to 26 feet (4 to 8 meters) | Creates an efficient overall work zone that significantly reduces the total steps needed during meal preparation. |
| Traffic Flow | No major traffic through the triangle | Improves safety by keeping foot traffic out of the primary cooking area, reducing interruptions and the risk of accidents. |
| Obstructions | No cabinets or islands blocking legs | Ensures a clear, direct path between the three work points, preventing frustrating detours around barriers. |
By really understanding and using these core rules, you can look at any kitchen plan and see how well it will actually work. It gives you the power to design a space that isn't just nice to look at, but is built to support your daily life, making every minute in the kitchen more enjoyable.
Putting the Triangle to Work in Popular Kitchen Layouts
The working triangle isn’t a rigid rule you have to follow to the letter. Think of it more as a flexible guideline that adapts to the actual footprint of your kitchen. Its real magic is in how it can be molded to fit any space, ensuring a smooth workflow whether you’re working in a tight corridor or a huge, open-concept room. The trick is knowing how to apply the concept to different layouts to build a kitchen that truly works for you.
Every layout comes with its own set of opportunities and challenges for creating an effective kitchen work triangle. But the goal is always the same: create a clear, easy path between the sink, stove, and refrigerator that feels completely natural and cuts down on wasted steps.
The Sleek and Efficient Galley Kitchen
Often found in smaller homes or apartments, the galley kitchen is made up of two parallel walls with a walkway down the middle. While its narrow shape might feel a bit limiting, it's actually one of the most efficient setups for a single cook and often creates a nearly perfect triangle.
The classic way to achieve this is to place the sink and refrigerator on one wall, with the cooktop on the opposite wall, directly across from the space between the other two appliances. This creates a tight, step-saving triangle that keeps the main work zone on one side, letting people walk through on the other side without getting in the way. The only catch is making sure that walkway is wide enough—you’ll want at least 42 inches to keep it from feeling cramped.
The Versatile L-Shaped Kitchen
There’s a good reason the L-shaped kitchen is one of the most popular layouts out there. By using two adjacent walls, it naturally opens up the room and blends beautifully with dining areas or living spaces. This layout provides a fantastic foundation for a great working triangle.
Typically, the fridge goes at one end of a leg, the stove at the end of the other, and the sink is positioned somewhere in the middle. This setup keeps foot traffic from cutting through your work zone and gives you plenty of counter space on either side of each station. If you want to explore different ways to set this up, checking out various kitchen layout ideas can give you some great inspiration.
The Spacious U-Shaped Kitchen
A U-shaped kitchen uses three walls to create a self-contained and super-functional "cockpit" for the chef. This layout is a total powerhouse for implementing a kitchen work triangle, as it lets you place one of the main work stations on each of the three walls.
With this arrangement, the sink, stove, and refrigerator form an ideal triangle with tons of counter space between them. The enclosed nature of the U-shape also keeps foot traffic out of the main work area, which is a big plus for both safety and efficiency. The only potential pitfall here is making the 'U' too wide. If the legs are too far apart, you can stretch the triangle beyond the recommended 26-foot perimeter, making your workflow less efficient.
Navigating the Kitchen with an Island
A kitchen island can either be your greatest asset or your biggest headache. When it’s designed the right way, it can form one point of a highly effective triangle. For instance, putting a prep sink or a cooktop on the island can create a compact, powerful work zone that feels incredibly intuitive.
The infographic below really nails down the core rules you need to respect, especially when you bring an island into the mix.
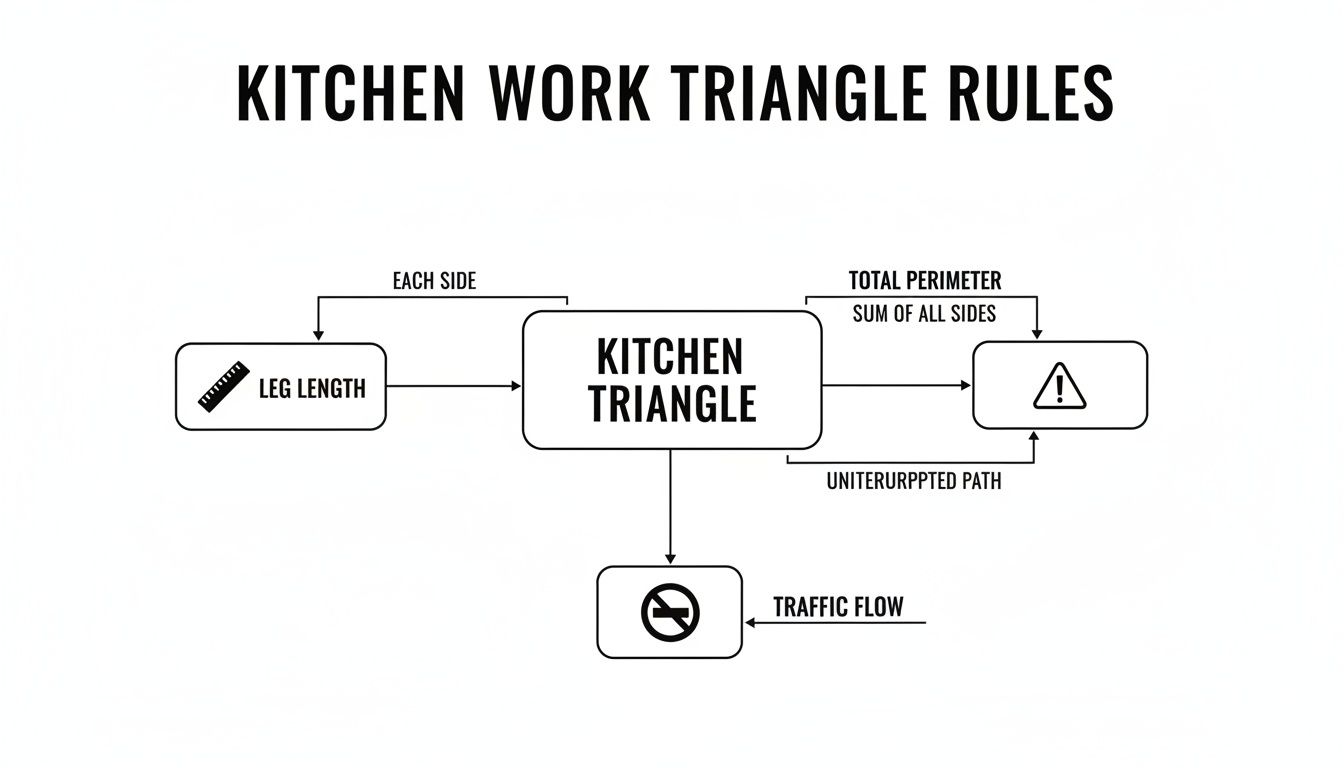
This visual guide drives home the point that clear paths, the right distances, and an unobstructed flow aren’t just suggestions—they're essential. The absolute biggest mistake is creating a "barrier island," which is an island plopped right in the path between two key work points, forcing you to constantly walk around it.
To avoid a barrier island, make sure your primary triangle stays clear. The island should complement the flow, not get in its way. A clearance of at least 42 to 48 inches all the way around the island is crucial for comfortable movement and opening appliance doors.
Seeing these principles in action in real homes can make them click. To see how the work triangle is adapted across different designs, check out these real-world examples of kitchen layouts in custom homes. By thoughtfully integrating these concepts, you can ensure your kitchen layout—no matter its shape—is built for maximum efficiency and enjoyment.
Evolving Beyond a Single Triangle in Modern Kitchens
The classic working triangle was a brilliant concept for its time—an era of smaller, simpler kitchens designed for a single cook. But let's be honest, today's kitchens have a much bigger job description.
They are the true heart of the home. They're command central for family gatherings, the after-school homework spot, and the social hub for entertaining guests, often all at once. This bigger role means the simple, three-point system had to evolve.
While the core principle of efficiency is still king, modern kitchen design now layers a far more flexible concept on top of the triangle: work zones.
Introducing Kitchen Work Zones
Think of work zones as specialized mini-stations, each one dedicated to a specific task. Instead of forcing everything into one all-purpose triangle, you create multiple, smaller, and highly focused areas that support how your family actually uses the kitchen.
This approach is a game-changer. It keeps different activities from tripping over each other, creating a calmer, more organized space where multiple people can work without causing chaos. It’s about building a sophisticated, multi-faceted system that reflects modern life.
Here are a few popular examples of work zones in action:
- Baking Zone: This is a baker's dream. Imagine a dedicated section of lower countertop perfect for kneading dough, with a stand mixer plugged in and ready. Below, deep drawers hold flour and sugar, while wall cabinets above store mixing bowls and measuring cups. A nearby wall oven completes the station.
- Coffee and Beverage Bar: Keep the morning rush out of the main cooking path. A dedicated coffee station can house the coffee maker, grinder, mugs, and sweeteners. You could even add a small beverage fridge for milk, creamers, and juice boxes.
- Prep Zone: This is often the MVP of a kitchen island. Centered around a secondary prep sink, it gives you a dedicated spot for washing vegetables and chopping ingredients. This keeps messy prep work contained and away from your main cleanup sink.
Strategic Appliance Placement in a Zoned Kitchen
Thinking in zones also helps you figure out the smartest place for your other appliances. For instance, the microwave doesn't automatically belong over the range. If its main job is reheating leftovers or making popcorn, it makes more sense to place it near the pantry and fridge to create a convenient "snack zone" that's easily accessible to kids and guests.
Along the same lines, the dishwasher should always be right next to the main sink. This simple rule makes loading and unloading a breeze and keeps you from dripping water all over the floor. This placement anchors your cleanup zone, making it incredibly efficient.
The goal of a zoned kitchen is to create specific destinations for tasks. This thoughtful organization prevents traffic jams and ensures that multiple people can use the kitchen simultaneously without getting in each other's way.
Layering Zones for a Multi-Cook Household
The real magic of work zones shines in households with more than one cook. You can layer multiple functional areas to create an incredibly efficient space that works for everyone.
Picture this: one person is at the cooktop and oven working within the primary triangle, while another uses the island's prep zone to chop vegetables for a salad. A third person can grab a drink from the beverage bar without ever crossing into the main cooking workflow.
This layering transforms a simple triangle into a dynamic system that supports a whole range of activities. The key is making sure each zone is self-sufficient with its own counter space and storage.
When planned correctly, this evolution of the kitchen triangle results in a space that is not only beautiful but intuitively functional for the whole family. With custom solutions, like those from Sinclair Cabinetry, you can design these zones to perfectly fit your workflow, creating a kitchen that truly works for you.
How Smart Cabinetry Perfects Your Kitchen Workflow
A brilliant layout is only half the battle. You can have the most perfectly measured working triangle, but if you’re constantly digging through cluttered cabinets to find a pan, the whole system falls apart. This is where strategic cabinetry transforms a great floor plan from a concept on paper into a living, breathing, functional kitchen.
Think of your cabinets as the support crew for each hero in your kitchen—the stove, the sink, and the fridge. Each of these stations has its own unique job, and each needs its own set of tools. Smart cabinet placement ensures those tools are exactly where you need them, right when you need them, cutting out those frustrating trips across the room.
Powering Each Point of the Triangle
The logic here is beautifully simple: store things where you use them. When you organize your cabinetry around the tasks you perform at each point of the triangle, you build a kitchen that practically anticipates your next move. It’s all about creating an environment where every action flows naturally into the next.
Here’s a practical breakdown of how to supercharge each work zone:
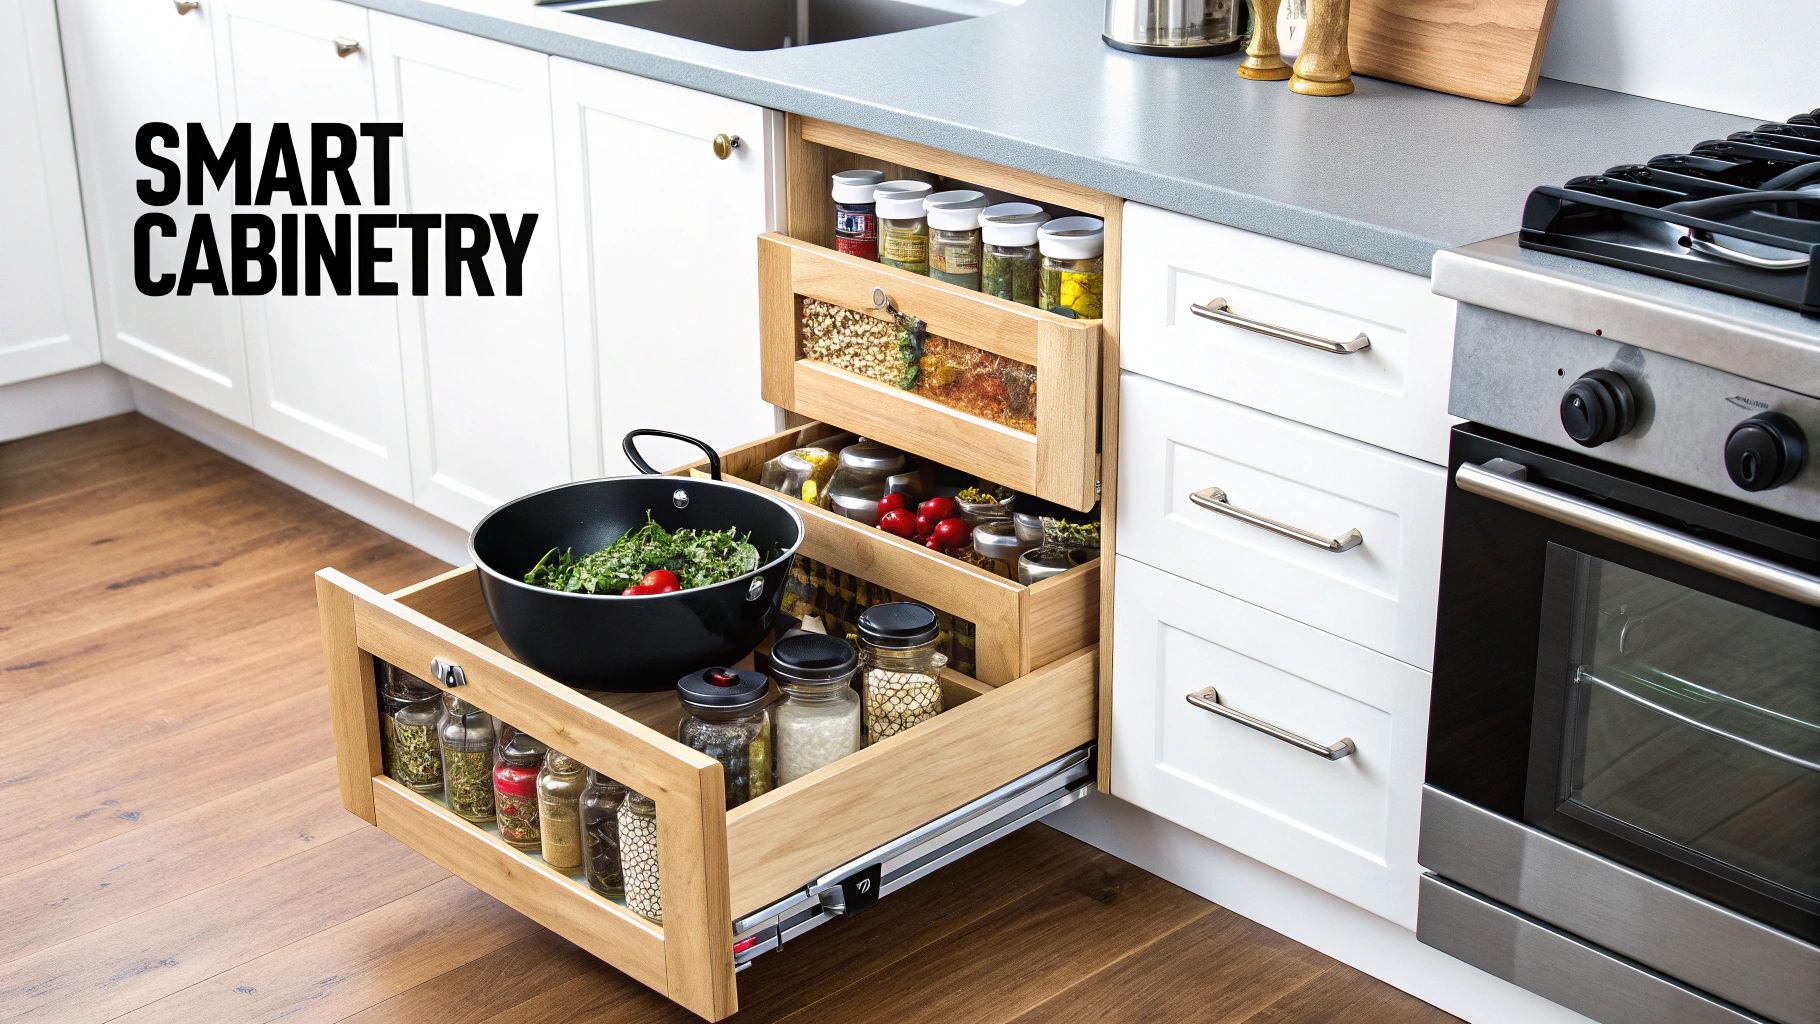
- The Cooking Zone (Stove): This is where the action happens, so keep your pots, pans, and cooking utensils within immediate reach. Deep drawers are a game-changer here—they beat lower cabinets hands down, letting you see everything at once without kneeling and rummaging. A narrow pull-out for spices and oils right next to the stove is another must-have.
- The Cleaning Zone (Sink): Your sink and dishwasher work as a team, so their storage should too. Place cabinets or drawers for your everyday dishes, glasses, and silverware nearby. This makes unloading the dishwasher a quick, painless task instead of a marathon across the kitchen.
- The Storage Zone (Refrigerator): The area around the fridge is all about prep. A tall pantry cabinet with roll-out shelves is perfect for dry goods. You also absolutely need a "landing zone"—a clear stretch of countertop for setting down grocery bags or ingredients you’ve just grabbed from the fridge.
This thoughtful approach works especially well in L-shaped layouts, which have become a massive global favorite. In fact, the L-shaped kitchen accounts for 34% of all installations worldwide because it’s so space-efficient and naturally creates a great work triangle. For cabinet makers, this trend underscores just how much homeowners value professional solutions that make these classic layouts shine.
Eliminating Clutter and Wasted Motion
Beyond just where you put your cabinets, what’s inside them makes a huge difference. Modern cabinetry isn’t just a box with a door anymore; it’s designed to conquer clutter and make every last inch of your kitchen accessible.
Cabinetry is the infrastructure of an efficient kitchen. When thoughtfully designed, it minimizes physical effort and mental load, turning cooking from a chore into a pleasure.
Features like corner lazy Susans or pull-out blind corner systems bring dead space back to life. Integrated utensil dividers and tray organizers keep your drawers from becoming a jumbled mess. These little details really add up, eliminating the daily friction that comes from a disorganized space and ensuring your working triangle kitchen design is supported by an equally intelligent storage strategy.
To get more ideas on organizing your space, check out our complete guide to kitchen storage planning. With custom solutions from Sinclair Cabinetry, we can design a system that’s built around your personal workflow, making sure your kitchen is every bit as functional as it is beautiful.
Common Questions About the Kitchen Triangle
Even after you get the hang of the rules, putting the kitchen work triangle into practice can bring up some real-world questions. It's a concept that's been around for a good long while, so figuring out how it fits into a modern home can feel a bit tricky. Let's tackle some of the most common questions we hear from homeowners.
We'll cover everything from whether the triangle is still a must-have to how it works in tiny galleys or massive open-plan spaces. Getting these key concerns sorted out will help you move forward on your own kitchen project with total confidence.
Does Every Kitchen Absolutely Need a Working Triangle?
While it’s a fantastic guideline for efficiency, the working triangle isn’t some unbreakable law. The whole point has always been to cut down on wasted steps and make your workflow feel more natural. If a different layout does that better for your space and how you cook, then that's the right answer.
Think about it: in a tiny, single-wall kitchen, a true triangle is physically impossible. A linear setup is far more practical, usually with the sink placed between the fridge and the cooktop. On the flip side, in a huge kitchen designed for multiple cooks, one giant triangle would have you running laps. In that case, a "work zone" approach with several smaller, task-specific triangles makes a lot more sense.
The real goal is to design for your personal workflow, not to force a geometric shape. Think of the triangle as a helpful tool, not a strict mandate.
How Does a Kitchen Island Change the Triangle?
A kitchen island can either be your triangle's best friend or its worst enemy—it all comes down to smart placement. When done right, an island can house your cooktop or a prep sink, forming one point of a super-efficient, compact triangle. This setup can create an amazing "cockpit" for the chef where everything is just a pivot away.
The big danger is creating what designers call a "barrier island." This is when an island gets plopped right in the middle of your workflow, forcing you to constantly walk around it to get from the sink to the fridge. It completely defeats the purpose of efficiency and becomes a source of daily frustration.
To avoid this classic mistake, make sure you have a clear, direct path between your three main work points. It's also critical to leave at least 42 to 48 inches of walkway on all sides of the island. This gives you enough room to move comfortably and lets you open appliance doors without creating a roadblock.
What Are the Biggest Mistakes to Avoid?
Besides the dreaded barrier island, a few other common missteps can wreck an otherwise great kitchen triangle. Knowing what to watch for during the planning stage can save you from years of hassle.
Here are the design blunders we see most often:
- Making the Triangle Too Large: Stretching the legs of the triangle past the recommended 9-foot maximum just means more walking. It makes the kitchen feel tiring and defeats the whole purpose of the concept.
- Making the Triangle Too Small: A triangle with legs shorter than 4 feet creates a cramped, clumsy workspace. You'll feel like you're tripping over yourself, and cabinet and appliance doors might even collide.
- Allowing Traffic to Cut Through: The main path through your kitchen should never slice through the triangle. This creates constant interruptions and is a major safety hazard, especially when you're moving hot pans or sharp knives.
- Forgetting Appliance Door Swings: A poorly placed refrigerator or oven door can completely block a walkway when open. Always map out the full swing of every appliance door to make sure your paths stay clear.
Taking a few minutes to walk through your movements in the planned space—even just in your head—can help you sidestep these all-too-common design traps.
Can This Principle Work for Accessible Kitchen Designs?
Absolutely. In fact, the core idea of minimizing movement and making work easier is a huge benefit for accessible or universal design. The principles of the work triangle offer a fantastic starting point for creating a kitchen that's safe and functional for everyone.
Of course, a few key adjustments are needed. This includes planning for wider pathways—typically 42 to 48 inches—to comfortably accommodate a wheelchair. It also means providing clear knee space under the sink and cooktop and keeping the triangle's total perimeter on the more compact side.
This is where custom cabinetry really shines. Solutions like pull-down shelving, adjustable-height countertops, and easy-to-open base drawers make the entire kitchen work beautifully for users of all ages and abilities.
A truly efficient kitchen is a perfect blend of a smart layout and intelligent storage. At Sinclair Cabinetry inc, we specialize in creating custom cabinetry solutions that are meticulously designed to support your unique workflow. From deep pot-and-pan drawers next to your stove to ergonomic storage near your sink, we build the infrastructure that makes your working triangle a functional masterpiece.
Discover how our bespoke cabinetry can bring effortless efficiency to your home by visiting us at https://sinclaircabinets.com.